
- 1.1 Contents
- 1.2 Functions at a glance
- 2.1 Compatibility
- 2.2 Signing in
- 2.3 Multi-media Resources and History Library
- 2.4 Interactive activities (e-Quiz)
- 2.5 Other learning tools
- 2.6 Offline reading
- 3.1 Print on demand
- 3.2 Single sign-on account
- 3.3 Screen reader
- 3.4 Adjustable font size
- 4.1
- 5.1 Storing sign-in information on iPad
- 5.2 Storing sign-in information on Chrome
- 6.1 Virtual Tour
- 6.2 Padlet
- 6.3 YouTube subtitles
‘Journey Through History - New Topic-based Series’ (e-Textbook) has been developed from our printed version of the same series. Both electronic and printed textbooks have been approved and included on the Recommended e-Textbook List (eRTL) and Recommended Textbook List (RTL) respectively.
The contents and structure of this set of e-Textbooks have been developed from the related printed version. This electronic version provides online interactive exercises and multimedia resources to facilitate learning and teaching. Teachers and students can use a single sign-on account to access this e-Textbook series and the connected resources.
Information on e-Textbook:
| Title | ‘Journey Through History - New Topic-based Series’ |
|---|---|
| Subtitle & level | S1 Book 1A Book 1B S2 Book 2A Book 2B S3 Book 3A Book 3B |
| Author(s) | Consultants: Dr Fan Wing Chung, Dr Tam Ka Chai; Authors: Rita K.L. Cheng, Hui Ka Yin |
| Publisher & developer | Aristo Educational Press Ltd |
| Operating System | Android, iOS, Mac OS, Windows |
| Latest version & last update | Please refer to the version information page. |
| Delivery type / mode | URL (web version) - for desktop computers, tablets and smartphones |
Download size for offline version (PDF files):
| Book | Download size for offline version |
|---|---|
| Book 1A | 32MB |
| Book 1B | 20MB |
| Book 2A | 30MB |
| Book 2B | 17MB |
| Book 3A | 34MB |
| Book 3B | 16MB |
Price:
Please refer to our ‘Price List’.
Contact information:
| Hotline(s) | 2811 2908 |
|---|---|
| Fax number | 2565 6626 |
| Web link | https://www.aristo.com.hk |
| Information on e-Textbook | https://e-aristo.hk/r/jrhist_eTB_info.e |
| Email address | support@aristo.com.hk |
| Postal address | 14/F, Lok’s Industrial Building, 204 Tsat Tsz Mui Road, North Point, HK |
Technical requirements:
| Technical requirements |
|
|---|---|
| Other e-features |
|
This e-Textbook is provided in a cross-platform web viewing mode to promote learning anywhere and anytime. The e-Textbook website can be viewed on desktop and laptop computers, tablet computers and smartphones.
Flexible interactive exercises and multimedia resources are provided to consolidate students’ learning and facilitate self-learning.
Students can copy the text and download the pictures from the e-Textbook website. Various learning tools (e.g. note-taking and highlighter) are also provided to let students consolidate the contents, compile their learning materials and construct knowledge.
This e-Textbook is provided in a cross-platform web viewing mode to promote learning anywhere and anytime.
| Platform | Device | System requirements |
|---|---|---|
| Website (URL) | Desktop and laptop computers (Microsoft Windows and Mac), tablet computers and smartphones (iOS and Android) | Browser Note 1*: Internet Explorer Microsoft Edge Chrome Firefox Safari |
Interface introduction:
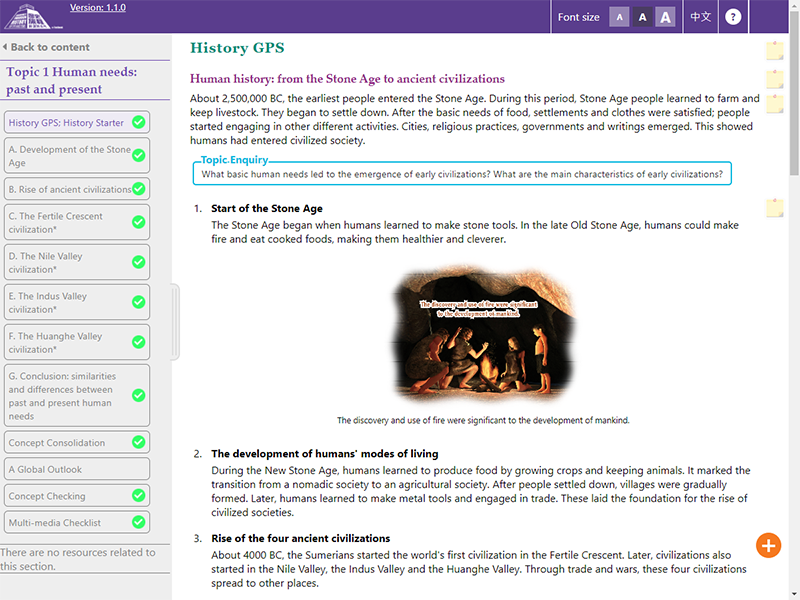 Desktop and laptop computer |
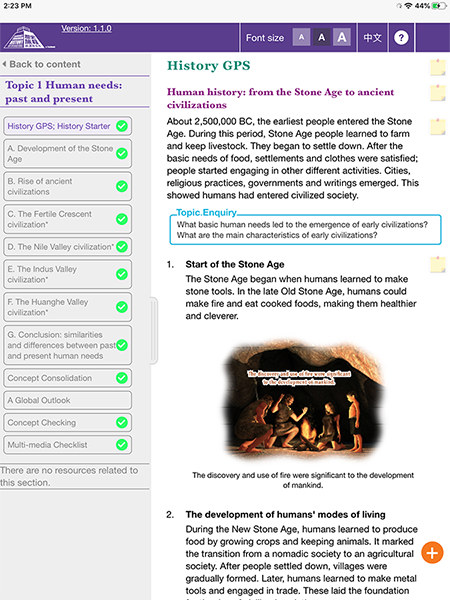 Tablet computer |
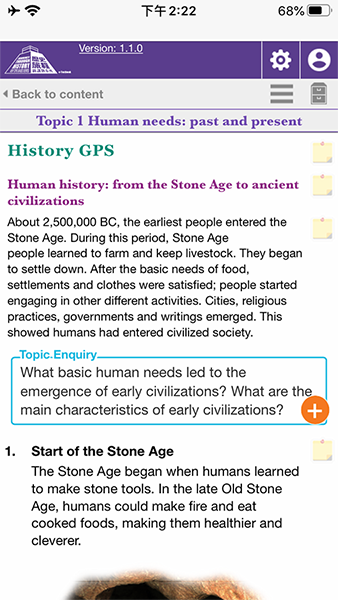 Smartphone |
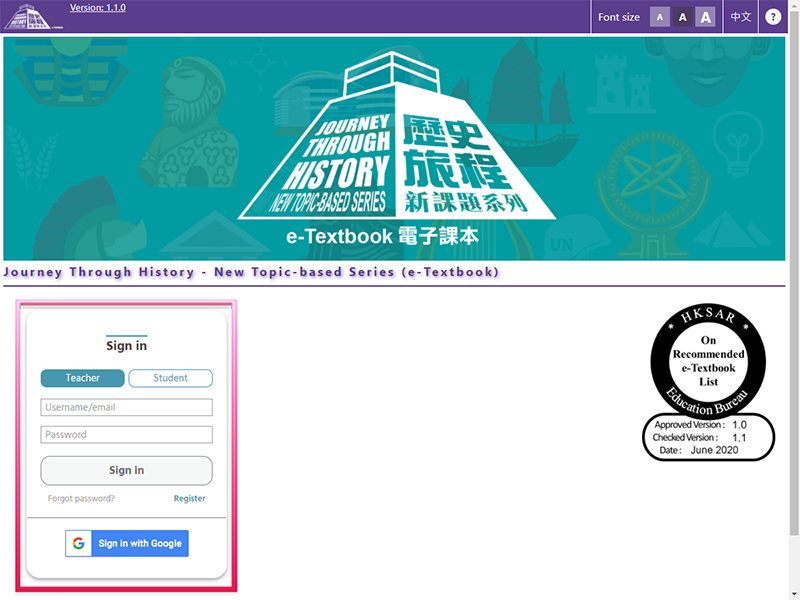
Enter your username and password at the following area, then select your role ( teacher or student ) and click Sign in .
If you have signed in successfully, the following content page will be shown:
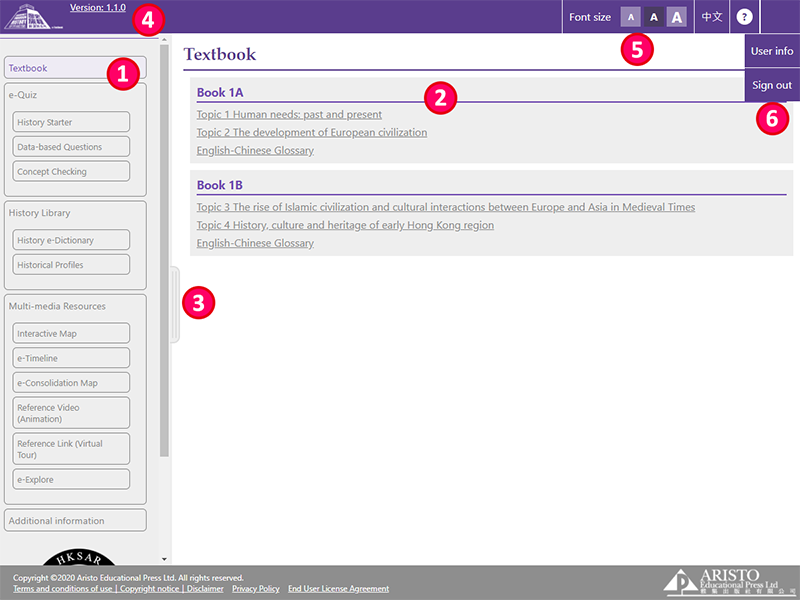
| 1 | Select textbooks, interactive exercises (e-Quiz) or other resources |
| 2 | Select a topic |
| 3 | Hide the left menu for easy viewing |
| 4 | Check the version history |
| 5 | Change the font size |
| 6 | Sign out |
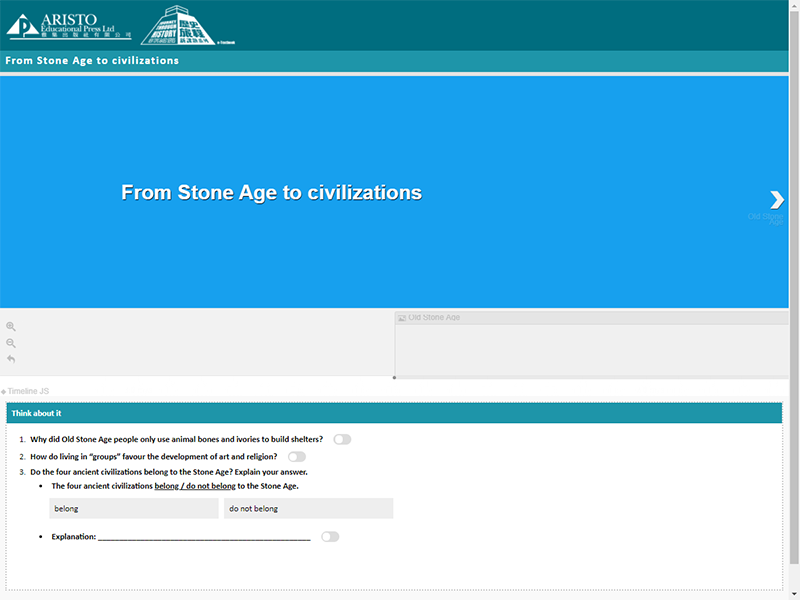
After selected a topic, you will see the following book page:
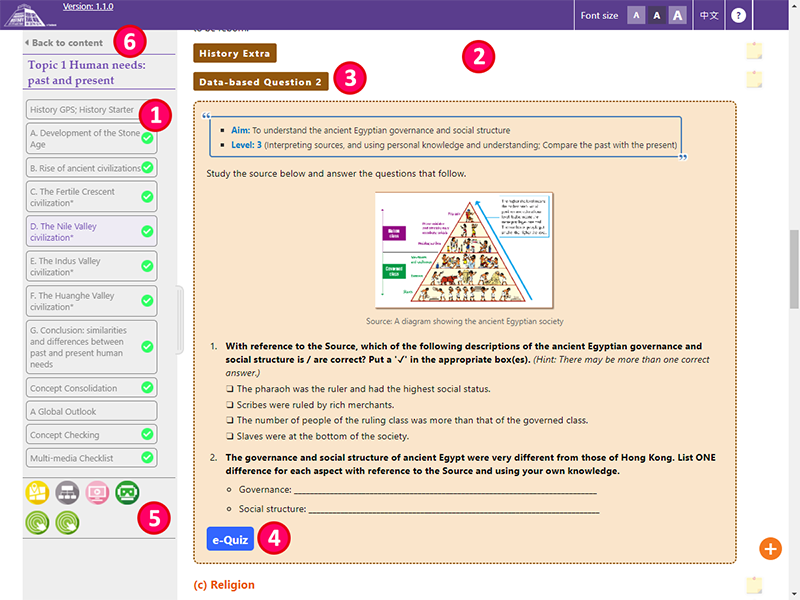
| 1 |
Select a section (if the section has been accessed before, a |
| 2 | Book content |
| 3 | Click this button to open more information |
| 4 | Click this button to start the related e-Quiz exercise |
| 5 | The related e-Learning resources in this section |
| 6 | Back to content |
If you have signed in successfully, the following content page will be shown:
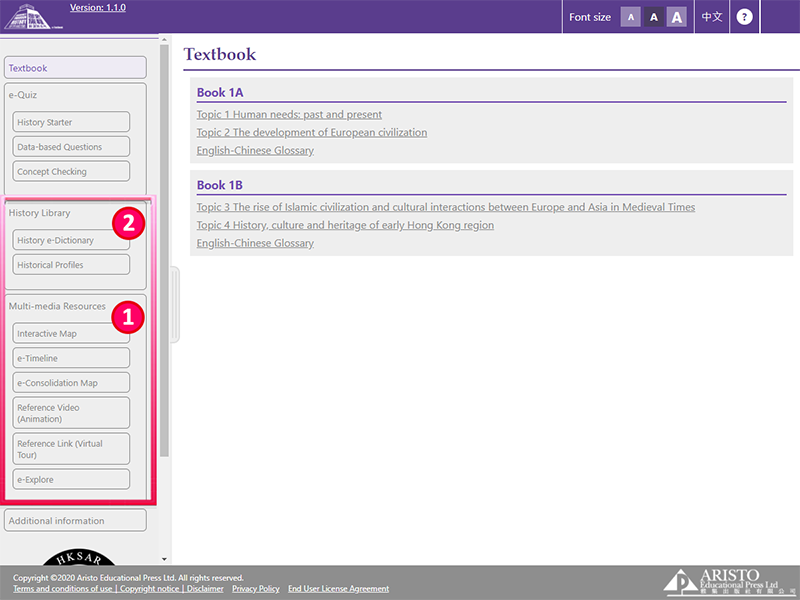
| 1 | Multi-media Resources |
| 2 | History Library |
Multi-media Resources
-
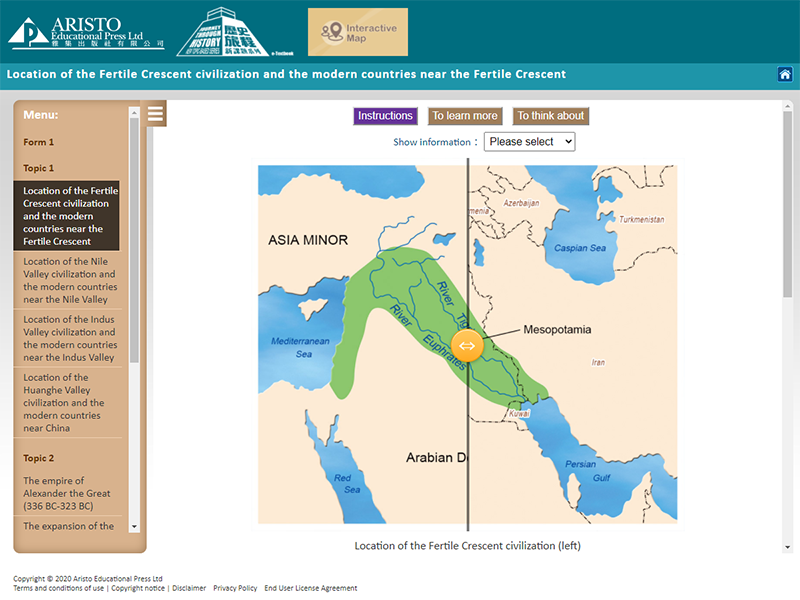
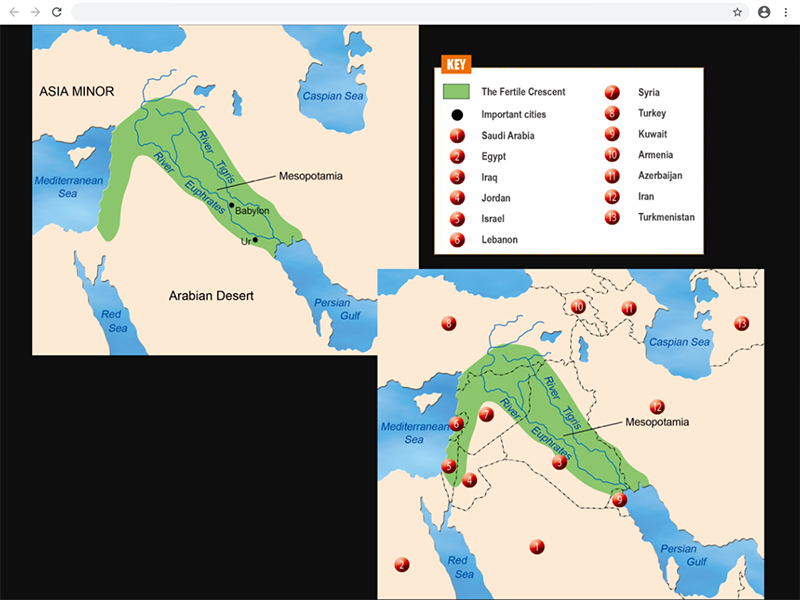
Interactive Map
-
e-Timeline
-
e-Consolidation Map
-
Reference Video (Animation) (with captions and labels)

-
Reference Link (Virtual Tour)
-
e-Explore
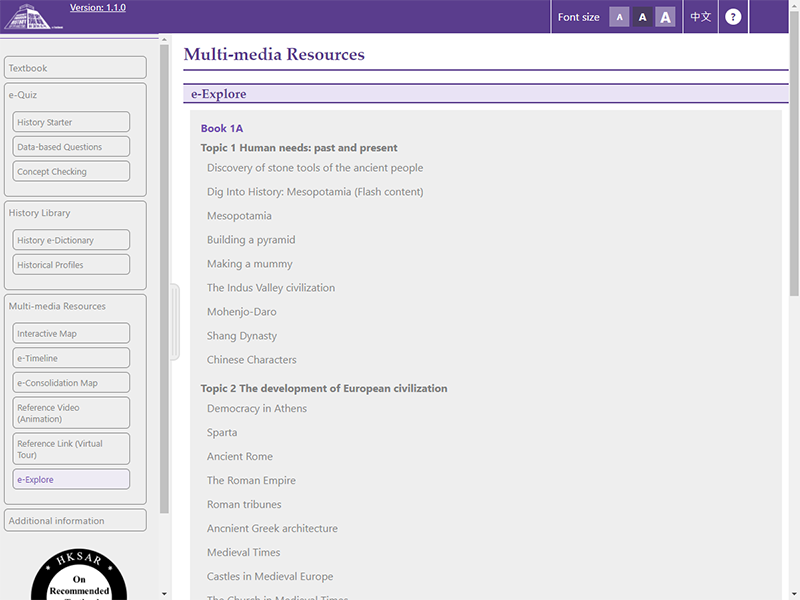
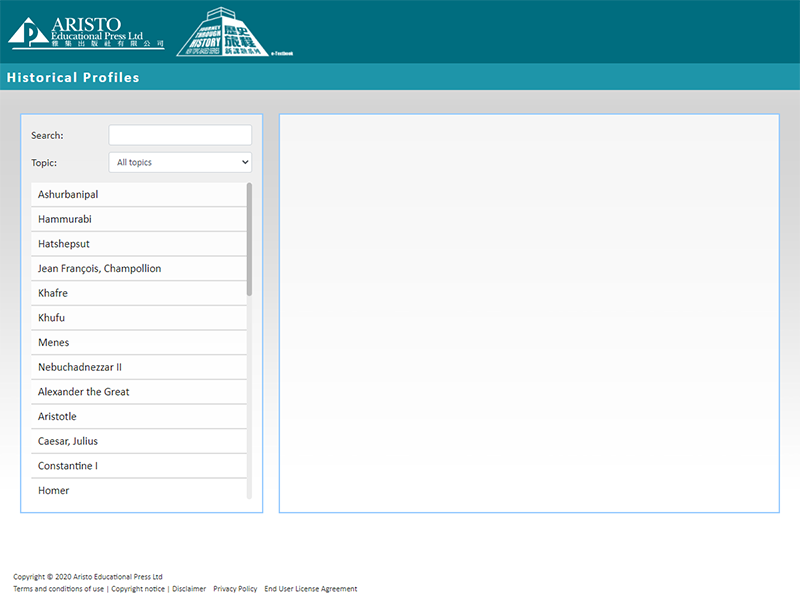
History Library
-
History e-Dictionary
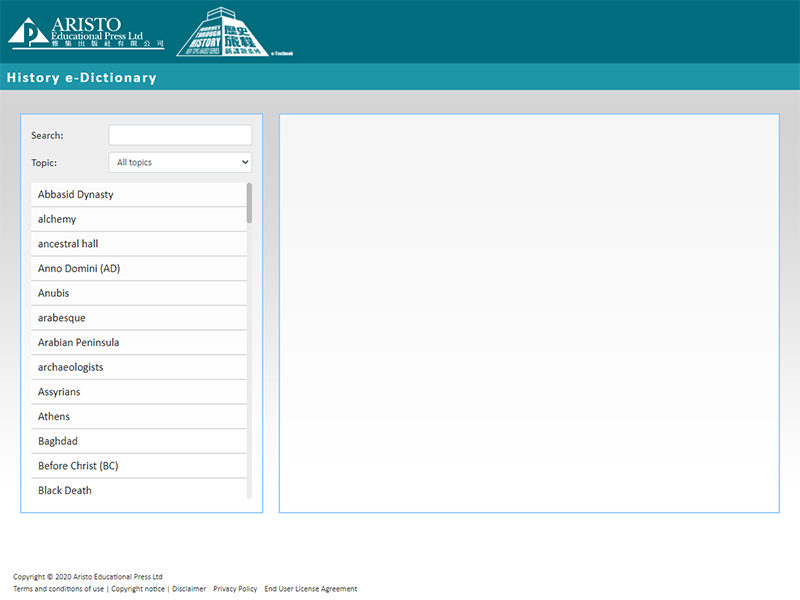
-
Historical Profiles
Select an e-Quiz exercise type
Select an e-Quiz exercise type from the following menu:
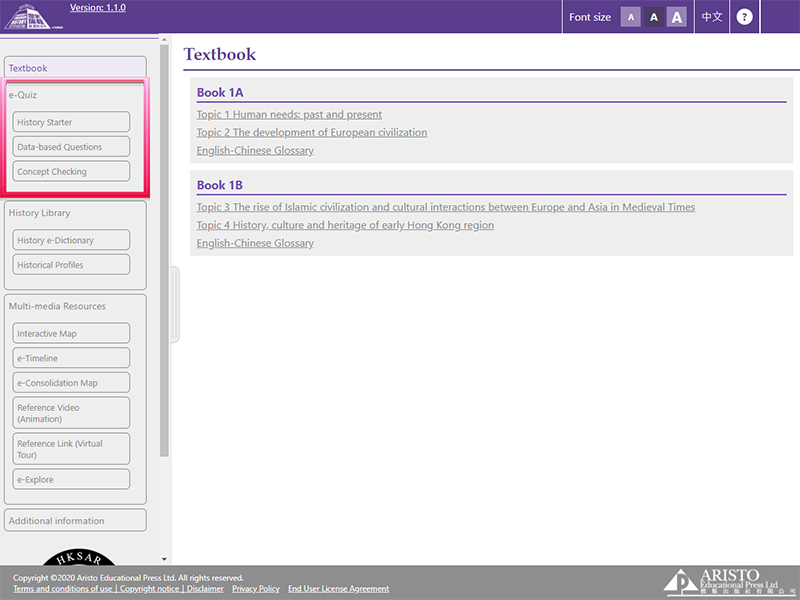
e-Quiz menu
Student’s version:
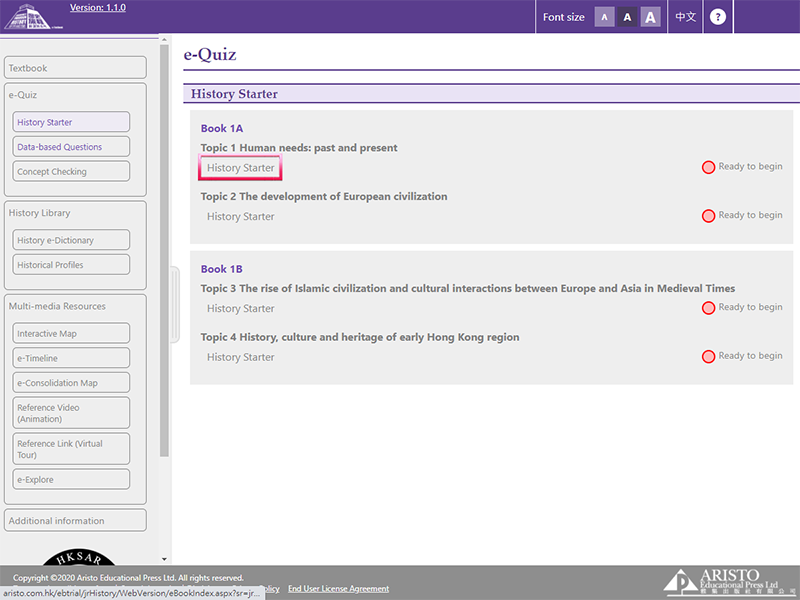
Click the title to start the e-Quiz exercise
Teacher’s version:
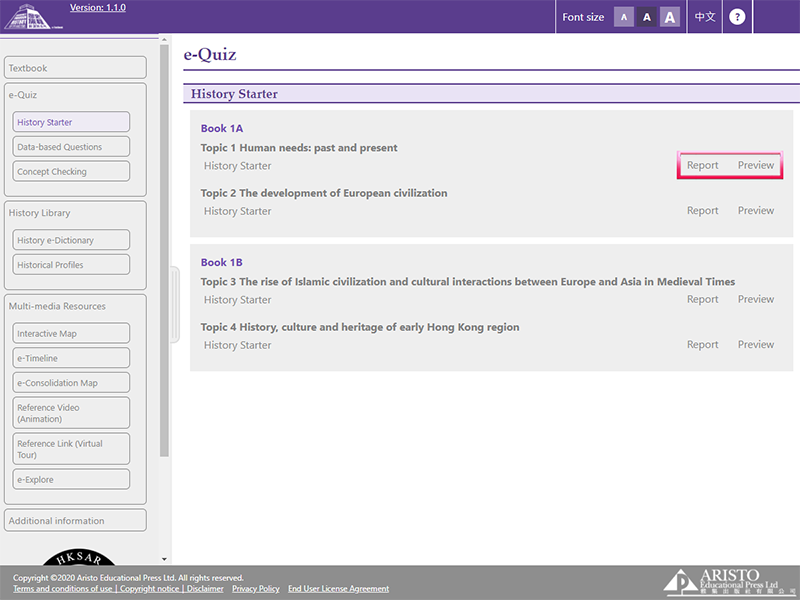
Report - Show the student’s performance report
Preview - Preview the student’s answering page
Student’s answering page
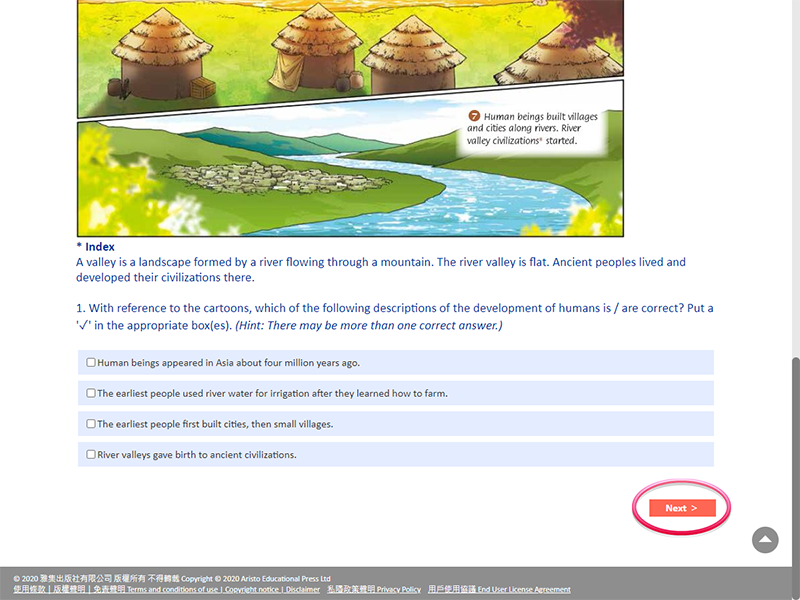
Click ‘Next’ to go to the next question. After clicking ‘Next’, the system will automatically save the current progress. Students will be able to check or change their answered questions if they open the exercise again.
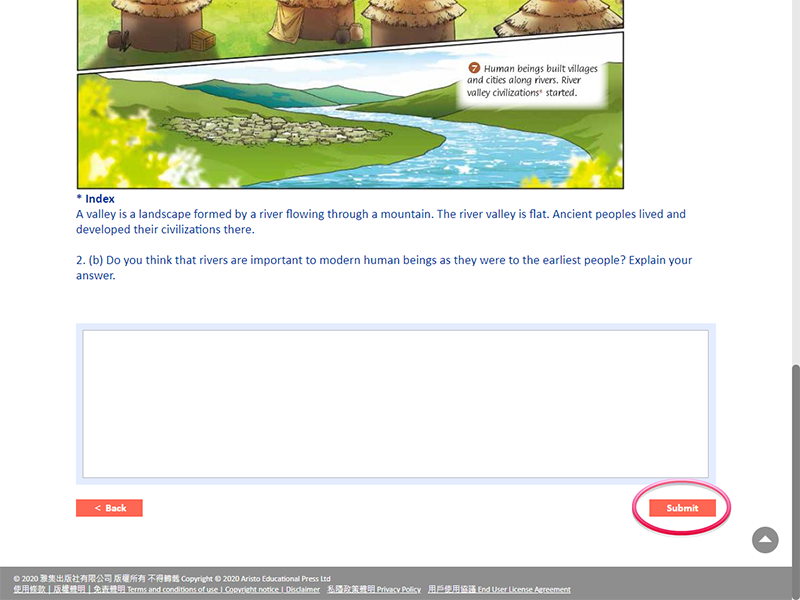
Click ‘Submit’ to submit the answers to teacher, but students cannot change their answers after they have submitted the e-Quiz.
Performance report (Teacher’s version)
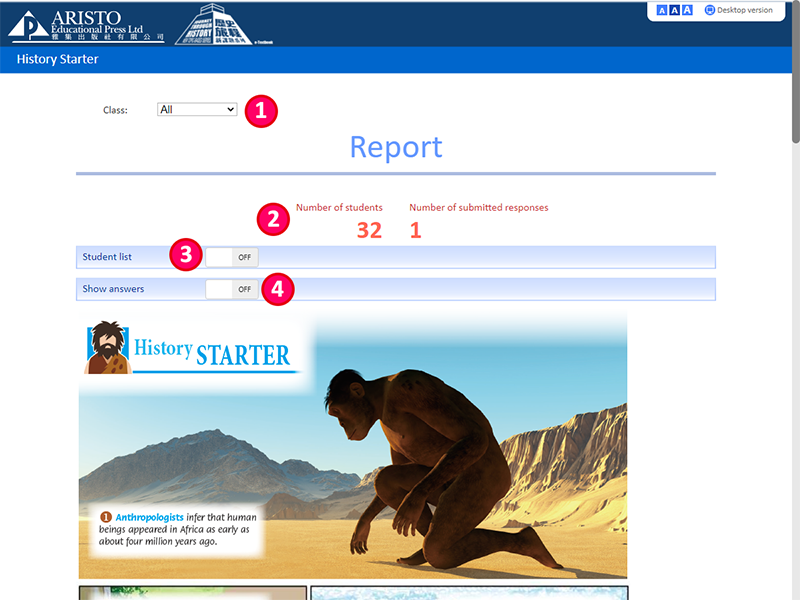
| 1 | Click here to select class |
| 2 | Show the results by class |
| 3 | Click here to show the results and responses of each student |
| 4 | Click here to show answers |
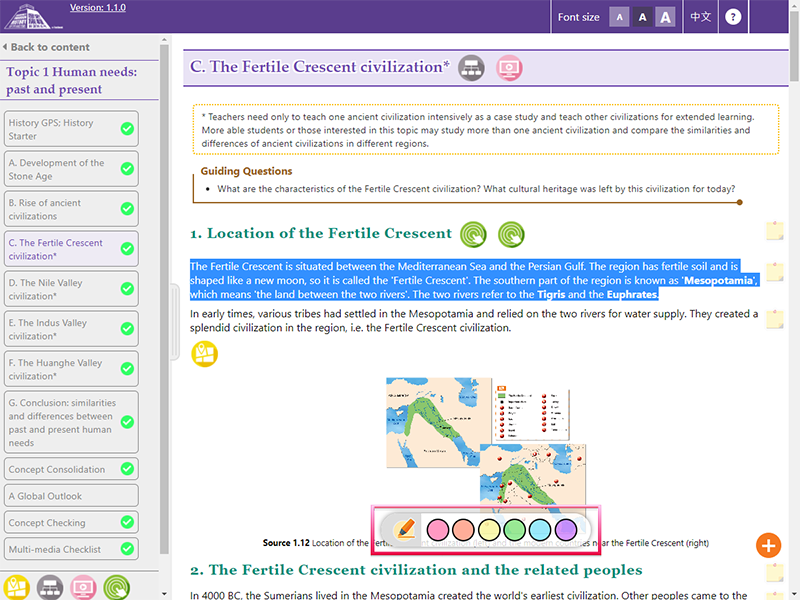
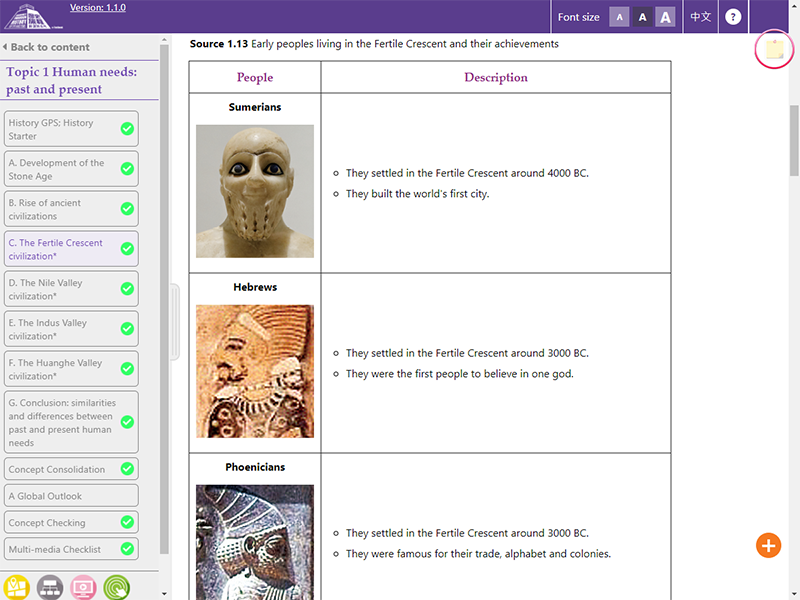
Highlighting text
After selecting text on book page layout, you will see a colour panel at the bottom. Click on a colour to highlight the selected text. If used on mobile devices, you can long press to select the text.
![]()
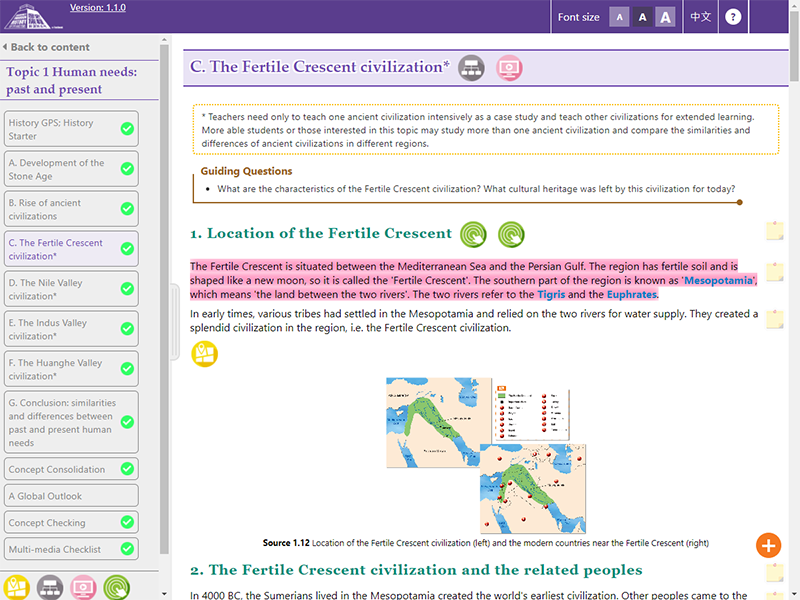
* Only one paragraph can be highlighted at a time.
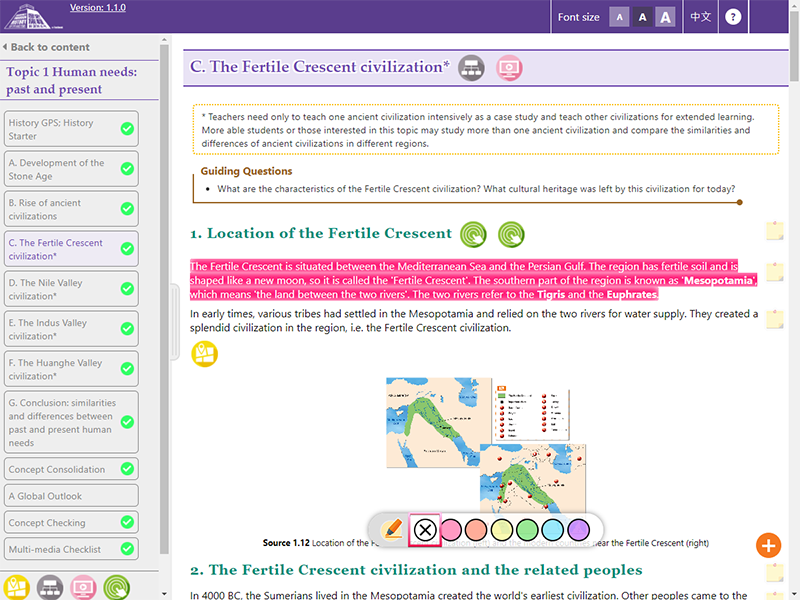
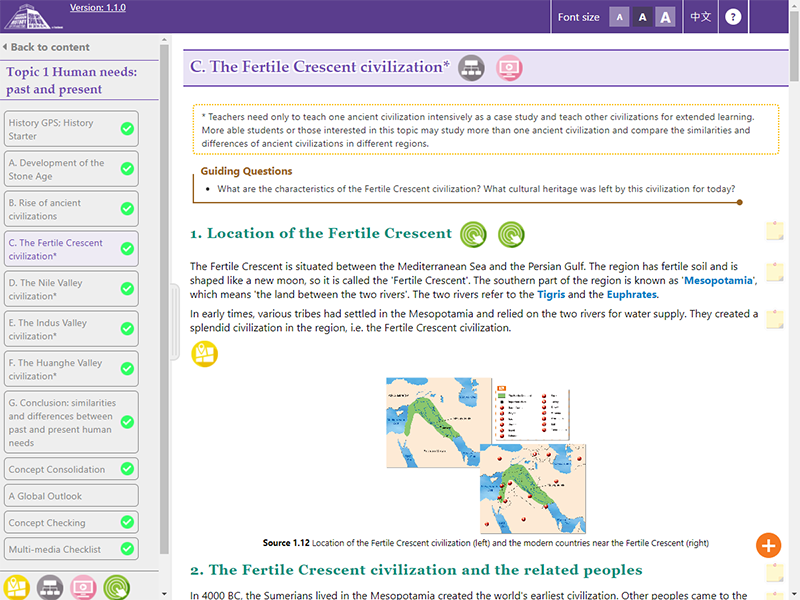
Click on the highlighted text, then press ‘X’ to clear the highlighting effect.
![]()
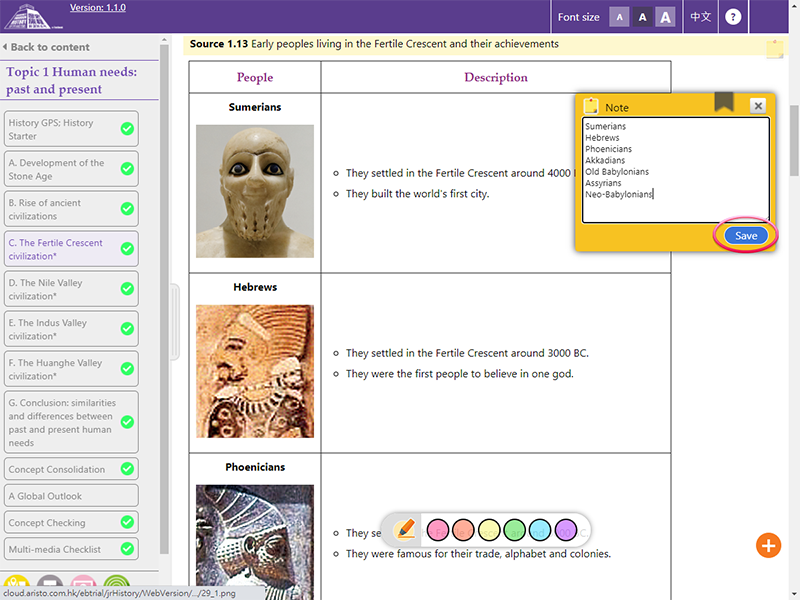
Adding notes
Click on the ![]() icon shown on the book page layout, then you can add notes for that paragraph. Click Save to save the notes.
icon shown on the book page layout, then you can add notes for that paragraph. Click Save to save the notes.
![]()
You can check your notes by clicking the ![]() icon again.
icon again.
Click ![]() to add bookmark.
to add bookmark.

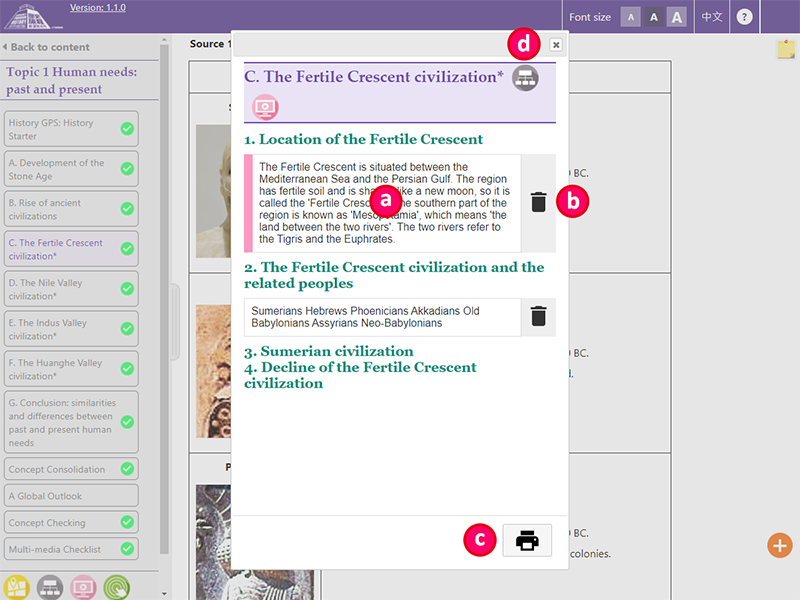
Saving or printing notes
You can open the following menu by clicking the + button at the right bottom corner of the book page layout:
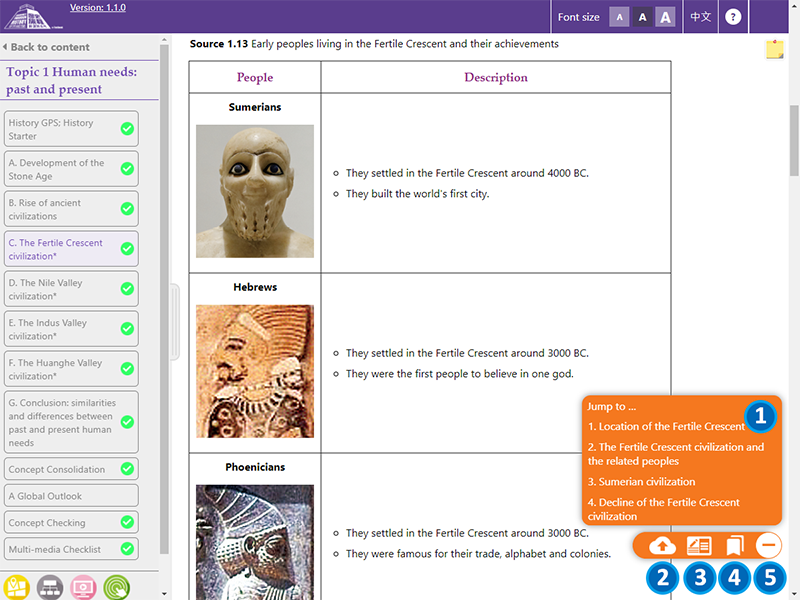
| 1 | Jump to different parts in this section | ||||||||
| 2 | Save the notes on Cloud server (provided by the publisher) | ||||||||
| (Note: Before leaving the page, please be reminded to press this button to save all your notes marked on this section, otherwise the system will not keep any record.) | |||||||||
| 3 |
Show all notes marked on this section
|
||||||||
| 4 | Show all bookmarks in this section | ||||||||
| 5 | Close menu |
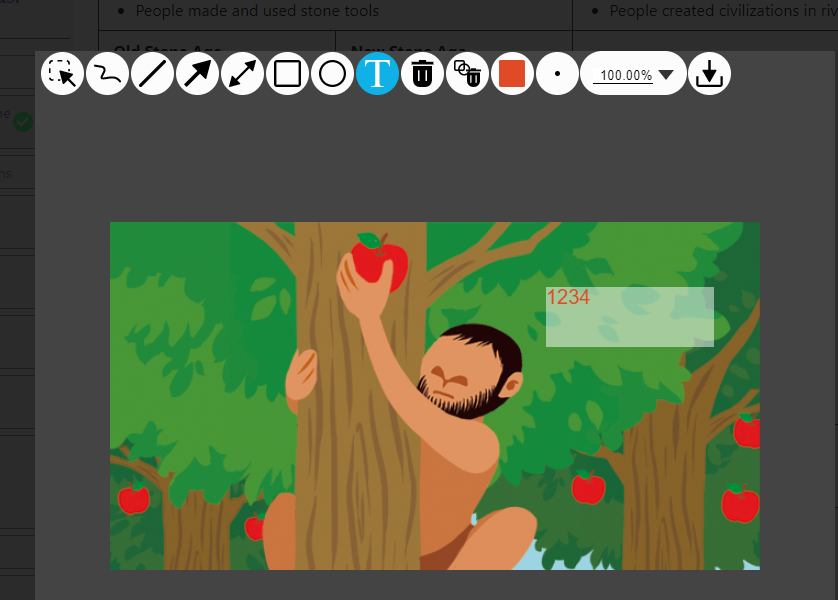
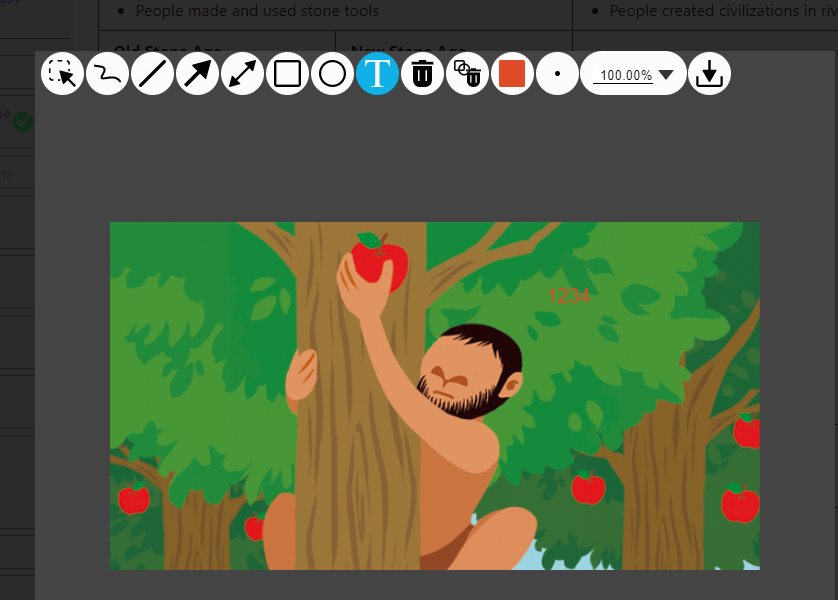
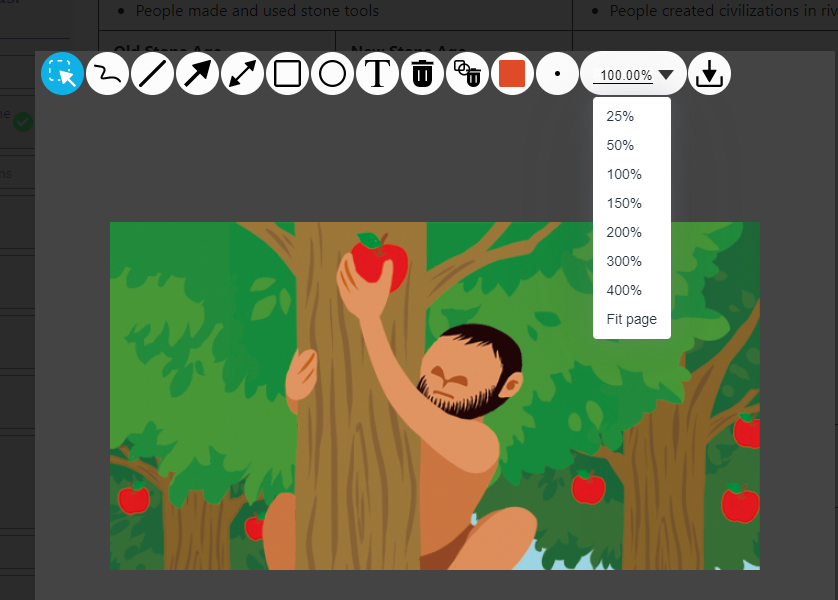
Drawing function
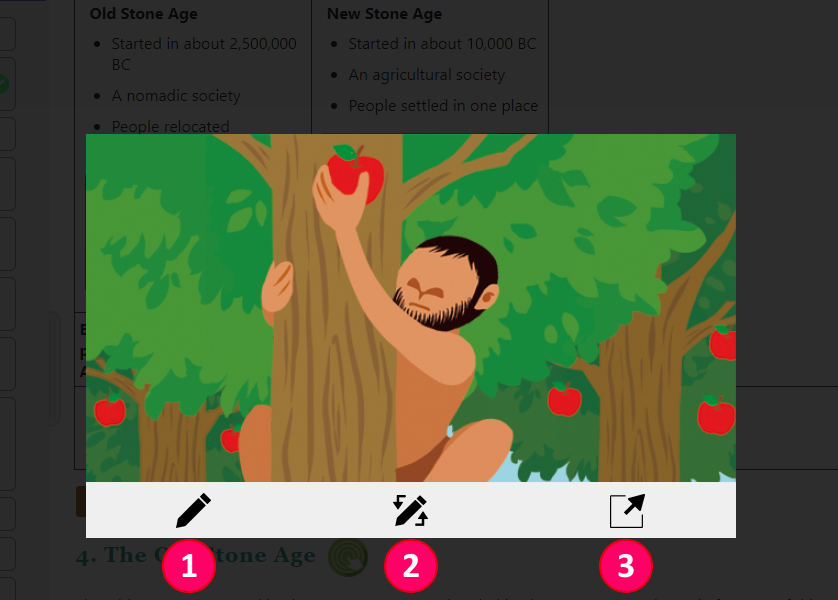
| 1 |
|
Open drawing tools (this option will only appear and work on a desktop or tablet computer) |
| 2 |
|
Show/Hide drawings |
| 3 |
|
Open the image in a new tab |
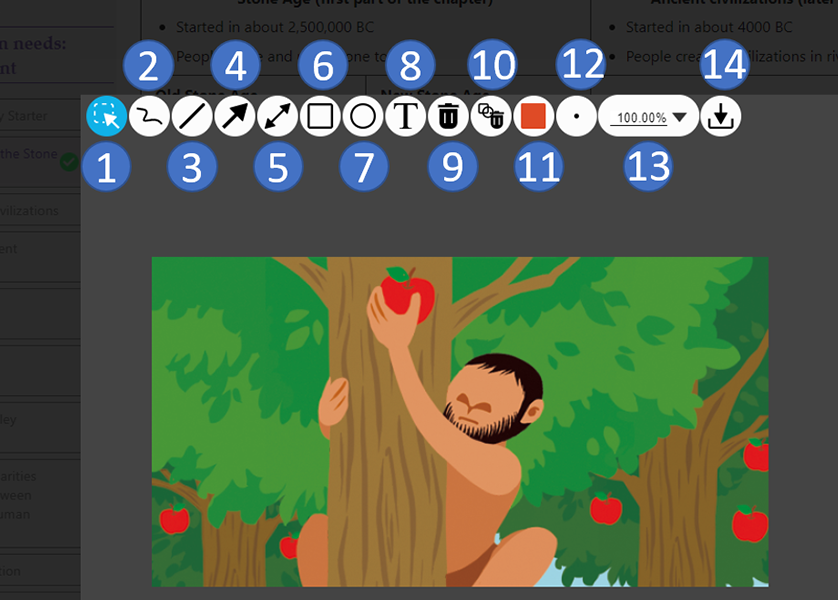
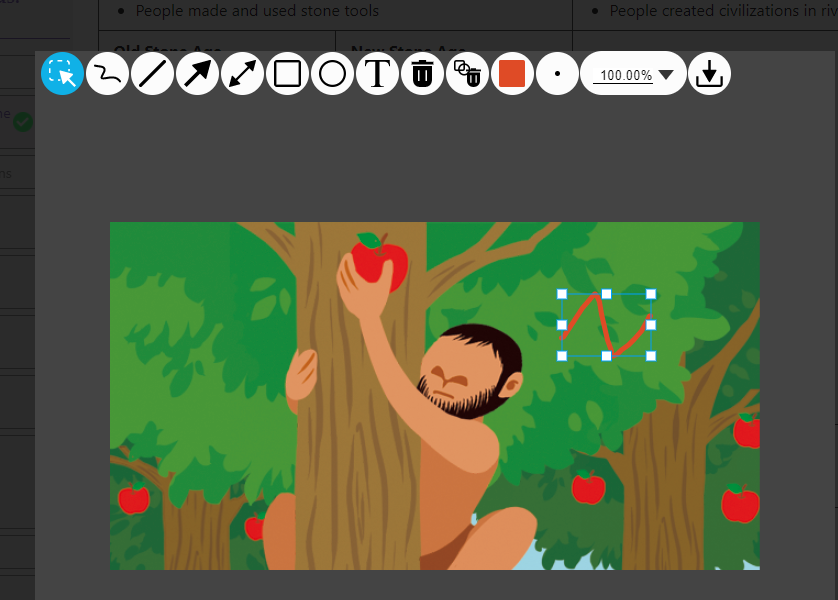
| 1 |
‘Select’ tool - Switch to this mode to select a drawing, then
|
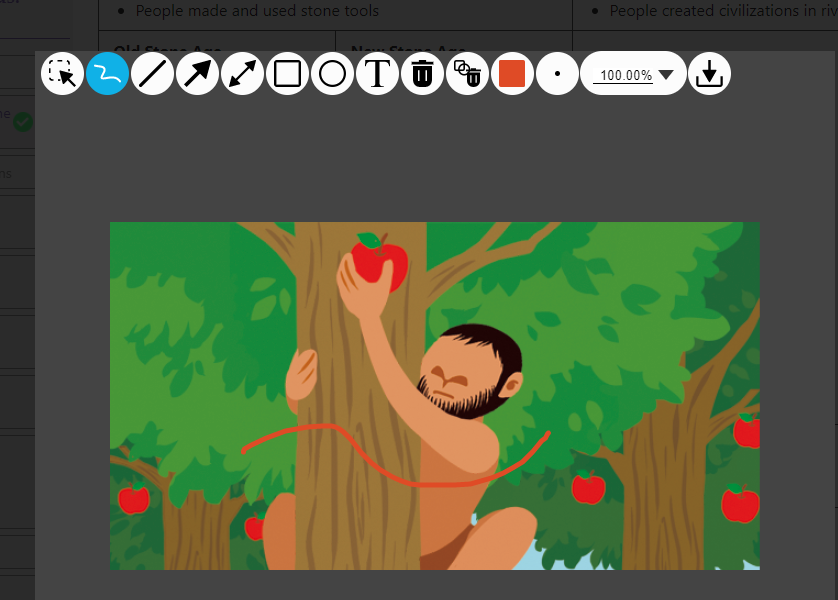
| 2 |
Draw (free-form)
|
| 3 |
Draw straight line

|
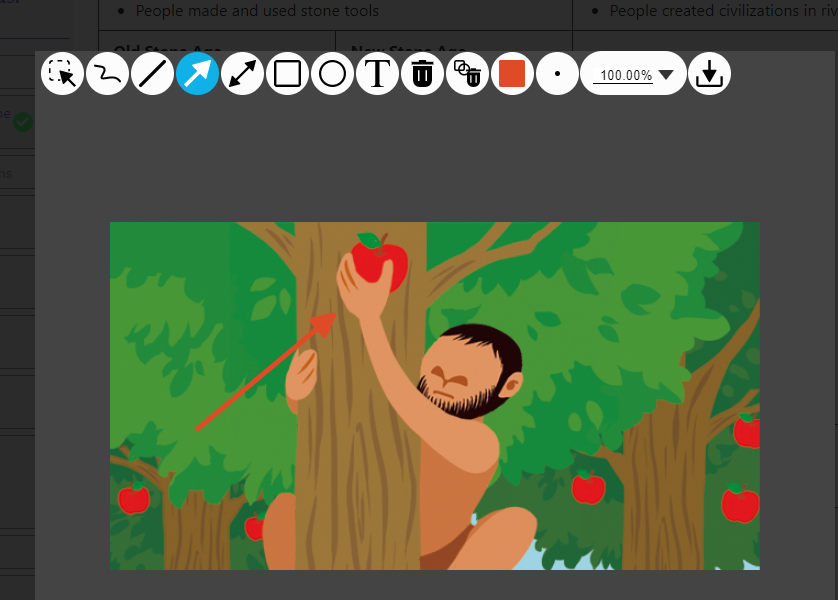
| 4 |
Draw single arrow
|
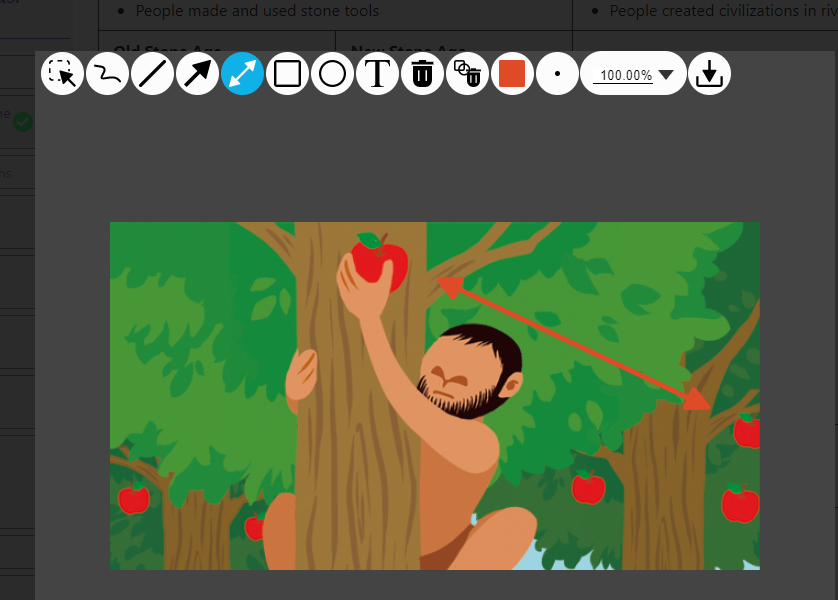
| 5 |
Draw double arrows
|
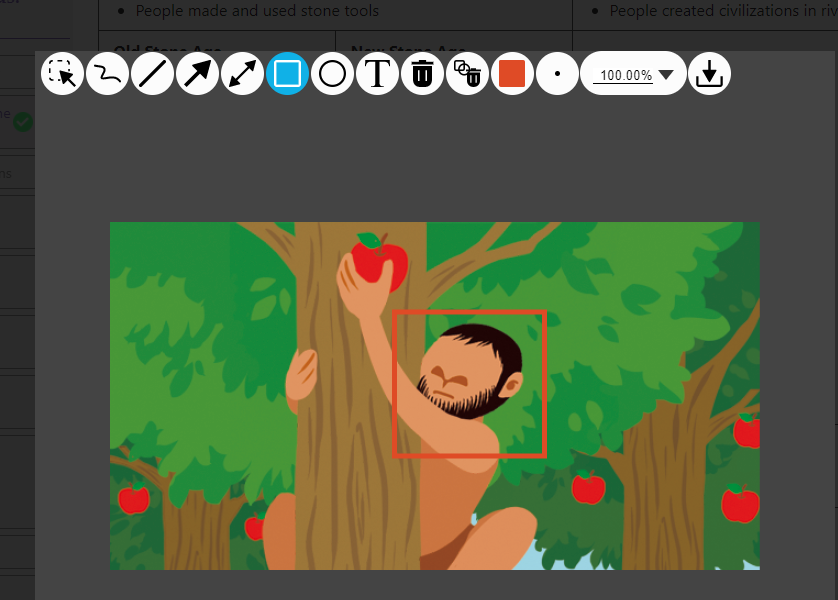
| 6 |
Draw rectangle
|
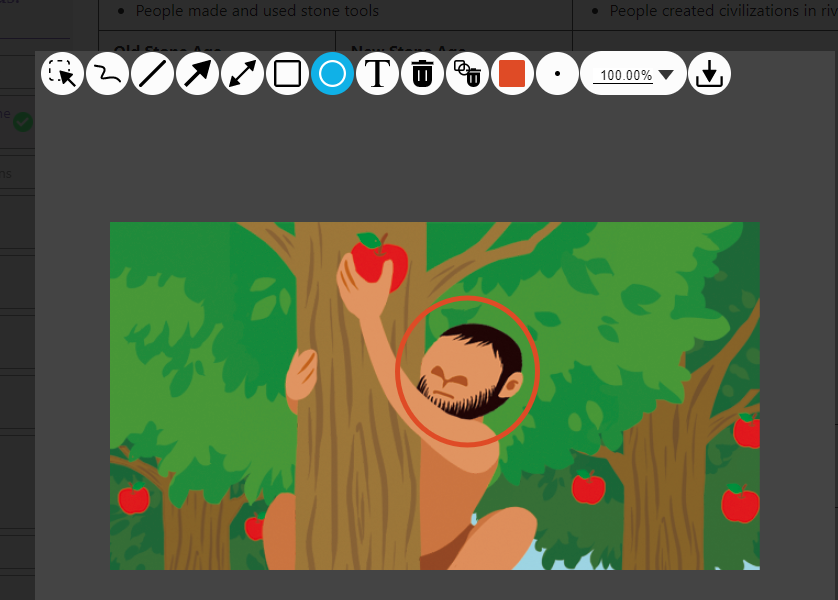
| 7 |
Draw ellipse
|
| 8 |
Add text:
|
| 9 |
Use ‘Select’ tool to select a drawing, then click this button to delete it.
|
| 10 |
Clear all drawings
|
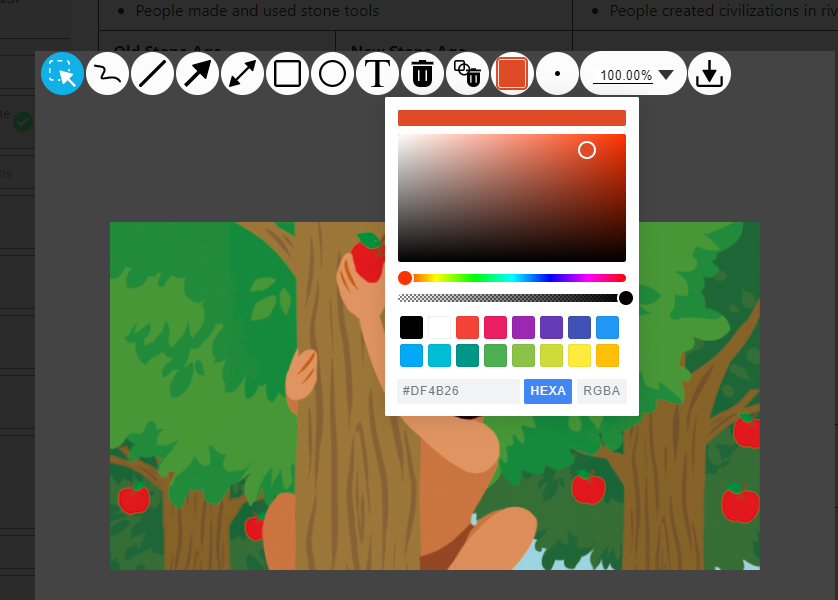
| 11 |
Select a colour for the line or text
|
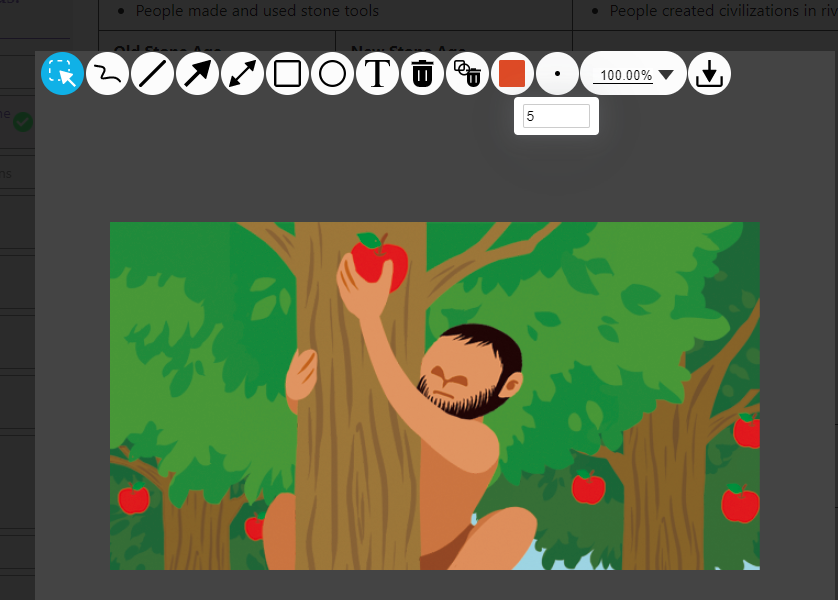
| 12 |
Change line thickness
|
| 13 |
Zoom in/out the image
|
| 14 |
Save drawings
|
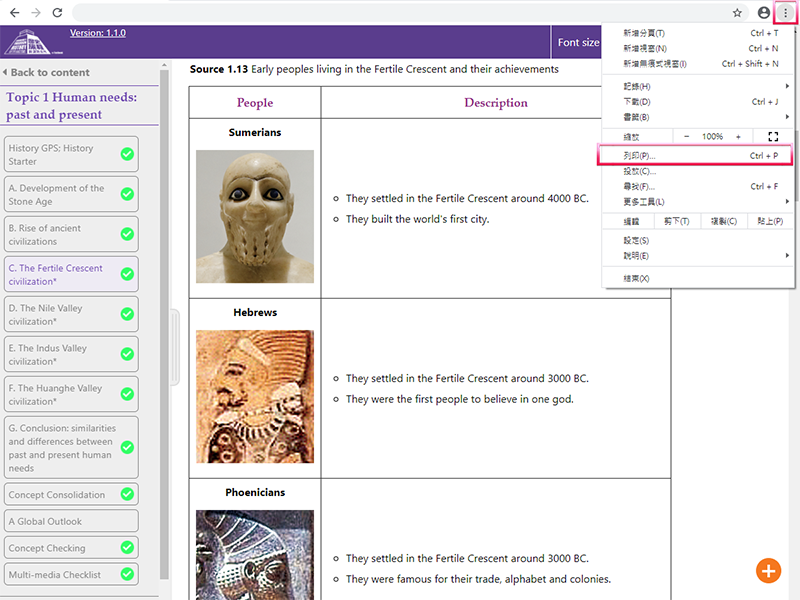
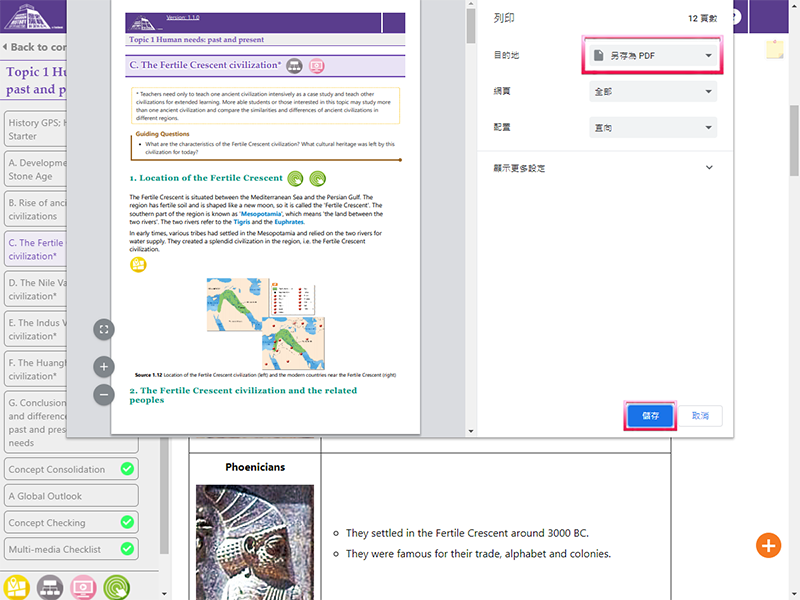
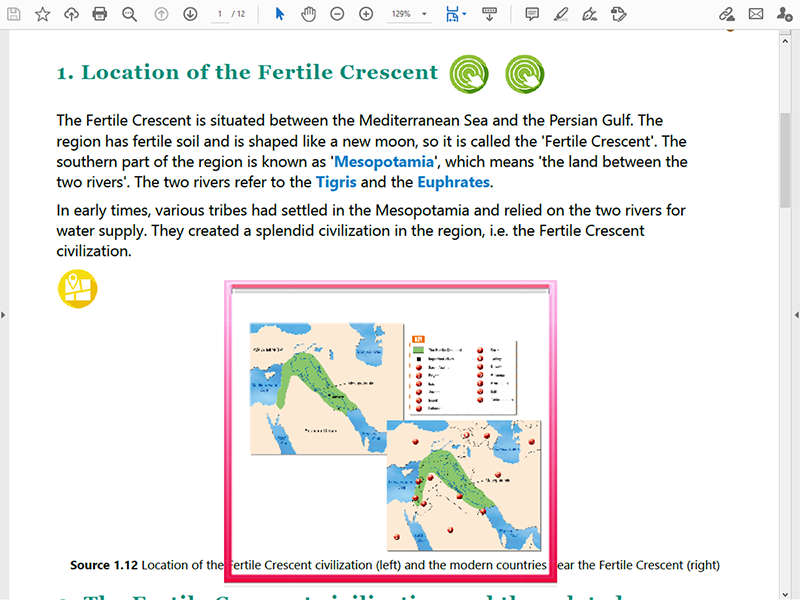
Offline PDF files can be provided to users. Users can also print and download the book contents in an offline PDF file directly from the e-Textbook website. Adobe Reader is required to view the offline PDF on desktop or laptop computers, tablet computers or smartphones.
-
Print the e-Textbook web pages as PDF file

-
Click on the picture to enlarge it on a web browser (Internet connection required)
After signed in the e-Textbook website, users can open the connected online resources directly. Users do not need to open another account or sign on again.
User can use a screen reading tool to read the text on the e-Textbook website.
* Testing software: VoiceOver – the vision accessibility feature on iPad (Settings > Accessibility > VoiceOver)
e-Textbook website – Adjusting font size
If the e-Textbook shows the following system message, please refer to the suggested solutions:
(i) Failed to build an offline database in your device. Please be reminded to upload your notes to Cloud (provided by the publisher) before leaving this web page, otherwise the notes will be lost. If the problem persists, please contact your system administrator.
Situation: When using the e-Textbook, the system will try to build an offline database in a temporary folder and save in the user’s device. If failed, this message will be shown.
Suggested solutions:
- Please ensure the users have been granted with the appropriate access right to save files in the devices. There should be enough storage in the devices too.
- Even the offline database cannot be built, users can save the notes on the publisher’s Cloud (please check step 2.5.3 for details) to ensure they can read the notes if they open the page again.
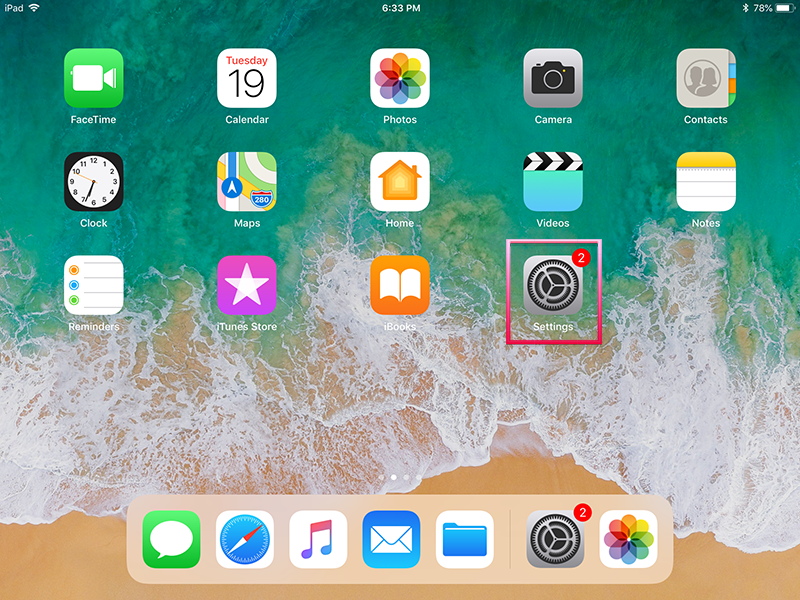
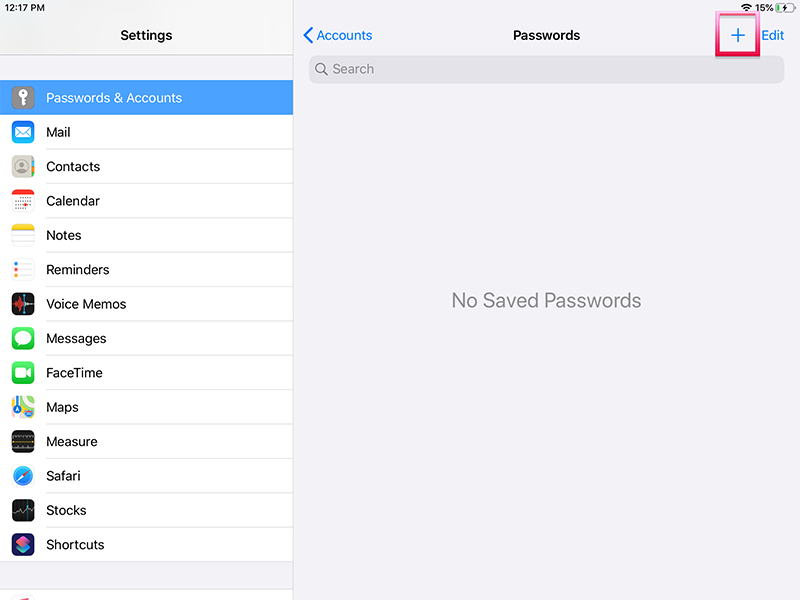
Enable AutoFill Passwords
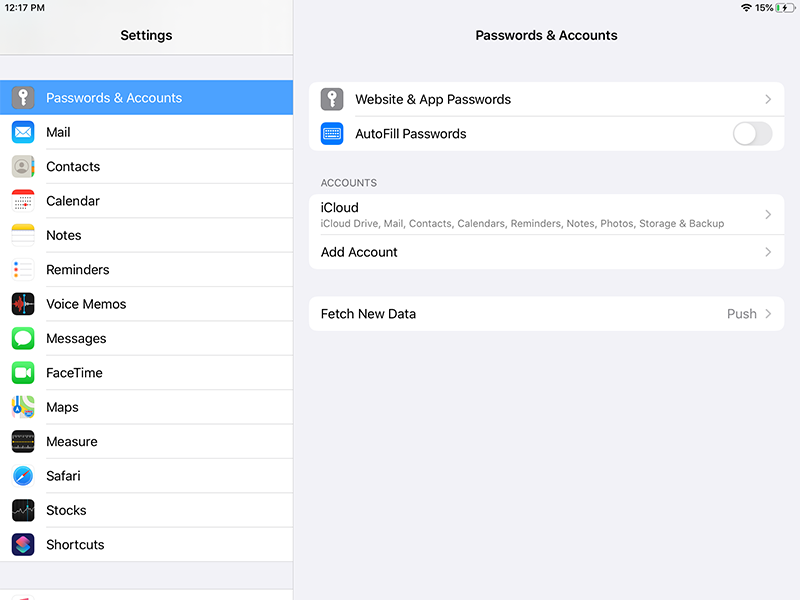
1. Go to ‘Settings’, choose ‘Passwords & Accounts’ from the left menu.
![]()
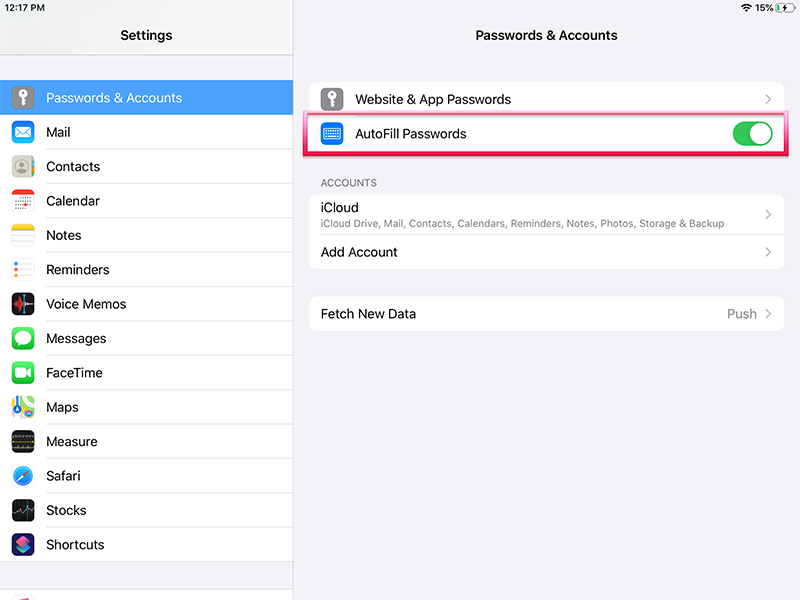
2. Enable ‘AutoFill Passwords’.
Storing sign-in information
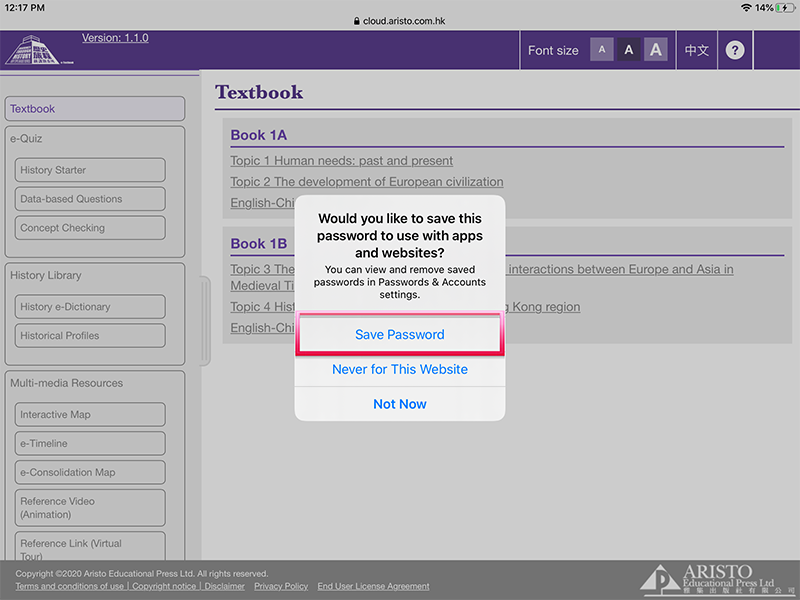
Enter your username and password and sign in, Safari will ask if you want to save your password when you have signed in for the first time. Click ‘Save Password’.
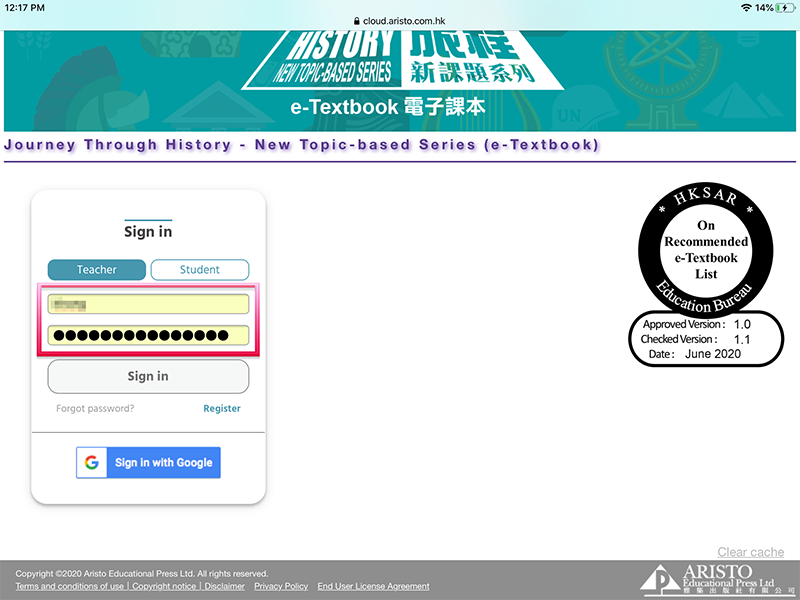
After you have saved the password, Safari will automatically fill in your information on the sign-in page when you visit the e-Textbook again. Fields where Safari has entered information are highlighted in yellow.
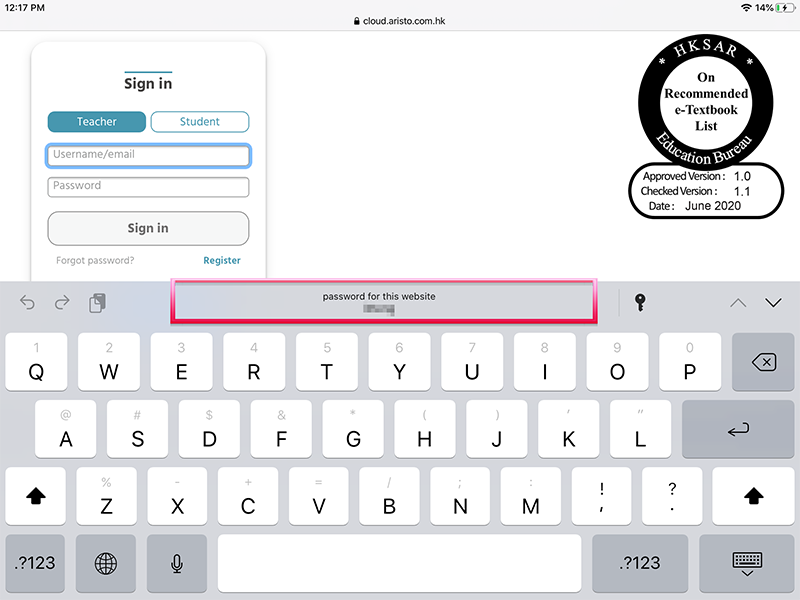
If the username and password have not been filled in automatically, you can select your saved account from the system interface as shown below after clicking the fields. You do not need to enter your sign-in information every time.
Managing stored passwords
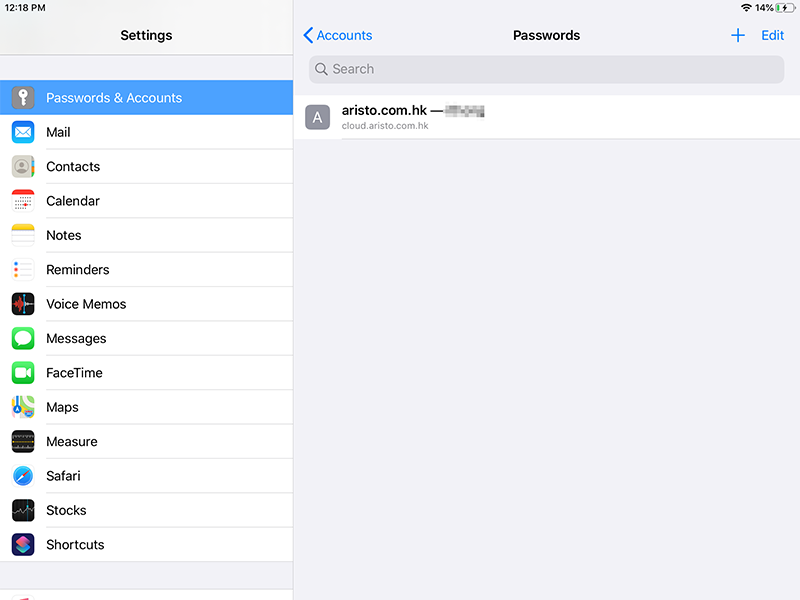
1. Go to ‘Settings’, choose ‘Passwords & Accounts’ from the left menu.

2. Click ‘Website & App Passwords’. User can modify or delete stored passwords on this page.

![]()
How to enable AutoFill Passwords again if I have chosen ‘Never for This Website’?
If you have chosen ‘Never for This Website’ in step 5.1.2, you can still manually save your sign-in information in Safari as follows:
- Go to Settings > Passwords & Accounts > Website & App Passwords, click ‘+’ at the top-left corner.
-
Enter the following sign-in information:
Website: aristo.com.hk
Username/Password: (your e-Textbook account)
![]()
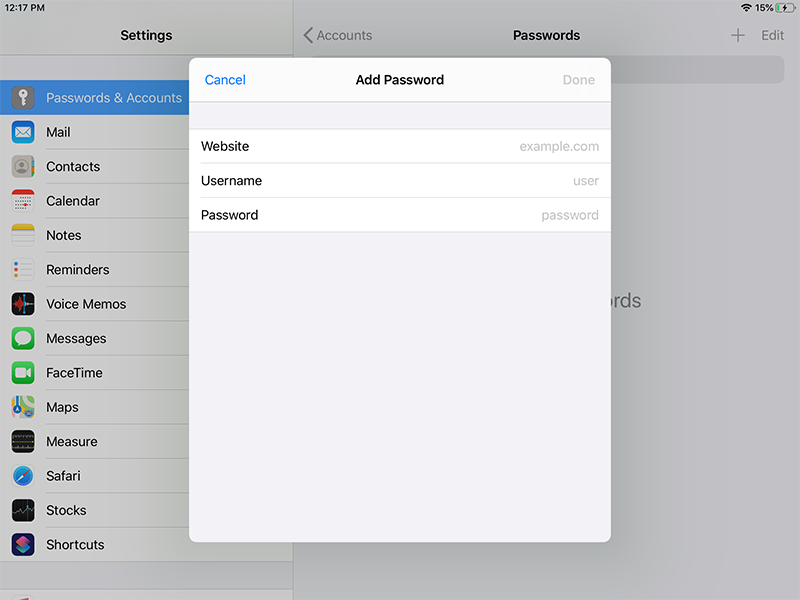
Your password will be saved and you can follow step 5.1.2 to make the sign-in page automatically entered with your information.
If you want to let Chrome remember your password for easy signing in, please follow the steps from here .
Delivery platform
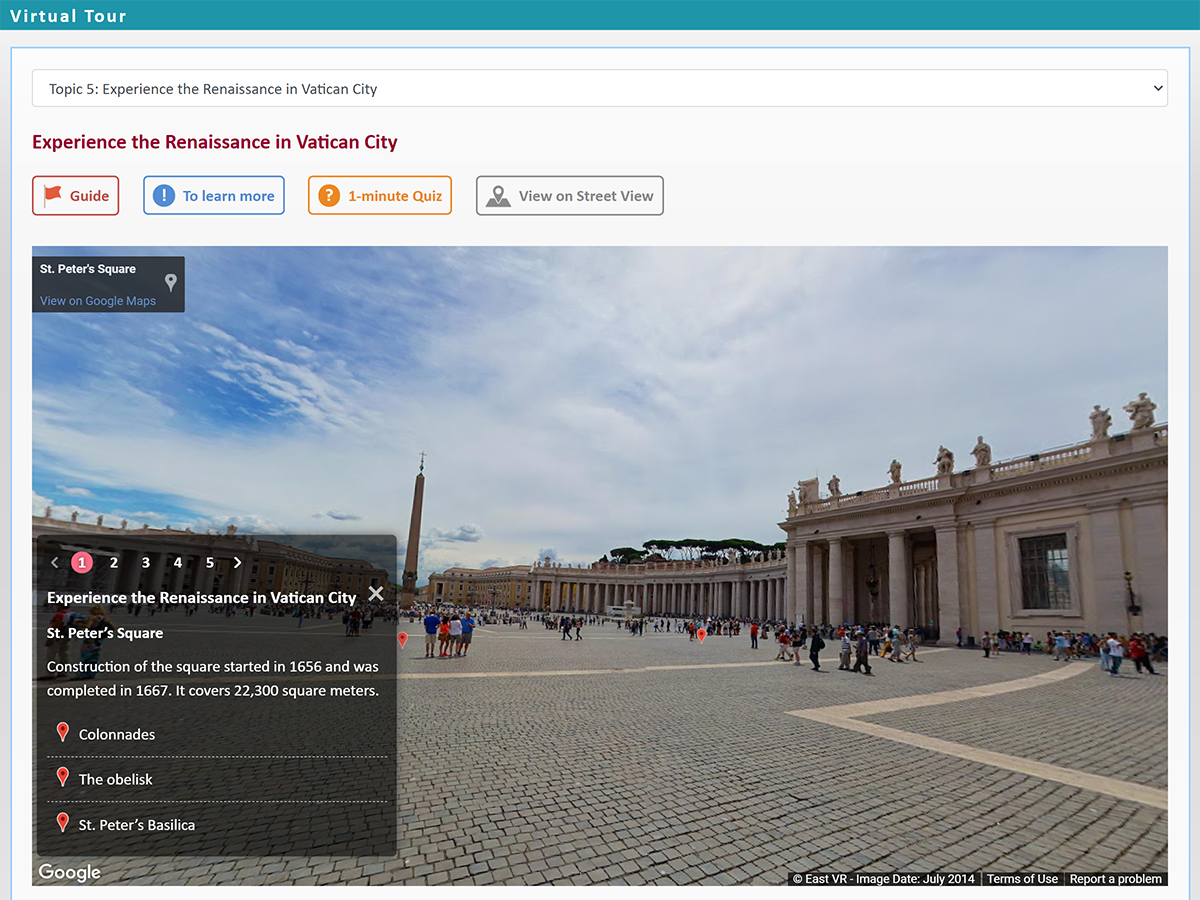
As Google has announced that Google Poly will be shut down on June 30, 2021, the delivery platform of ‘Multi-media Resources - Reference Link (Virtual Tour)’ in this e-Textbook series has been changed from Google Poly to Google Street View or Aristo’s platform.
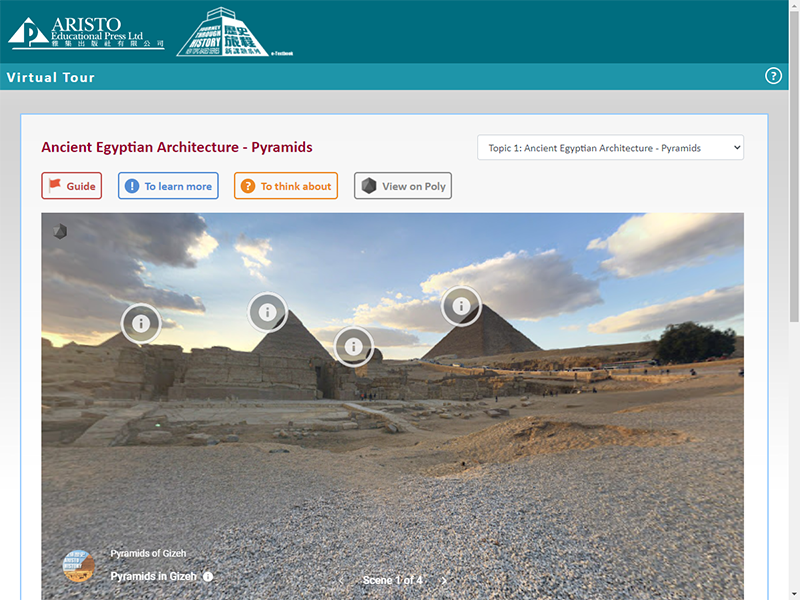
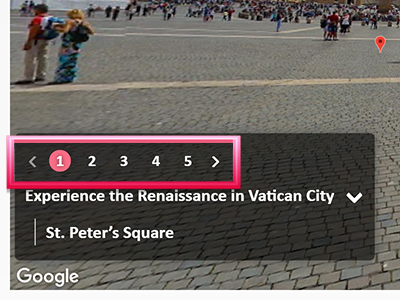
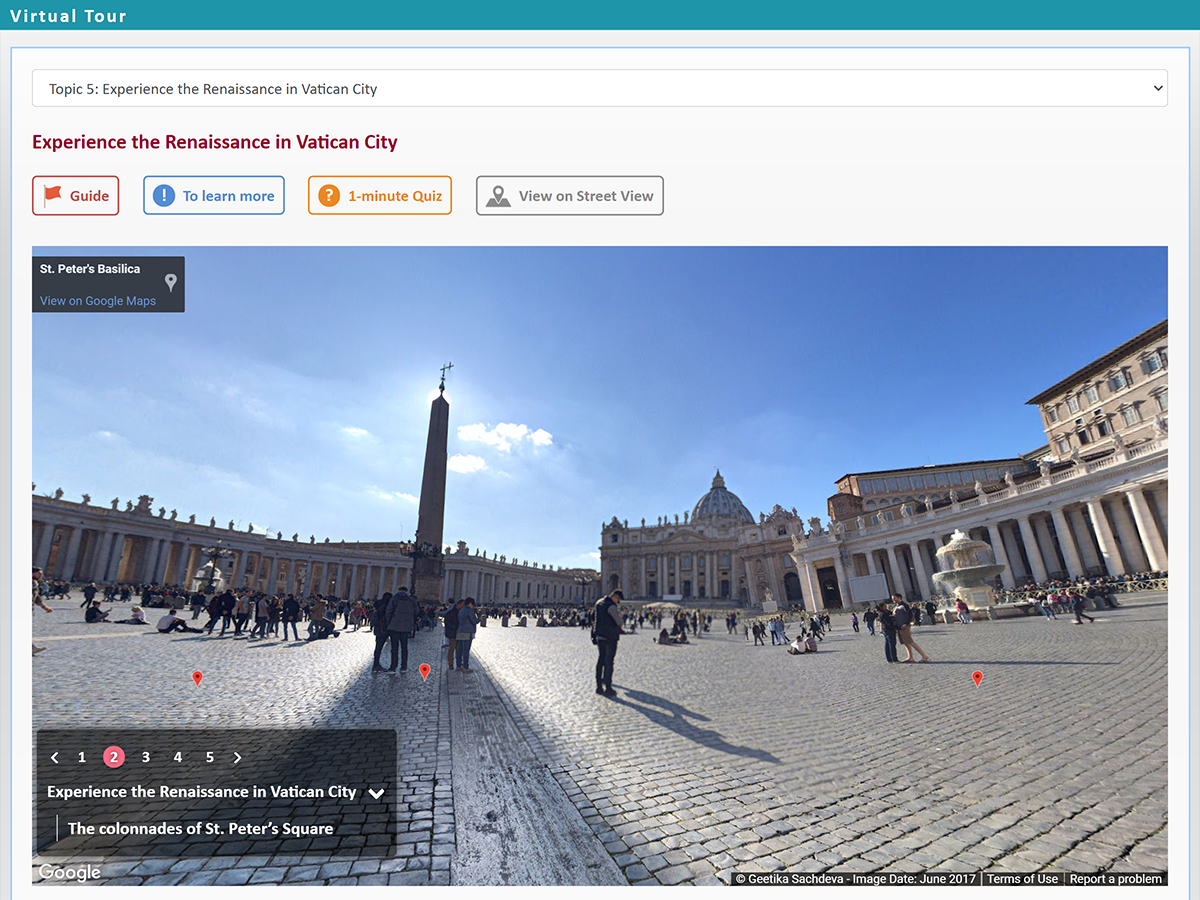
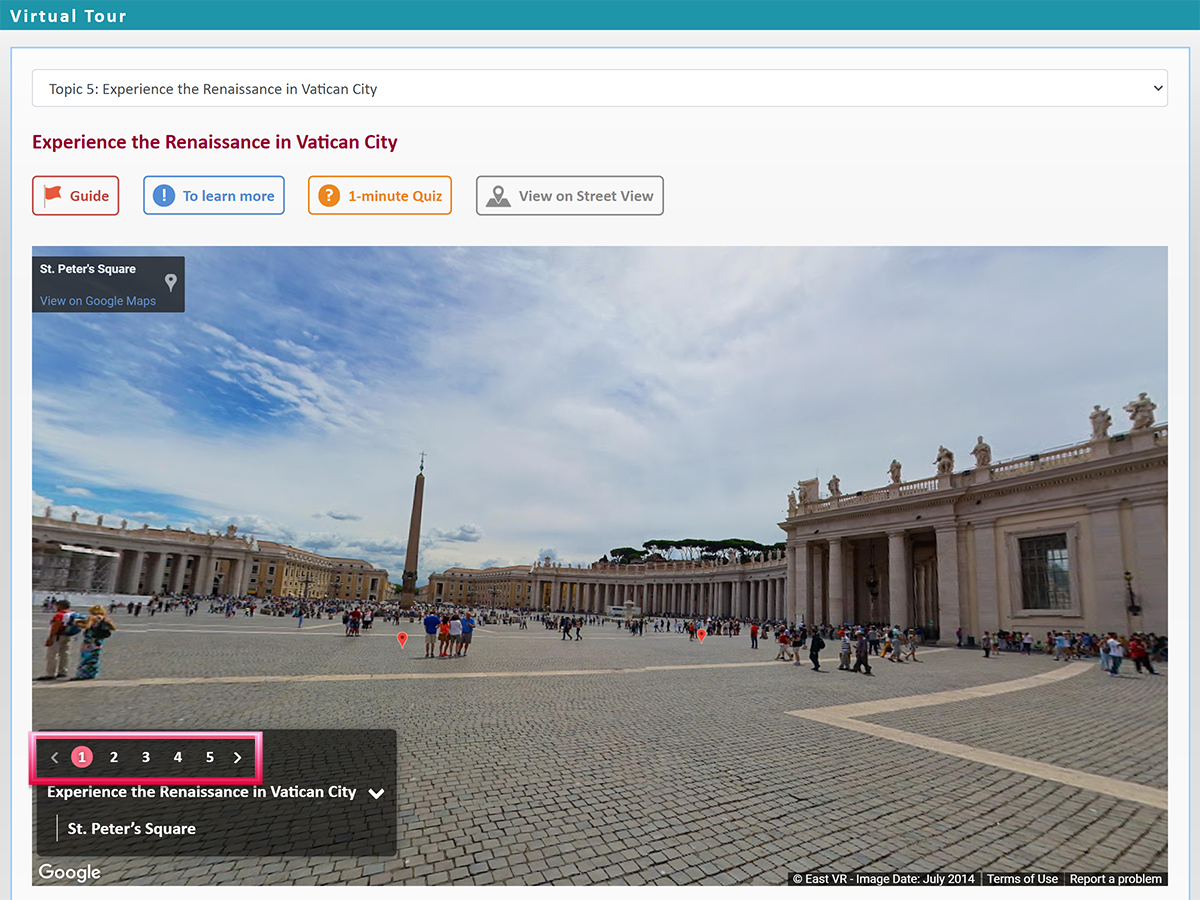
Interface introduction
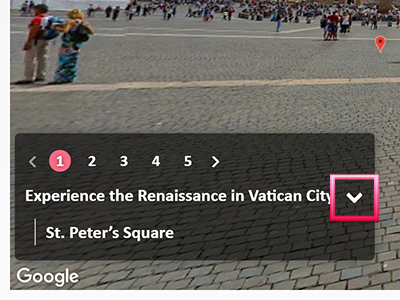
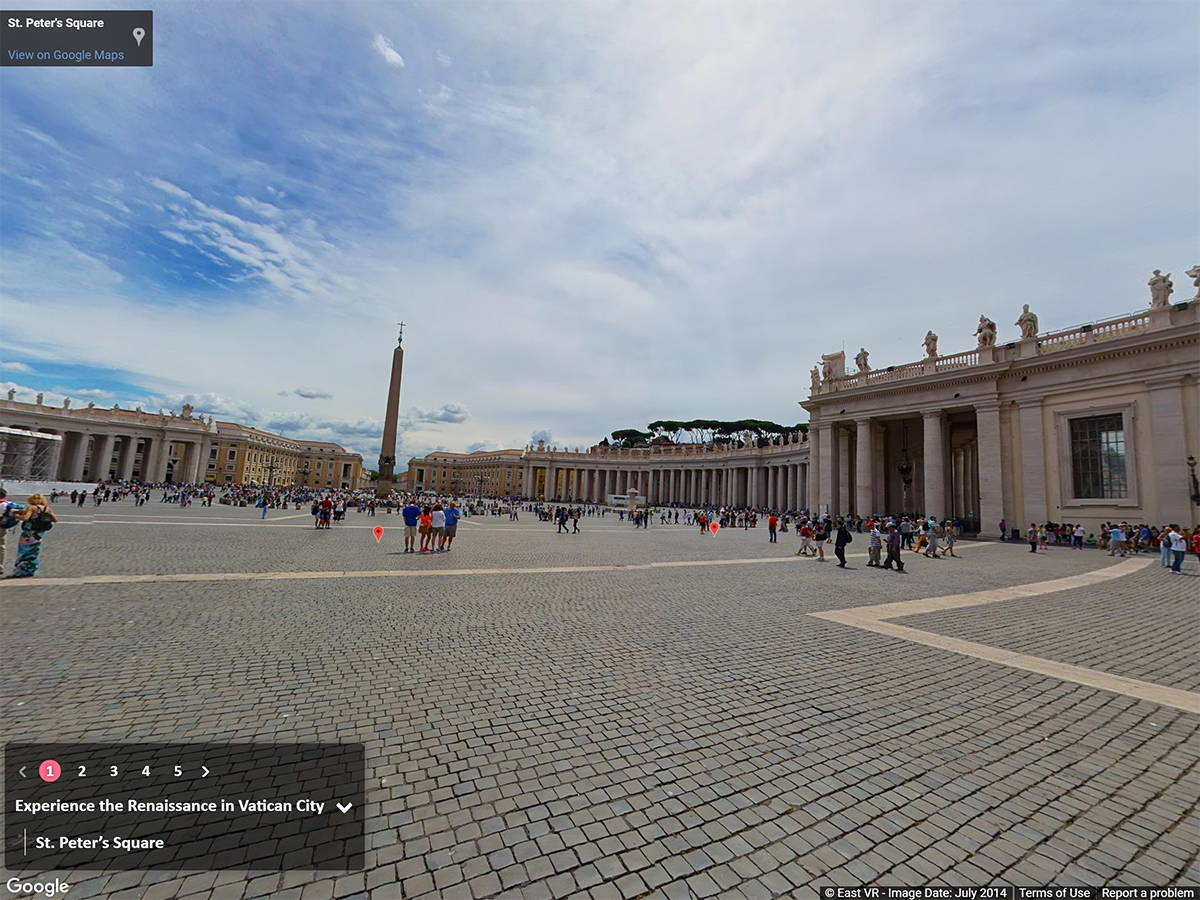
Google Street View

-
Click on the ‘’, ‘’ or the number button from the bottom left menu to switch to other scenes of the street view.
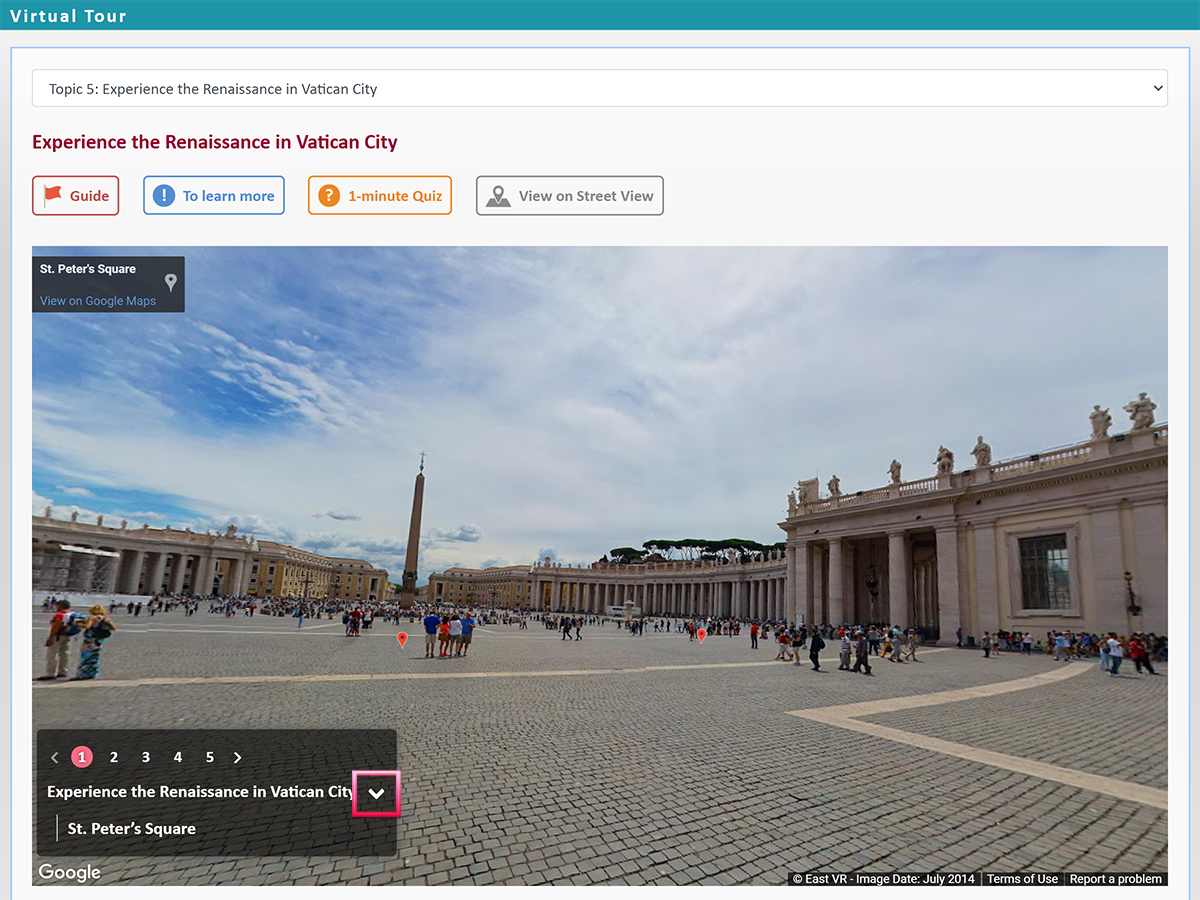
-
Click on the ‘’ button next to the title of the street view to show its information and markers.
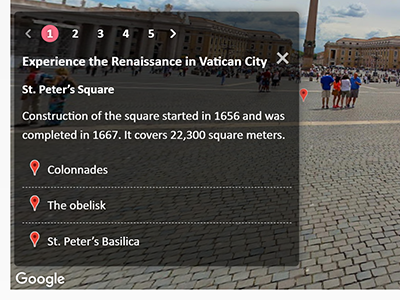
-
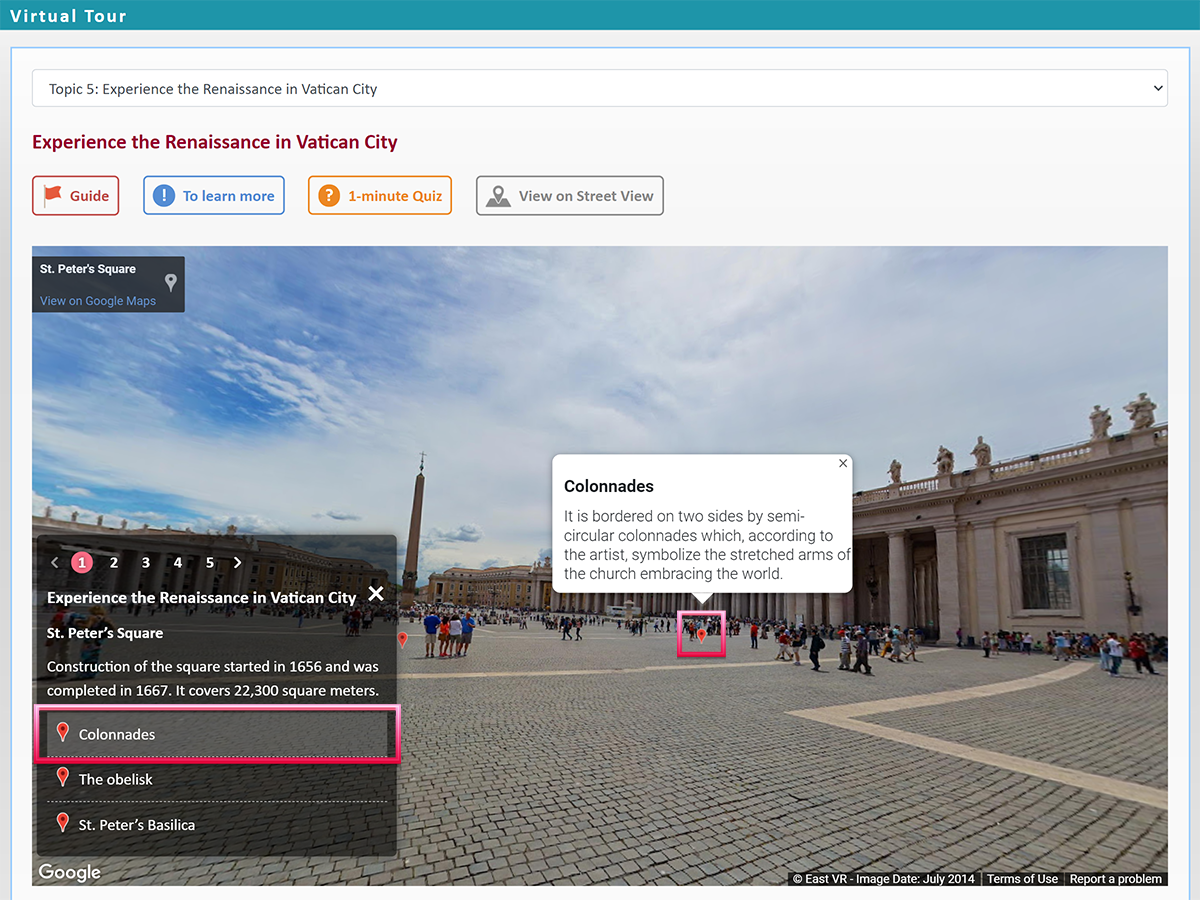
Click on the marker from the bottom left menu or on the street view to check the information of this marker.
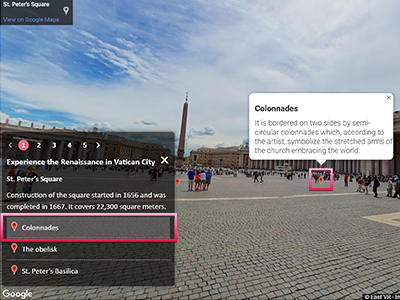
-
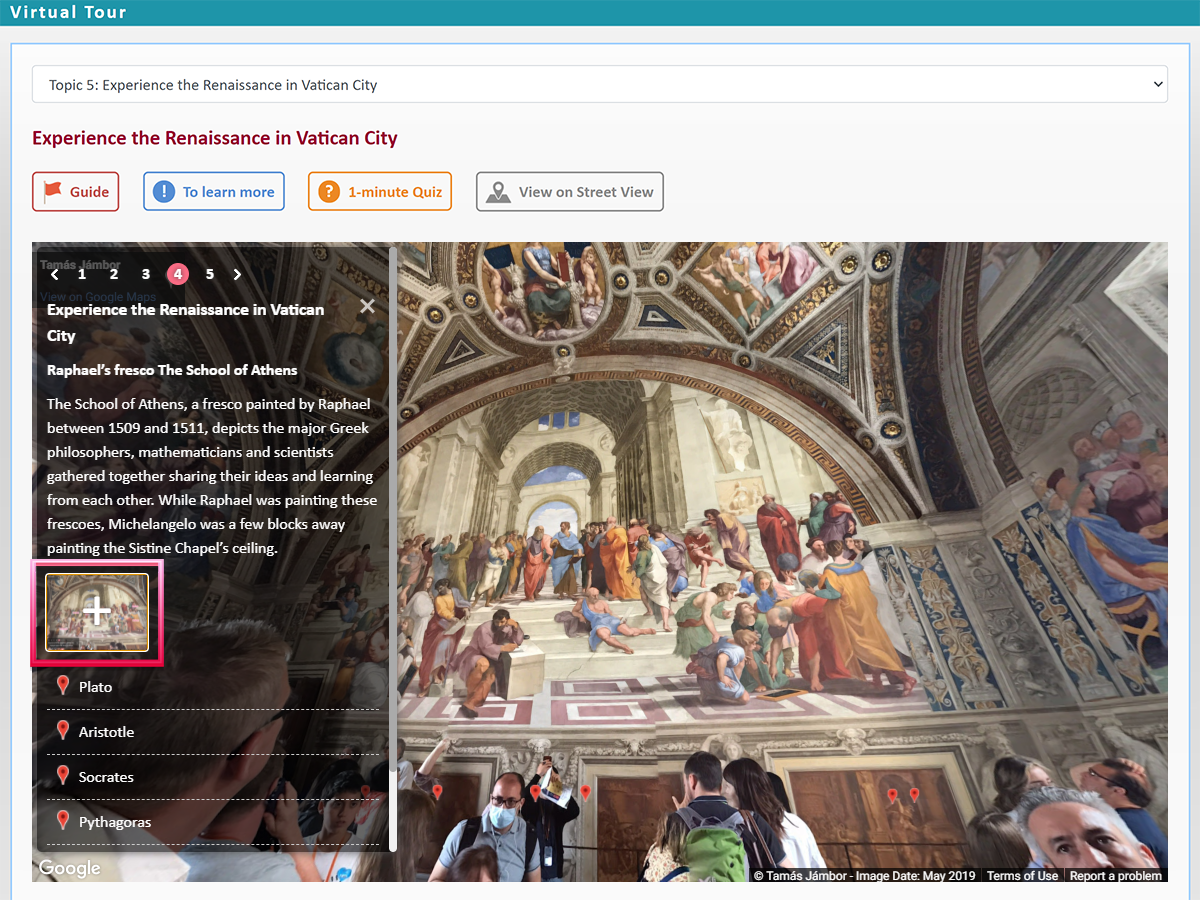
Click on the thumbnail (if available) to show the supplementary information.

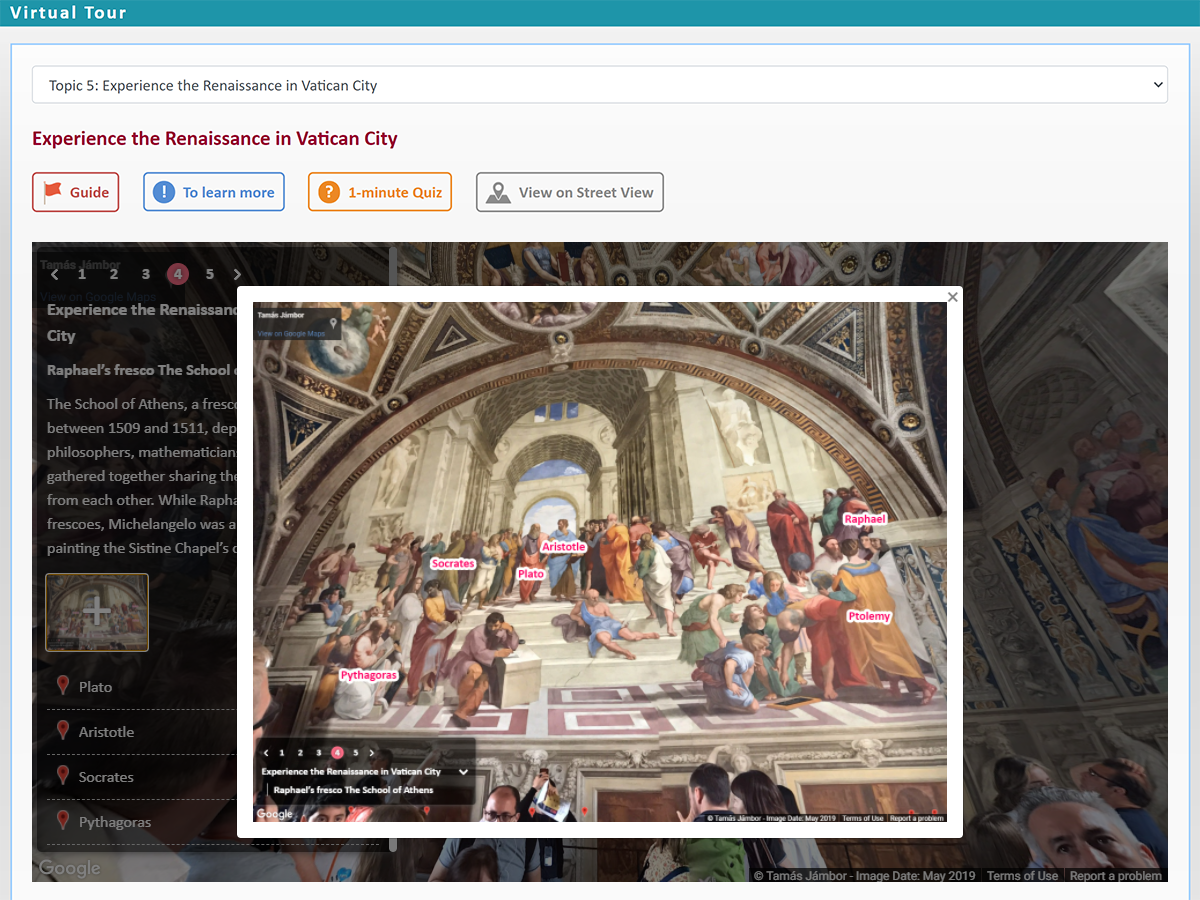
-
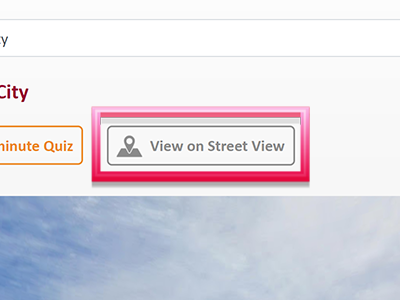
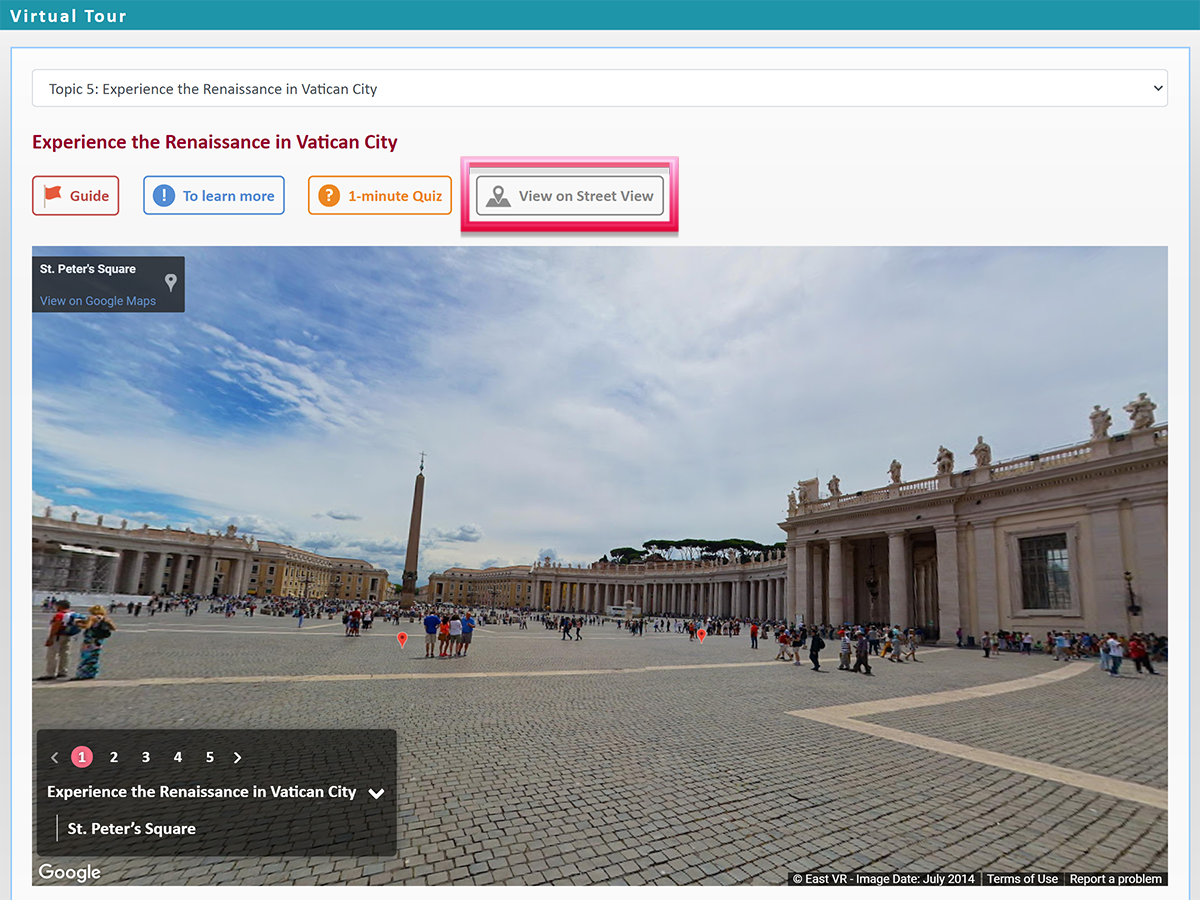
Click on the ‘View on Street View’ button to open a new tab to view the enlarged Google Street View.
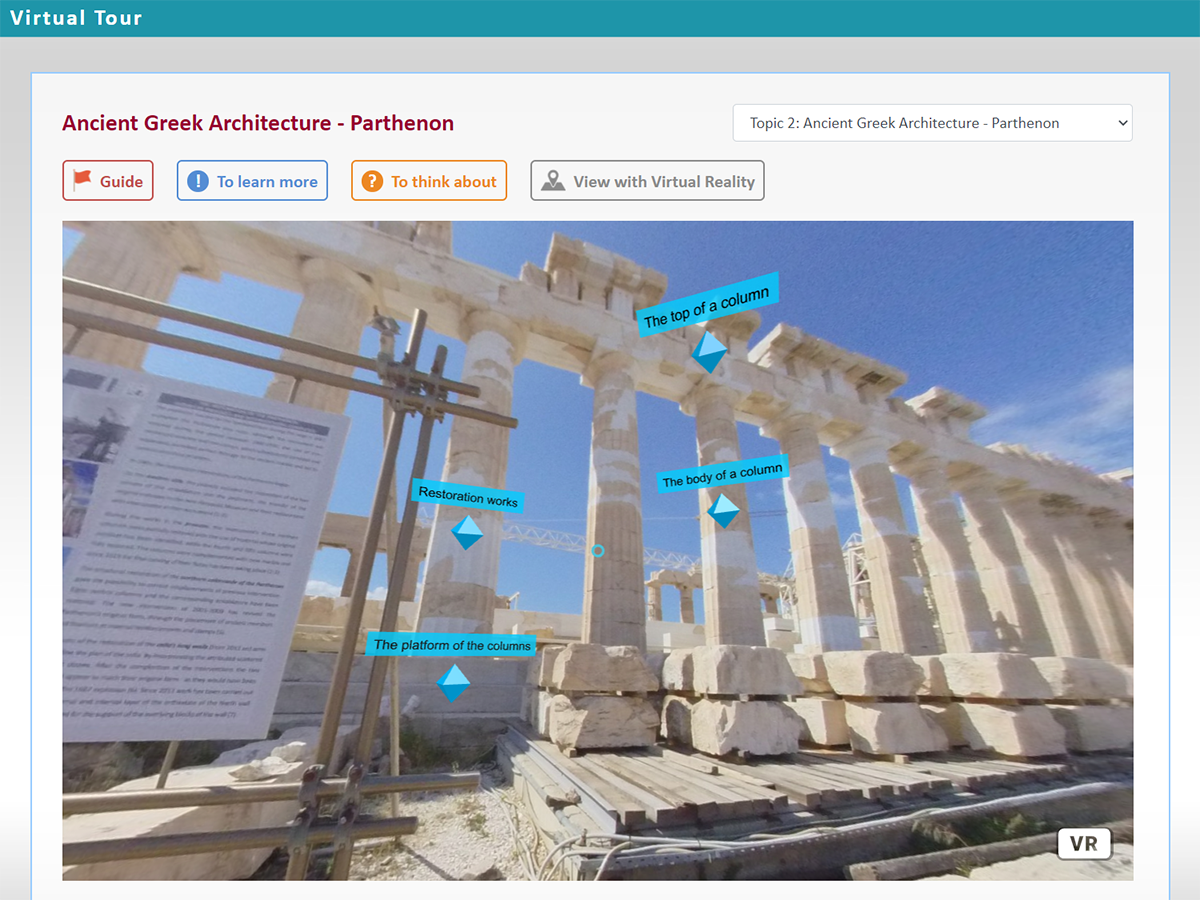
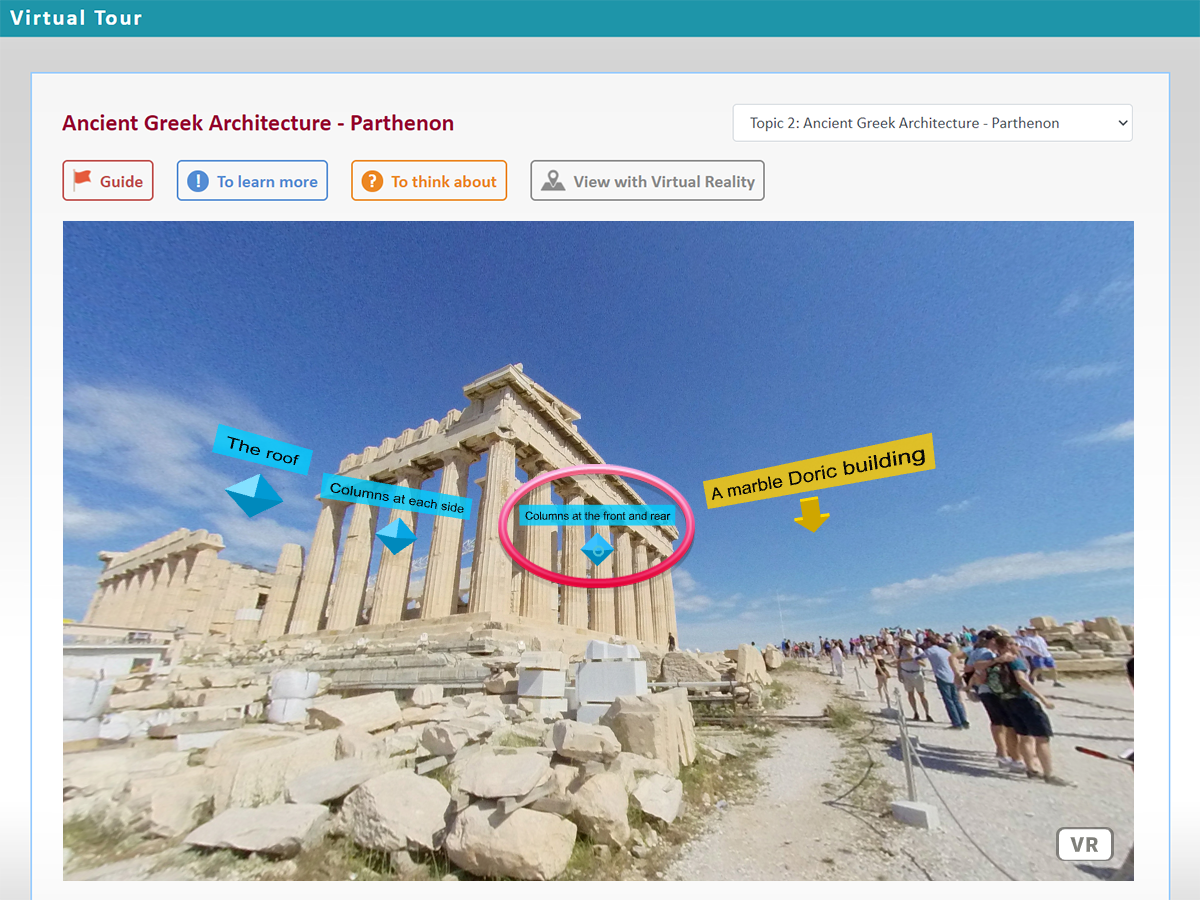
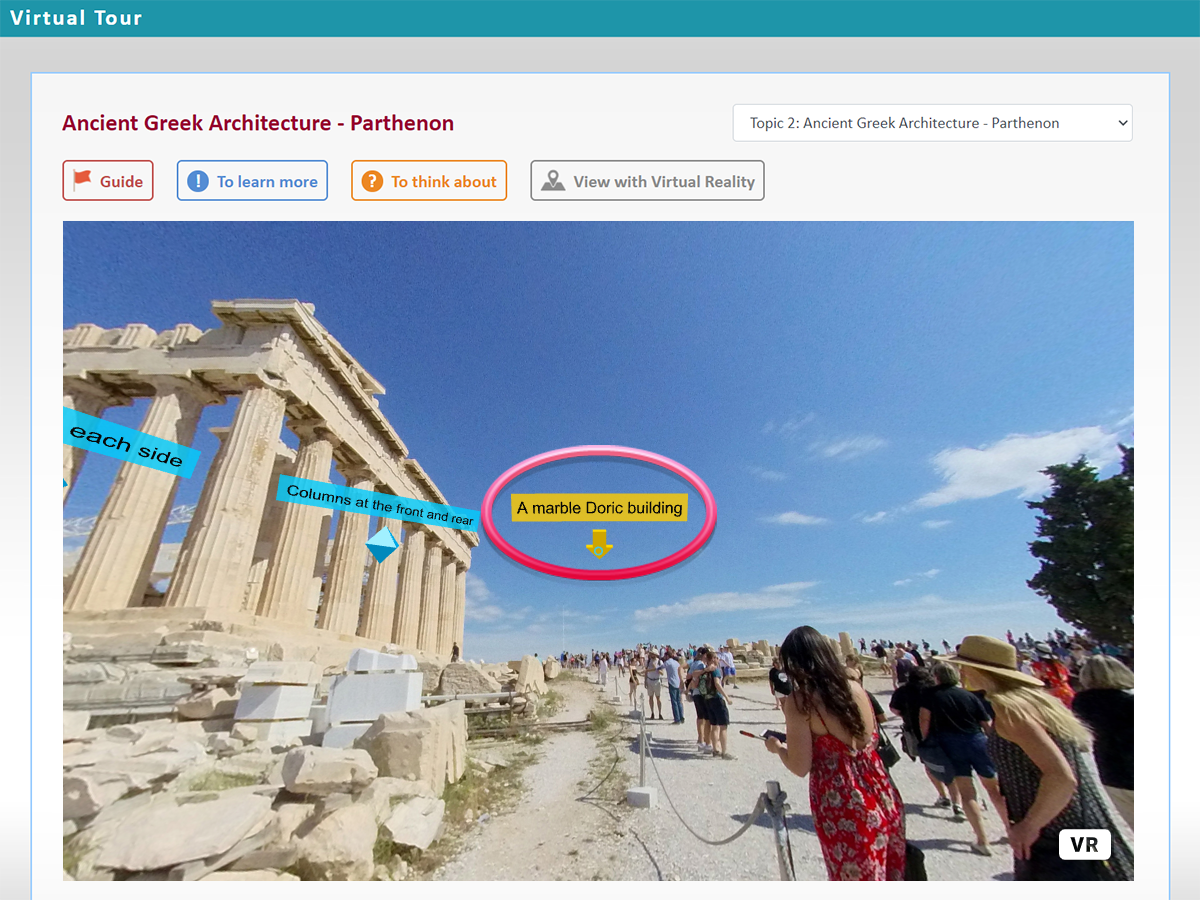
Aristo’s platform
-
Drag on the scene to move the blue circle at the centre of the screen. Make this blue circle overlap with a button on the scene for 1 second to click on that button.
-
Click on different buttons to view the supplementary information or switch to another scene.
View the supplementary information 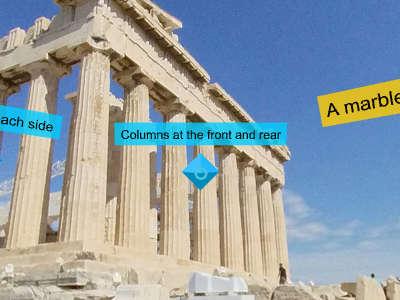
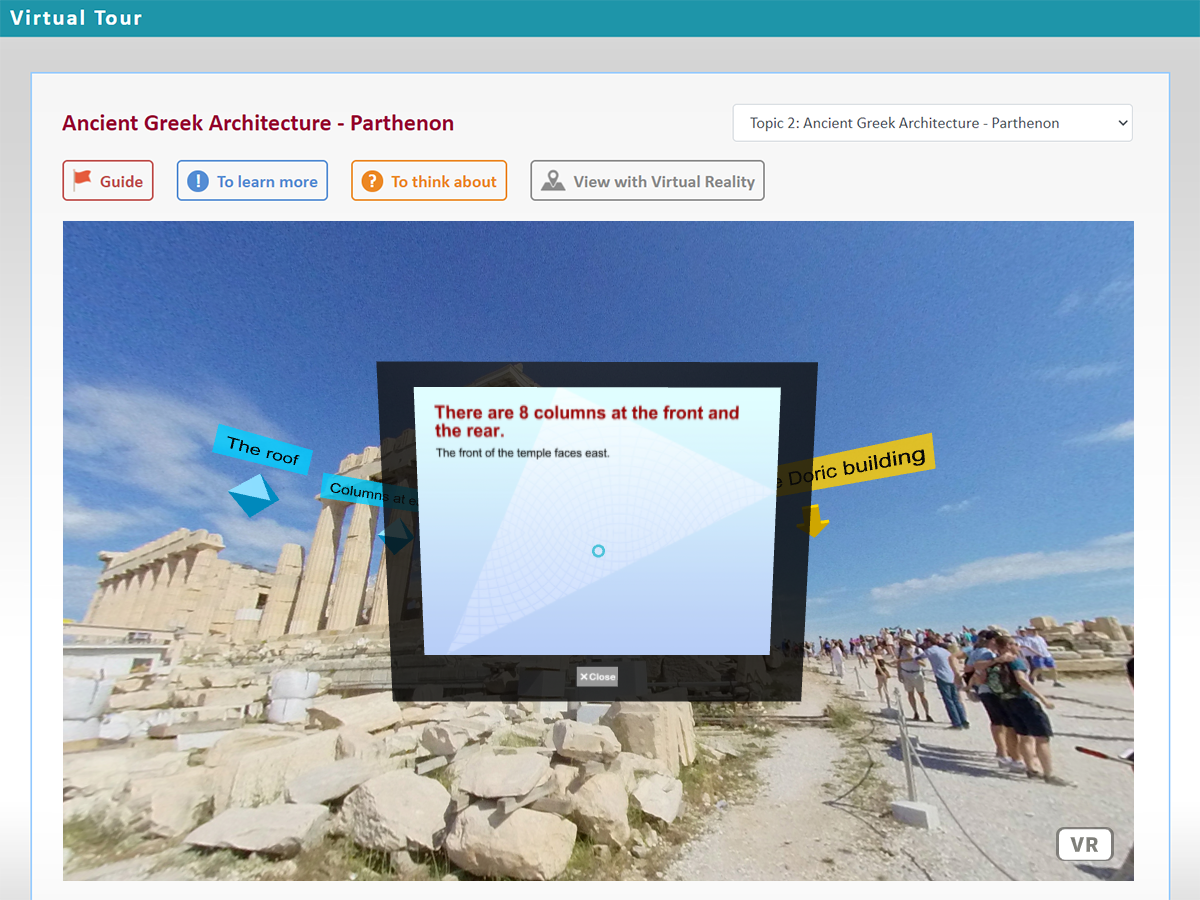
Switch to another scene 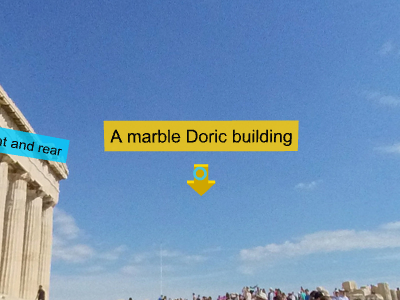
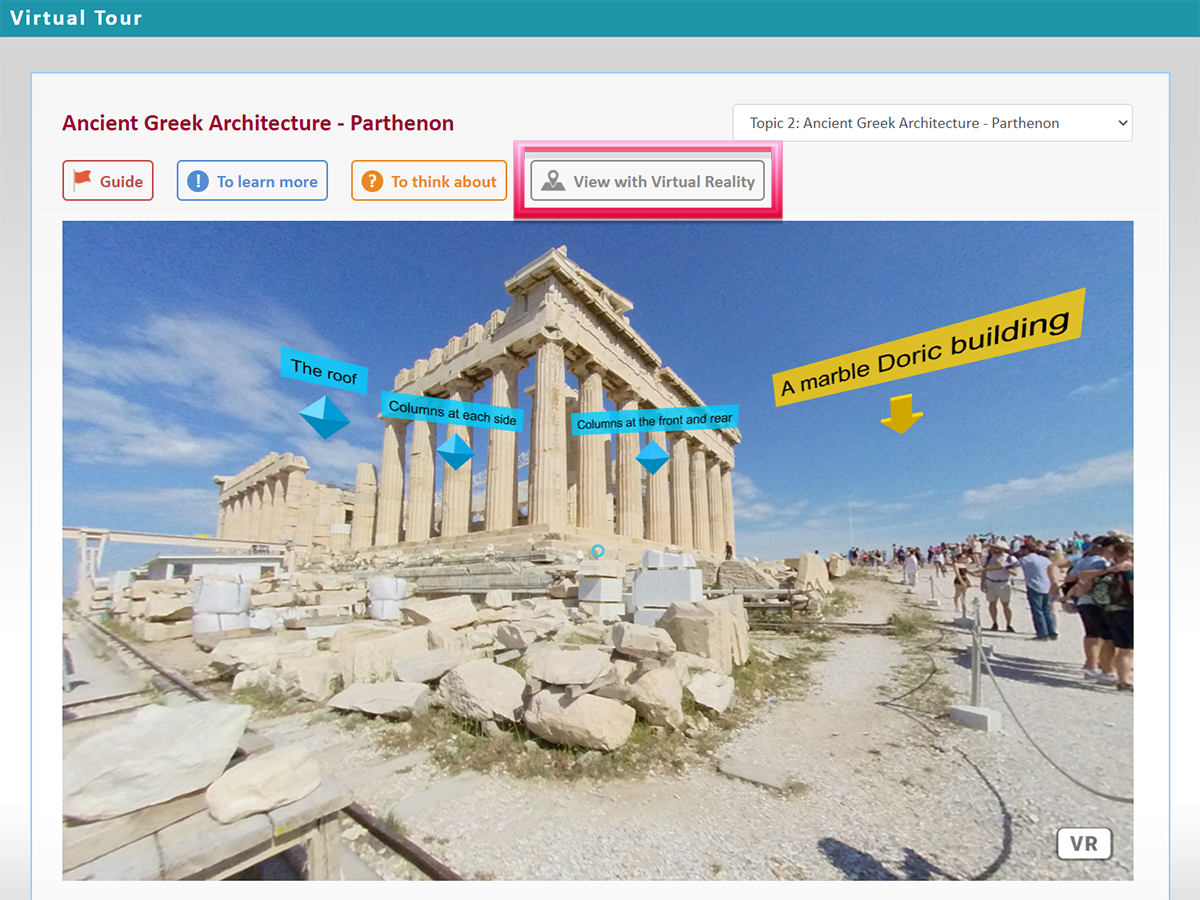
-
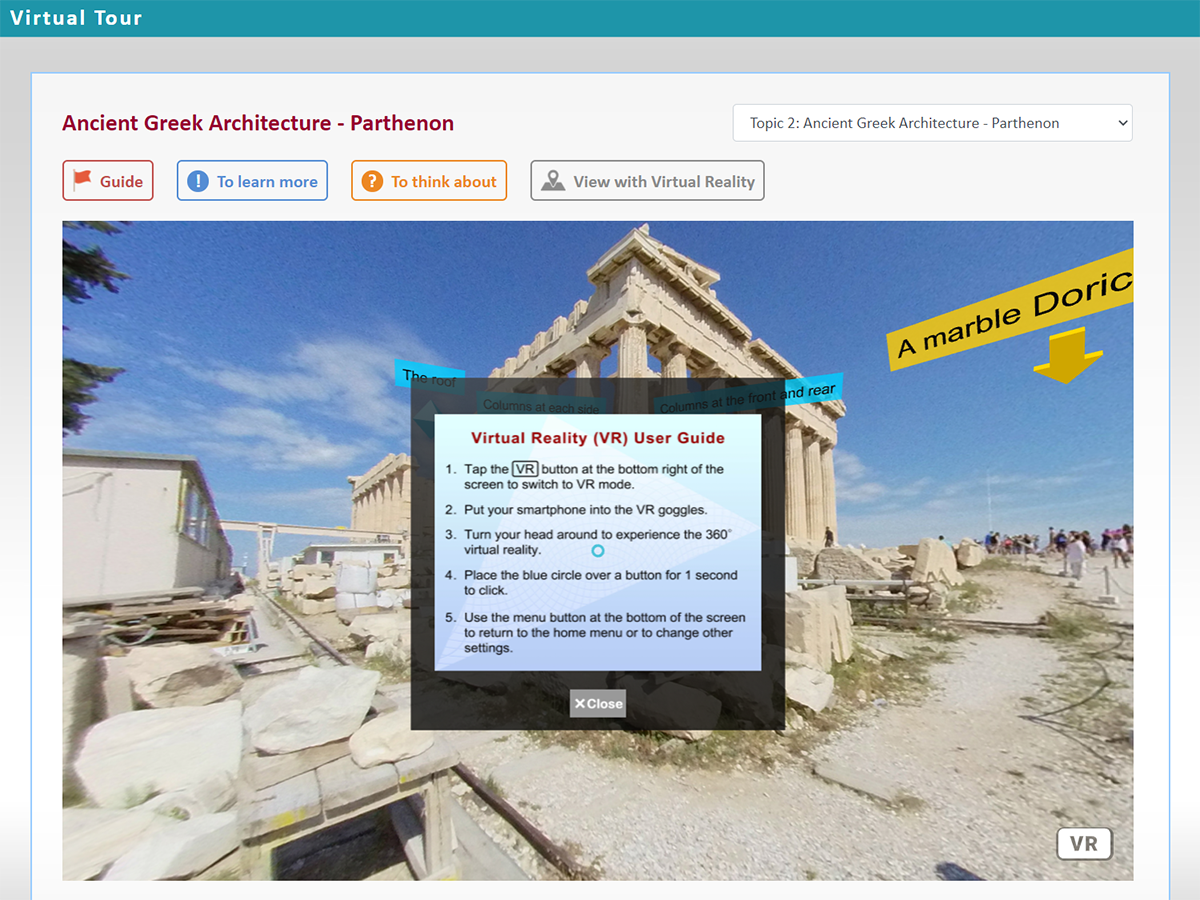
On the virtual tour web page, click on the ‘View with Virtual Reality’ button to open a new tab to view the enlarged scene.
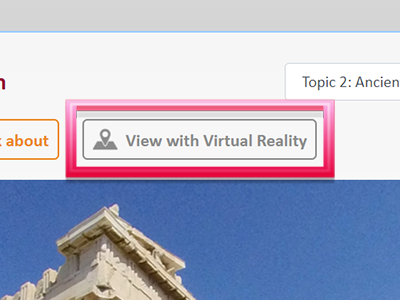
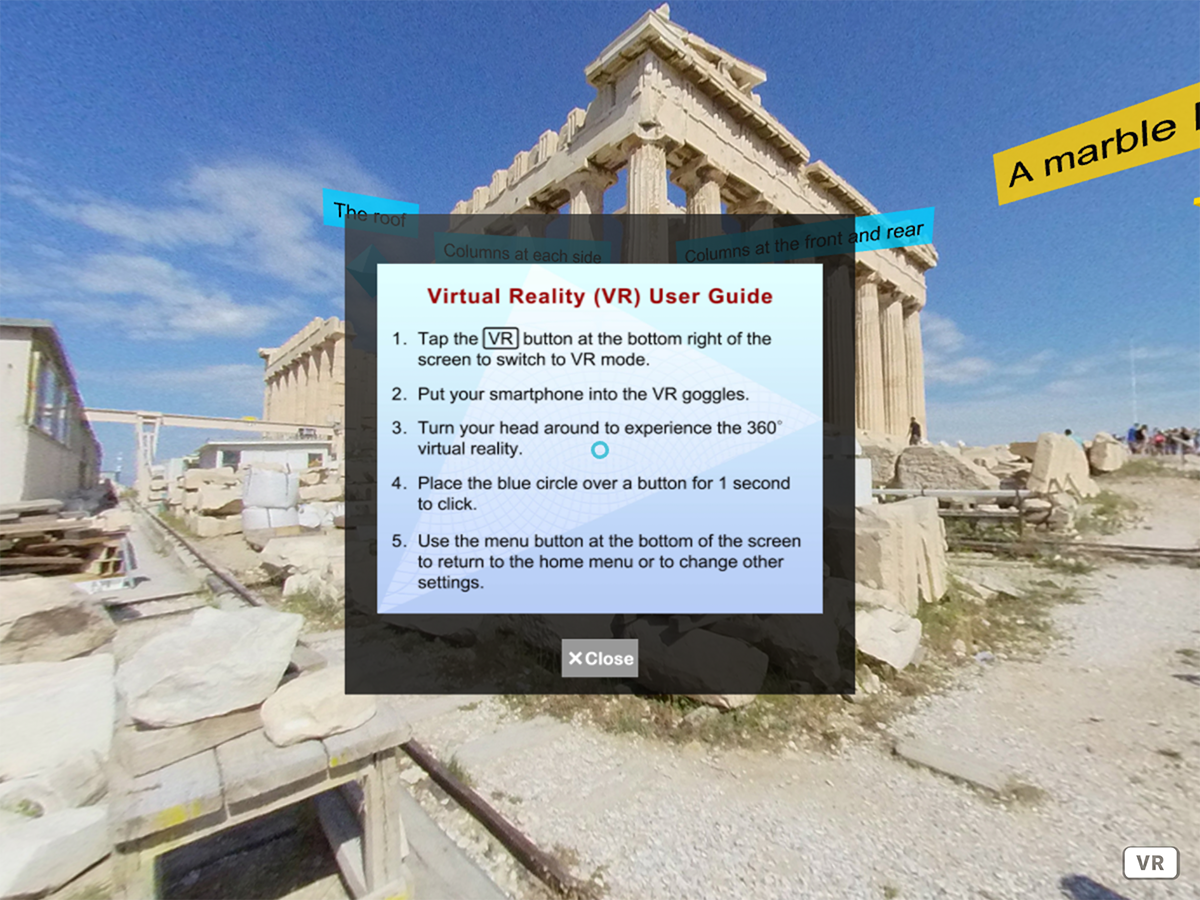
-
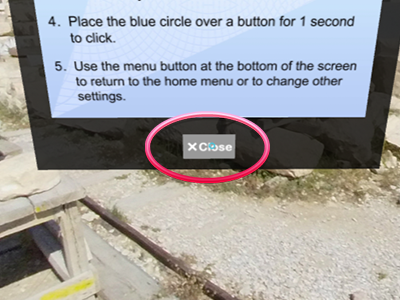
To view the virtual tour with VR glasses, use a smartphone to open the virtual tour web page and follow the instructions on the screen to start.


About the official information, replacement solution and other arrangements by Google related to the shutting down of Poly
With the shutting down of Poly, Google will also stop the related mobile app Google Expeditions on June 30, 2021.
For the official information, replacement solution and other arrangements by Google related to the shutting down of Poly, please refer to the following links:
- 6.2.1 Copy Padlet file
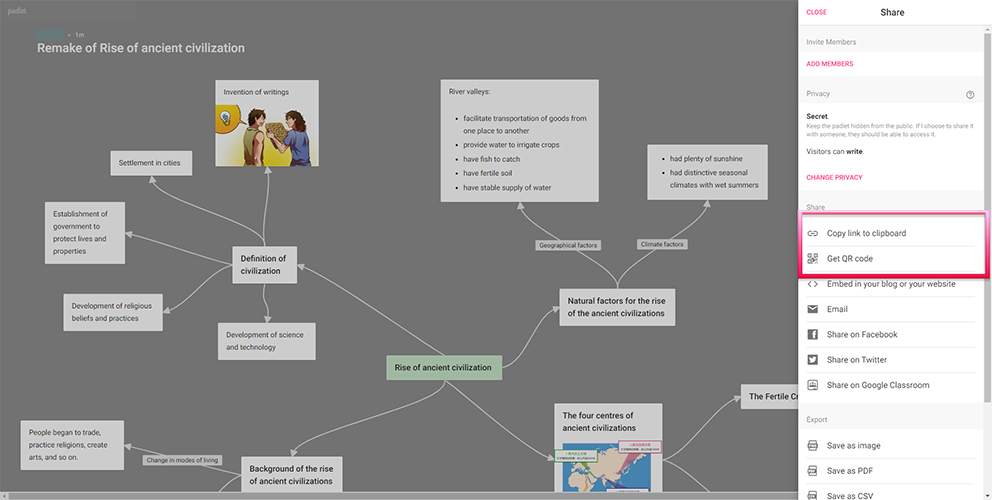
- 6.2.2 Edit and share Padlet file with students
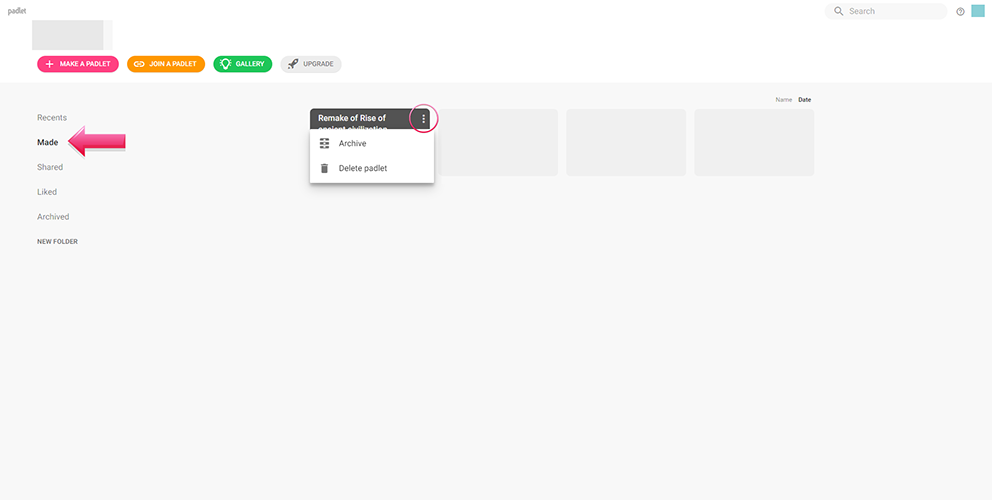
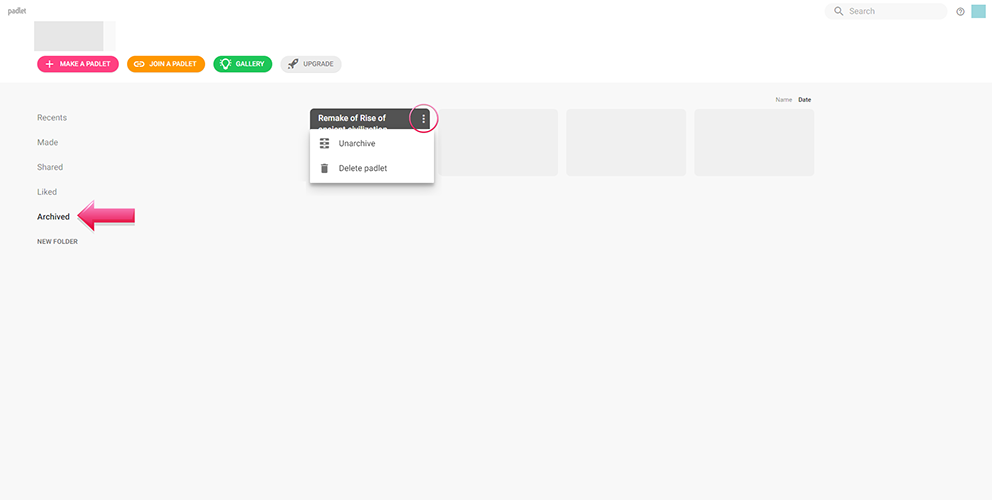
- 6.2.3 Archive or delete a Padlet file
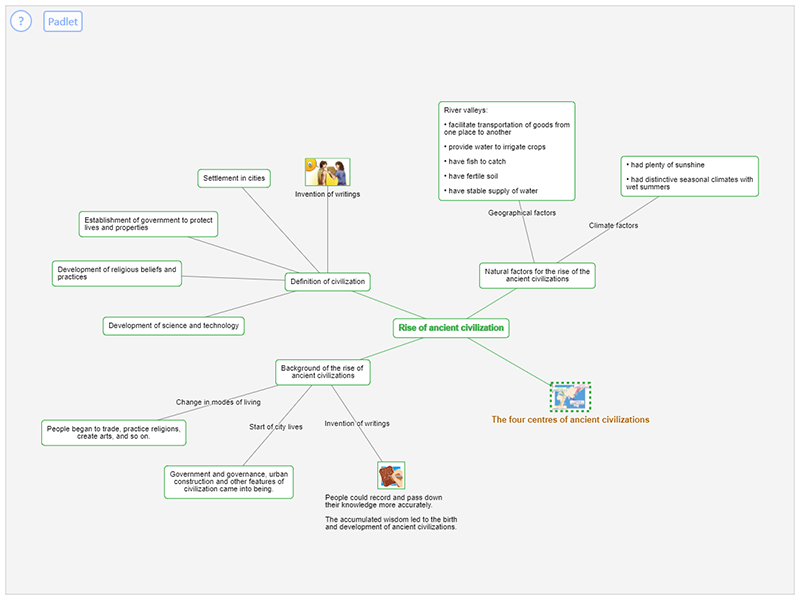
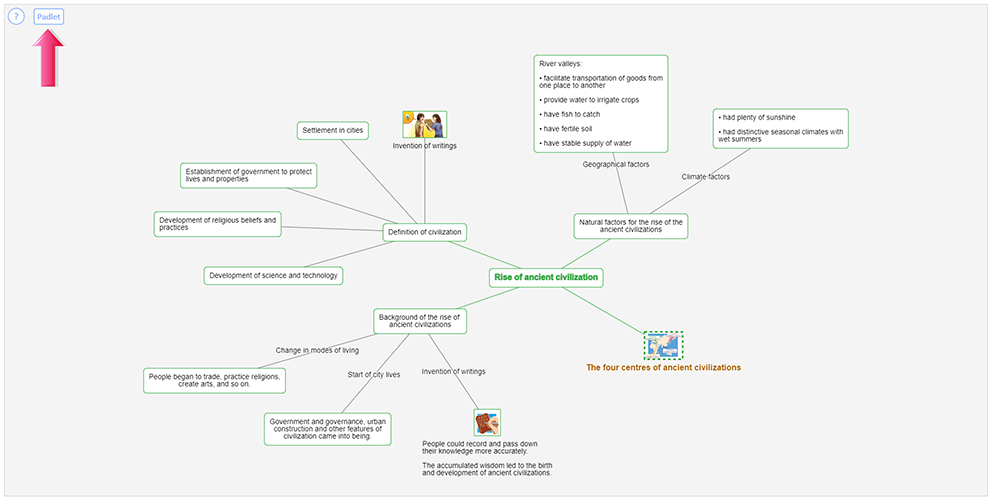
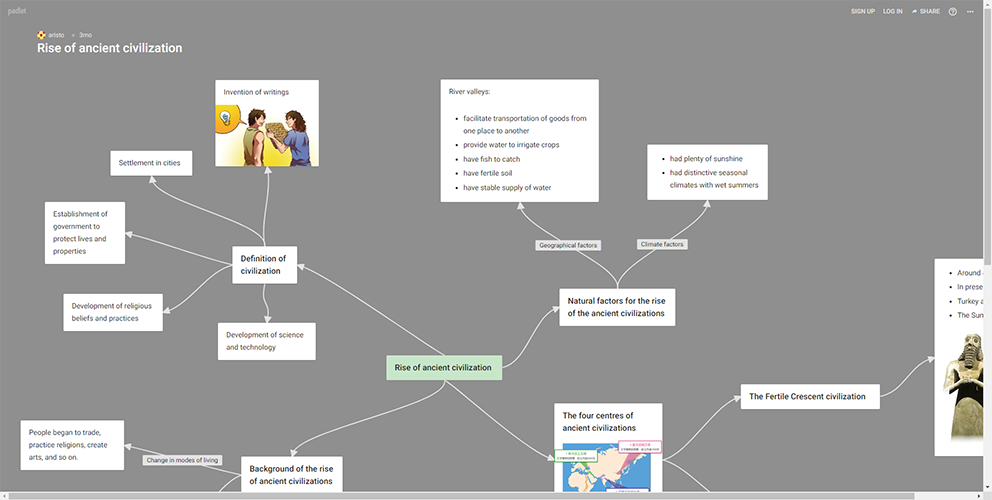
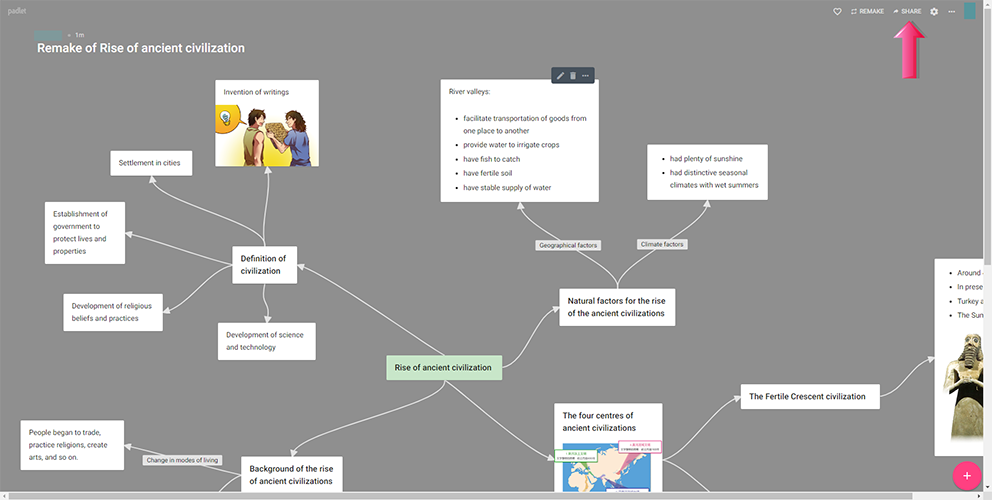
Open the Padlet mindmap made by Aristo. Login is not required to view the mindmap on Padlet.
![]()
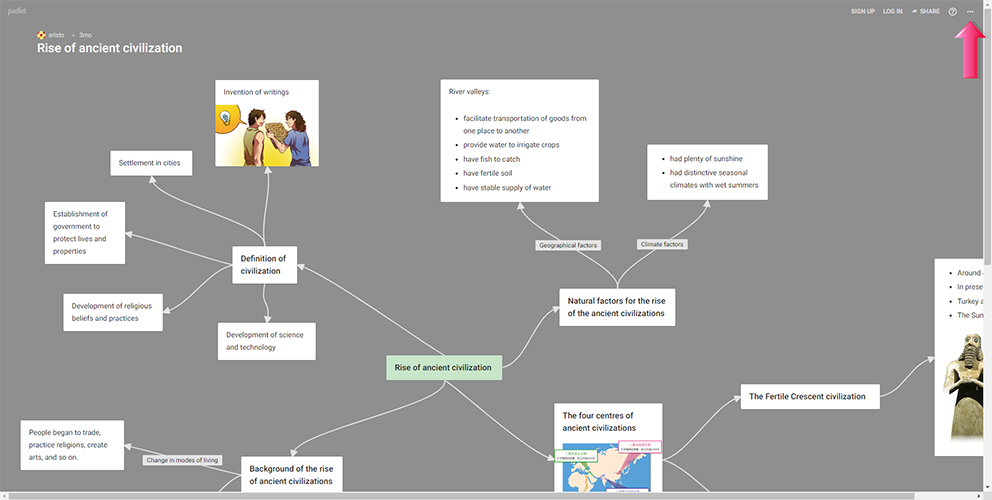
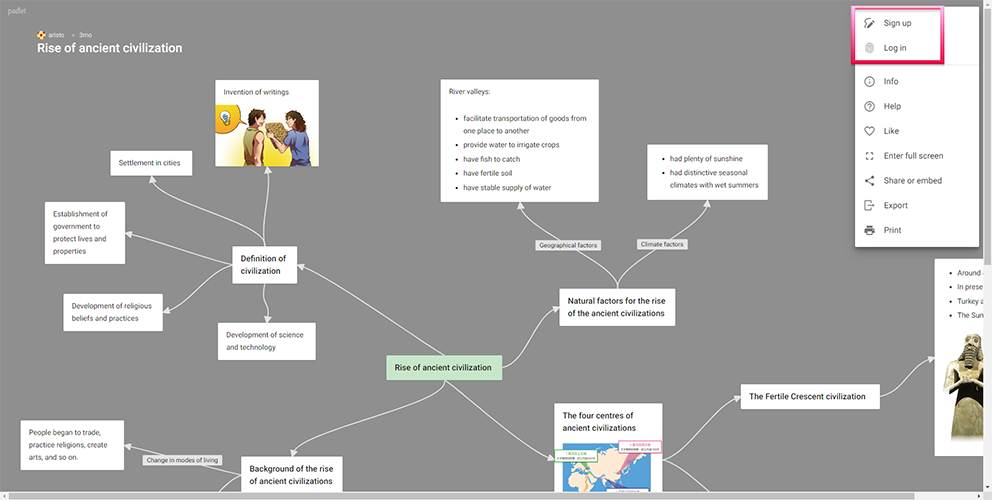
To copy the Padlet file, teachers will need to log in Padlet with their own accounts. Tap the ⋯ button from the top right corner, then select Sign up to register a new account or Log in with an existing account. Teachers can sign up and log in with their Google accounts too.
![]()
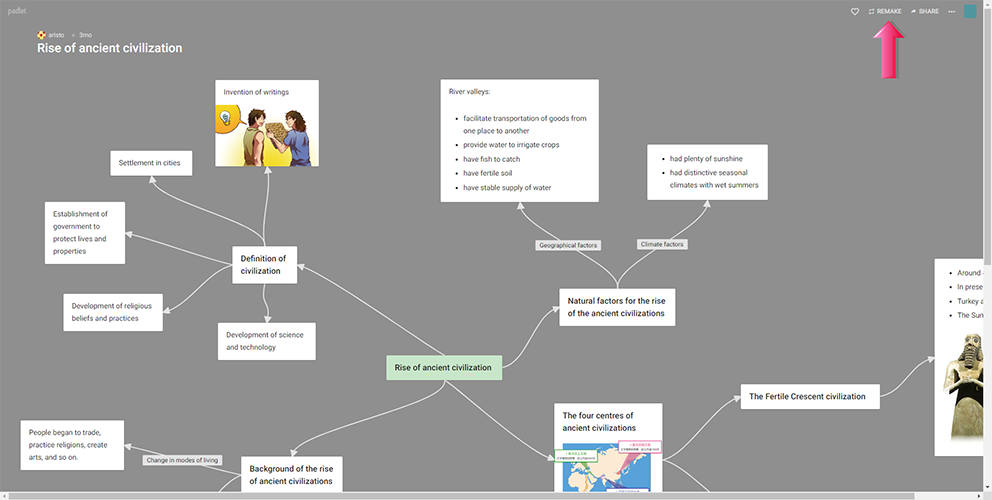
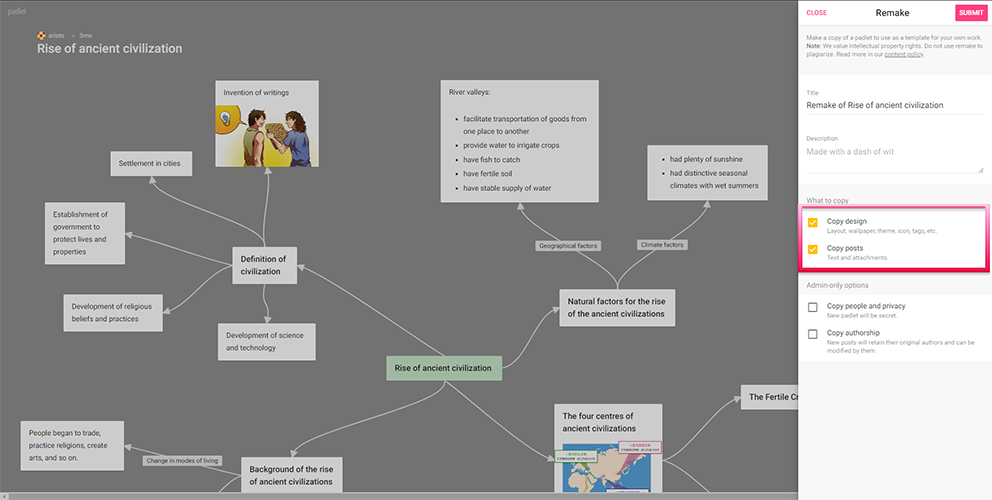
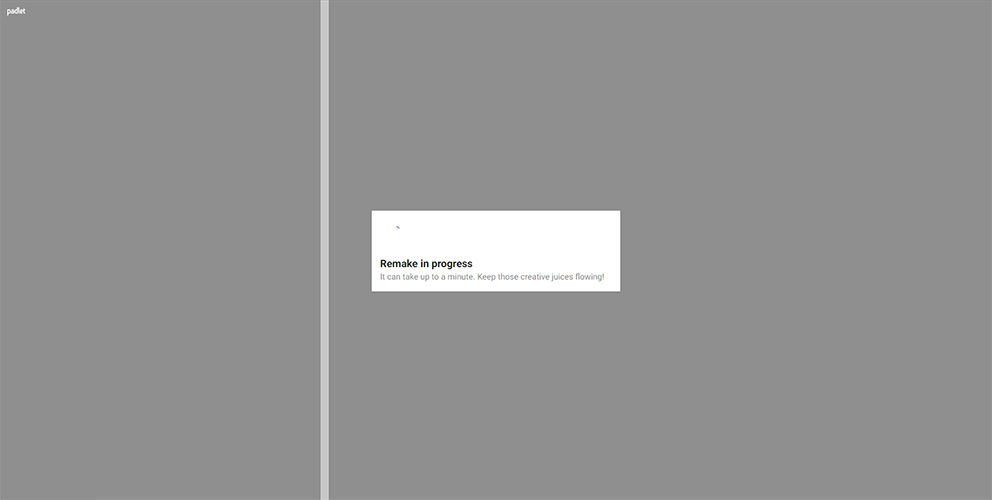
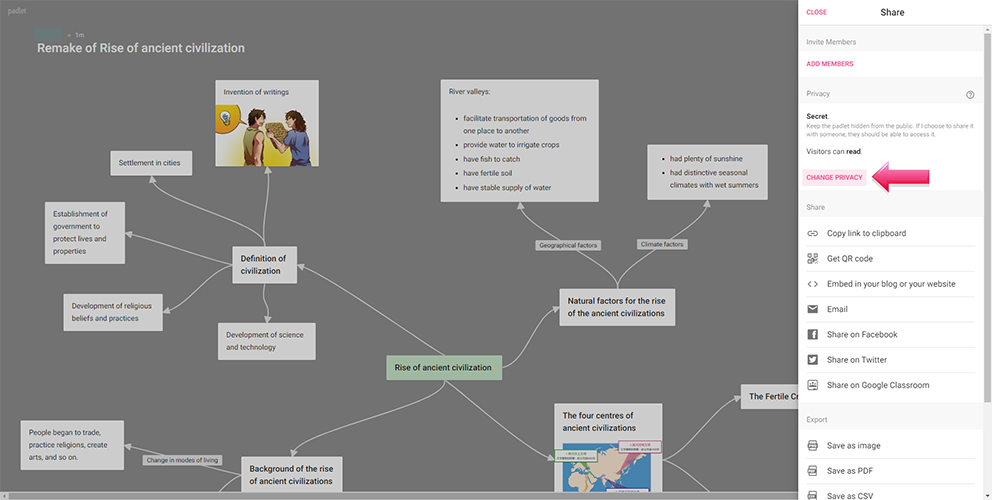
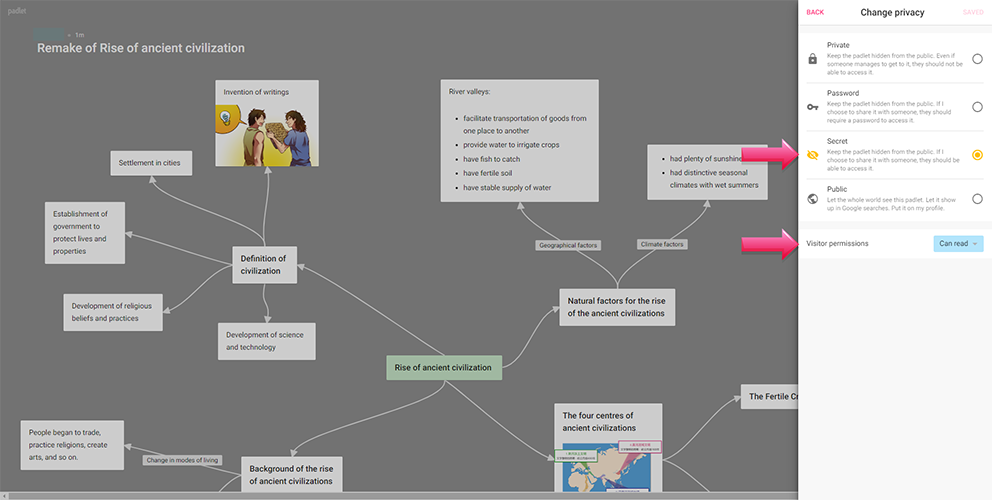
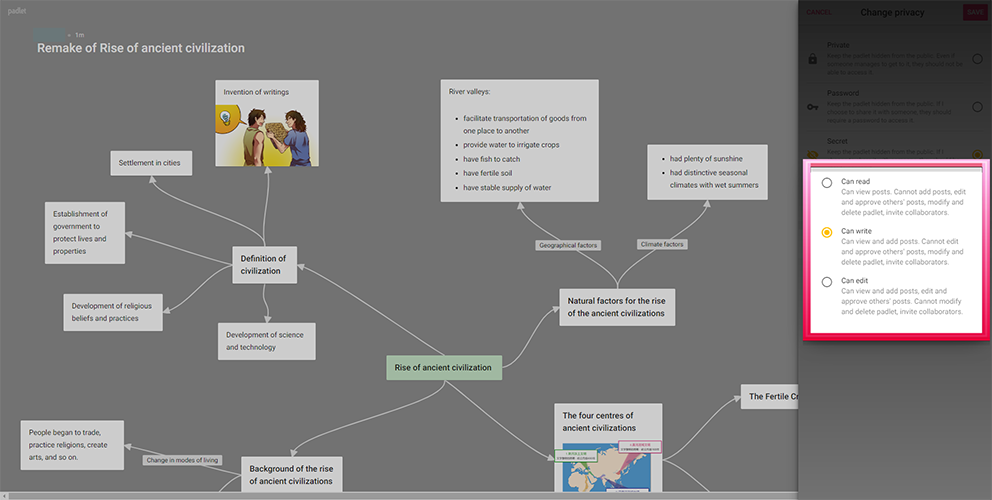
Tap the REMAKE button from the top right corner to copy the Padlet file. Under the Remake setup page, select Copy design and Copy posts to copy the contents of the mindmap to the teachers’ own accounts.
![]()
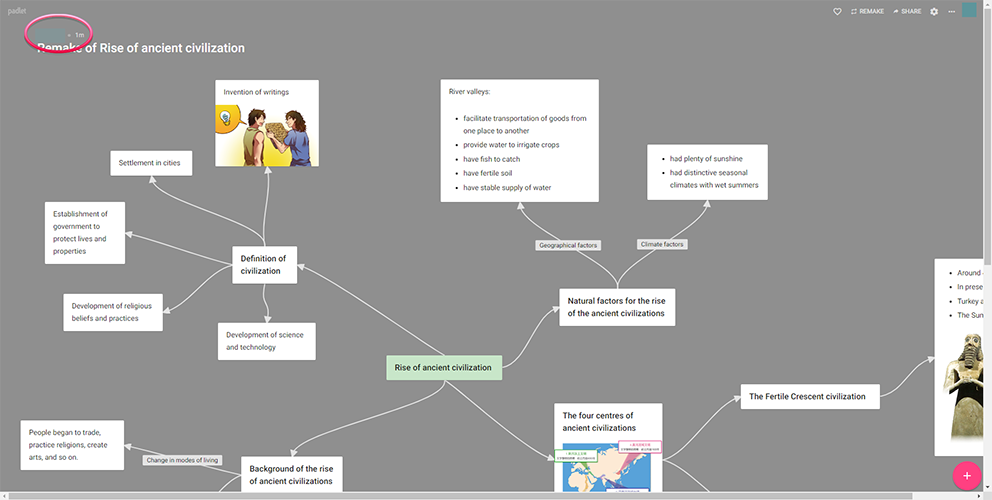
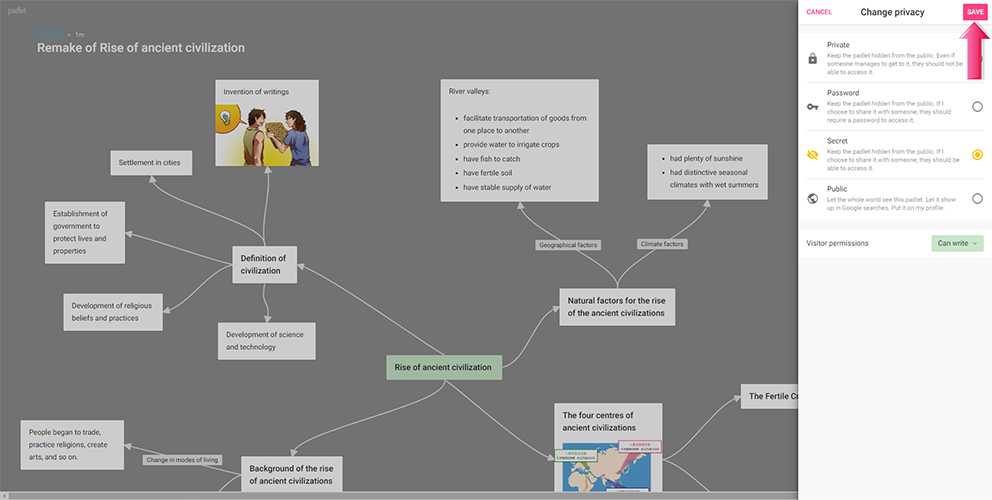
If the ‘Remake’ is successful, teachers can see their account names at the top left of the mindmap.
![]()
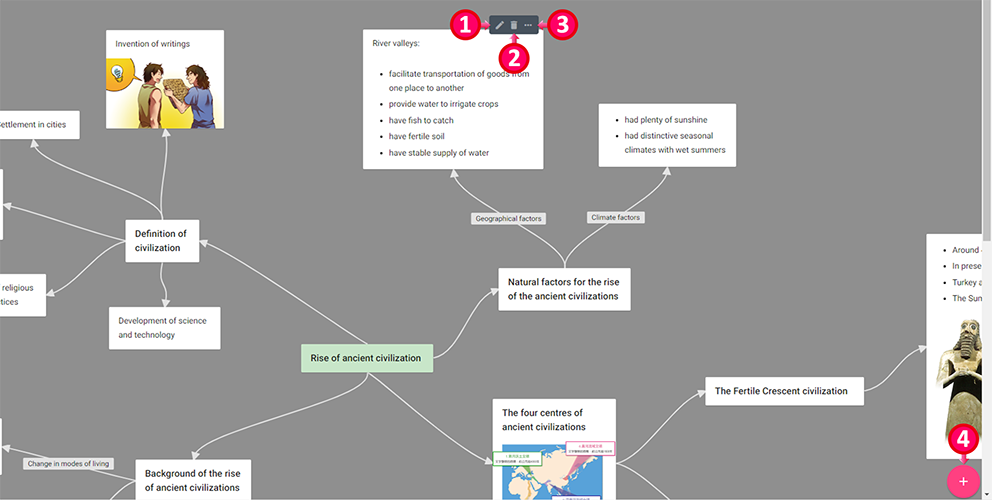
| 1 | Edit the content of the post |
| 2 | Delete the post |
| 3 | Find the other settings, e.g. change the colour of the post or connect it to another post |
| 4 | Add new post |
- the owner has added subtitles/captions;
- YouTube automatically adds subtitles/captions.
https://support.google.com/youtube/answer/100078?hl=en
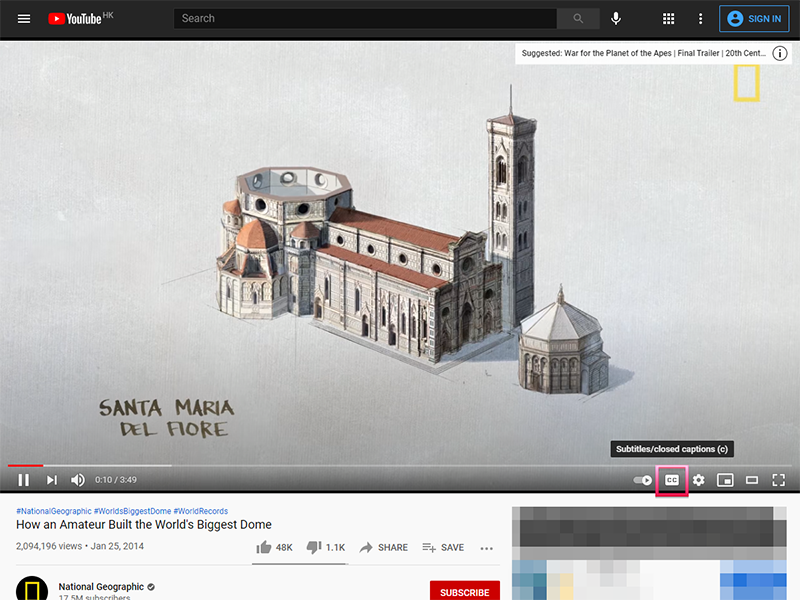
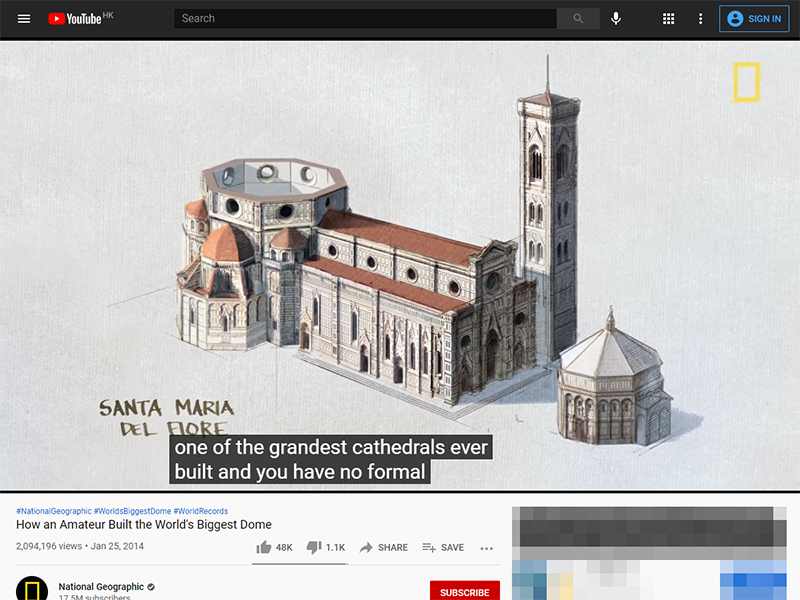
(Desktop computer) Subtitles on YouTube website
After opening a YouTube video, click the ‘Subtitles/closed captions’ button (![]() or
or ![]() ) at the bottom of the video to turn on subtitles.
) at the bottom of the video to turn on subtitles.
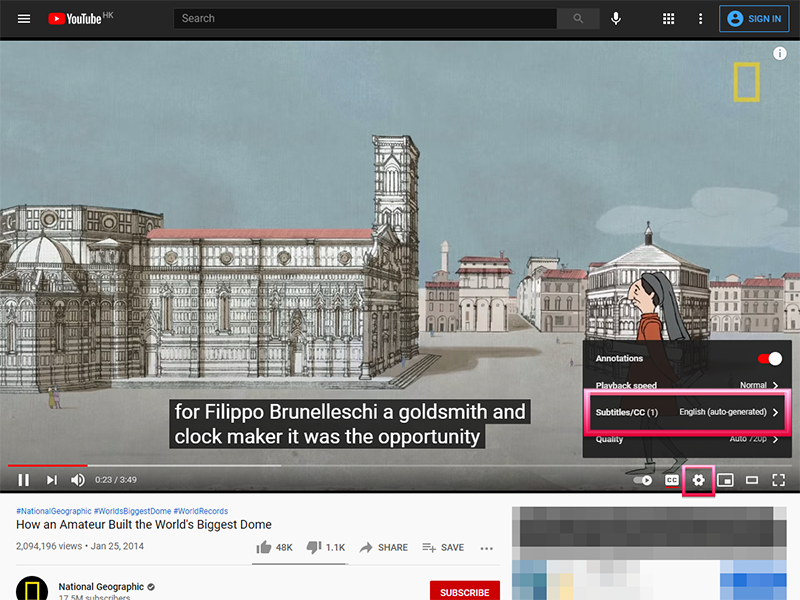
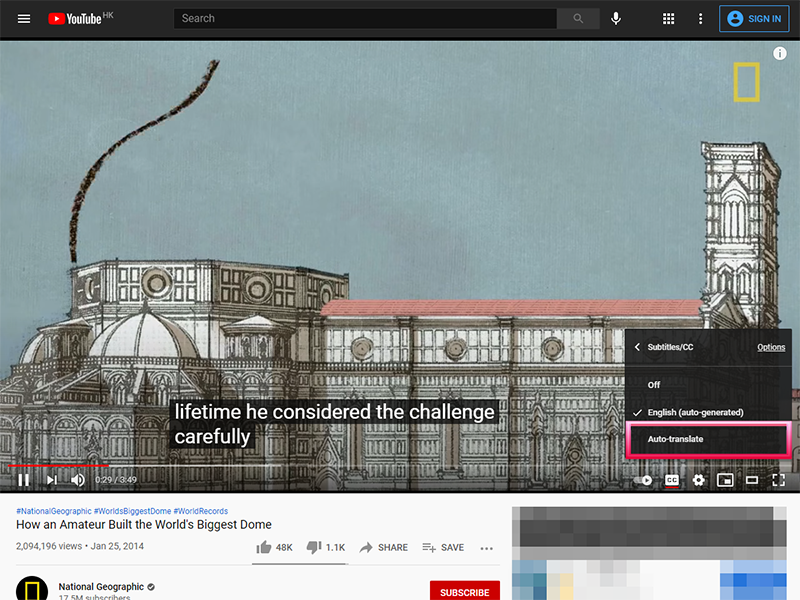
To change the language of subtitles, click ‘Subtitles/CC’ in the ‘Settings’, then click ‘Auto-translate’ and select ‘Chinese (Traditional)’ or other required languages.
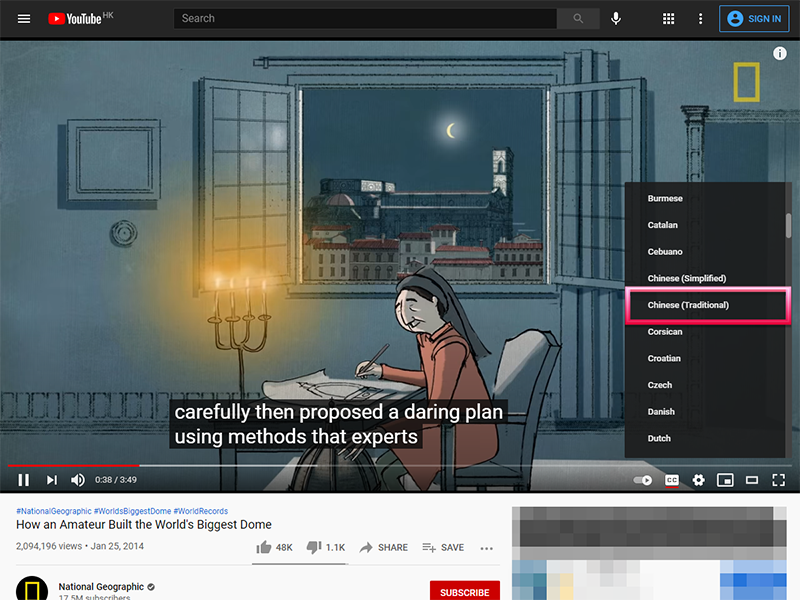
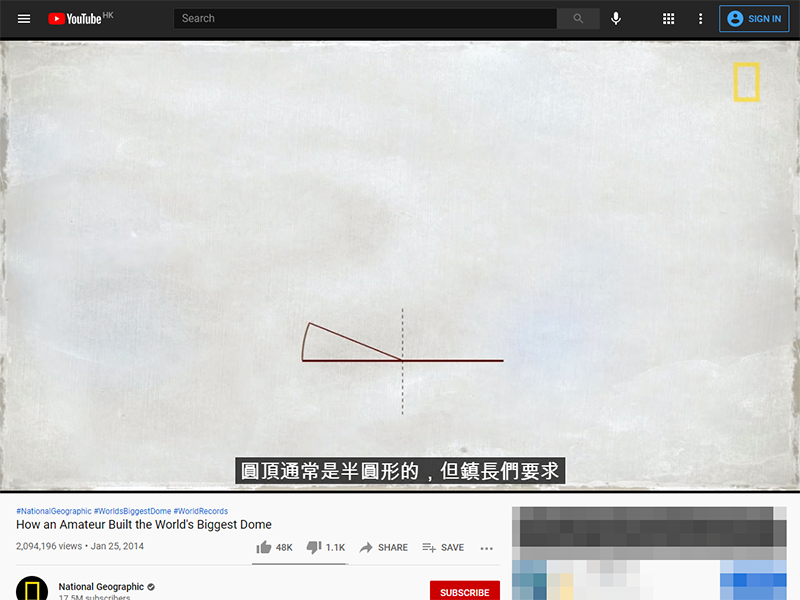
Note 1: The auto-generated and translated subtitles are for reference only, that the subtitles may not be accurately presenting the video content.
Note 2: If the video doesn't offer subtitles/captions, ![]() or
or ![]() might still show but won't be selectable. If the button doesn’t show, subtitles/captions are not available for that video.
might still show but won't be selectable. If the button doesn’t show, subtitles/captions are not available for that video.
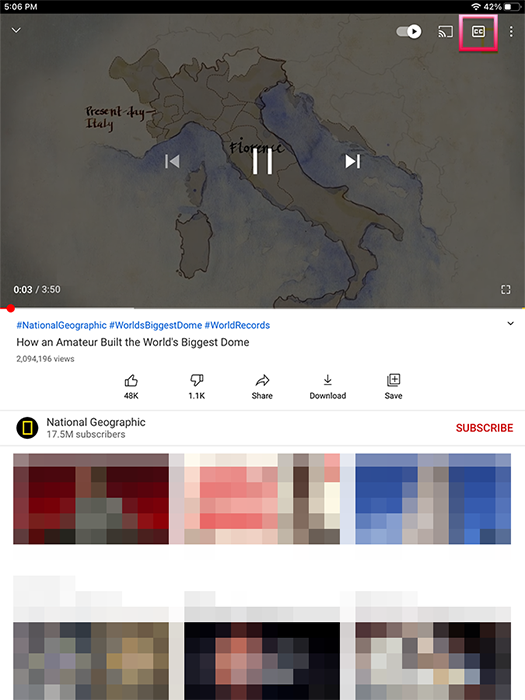
(Android, iPhone and iPad) Subtitles on YouTube app
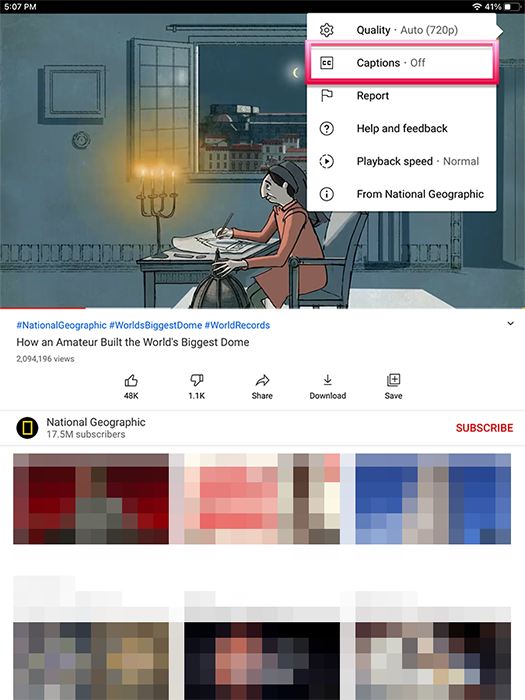
After opening a YouTube video, tap ‘Subtitles/closed captions’ at the top right of the video to turn on subtitles (may need to tap ‘Settings’![]() first).
first).
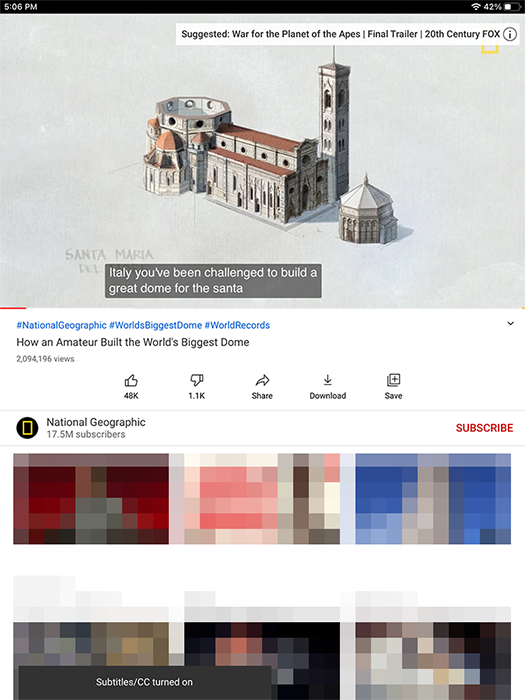
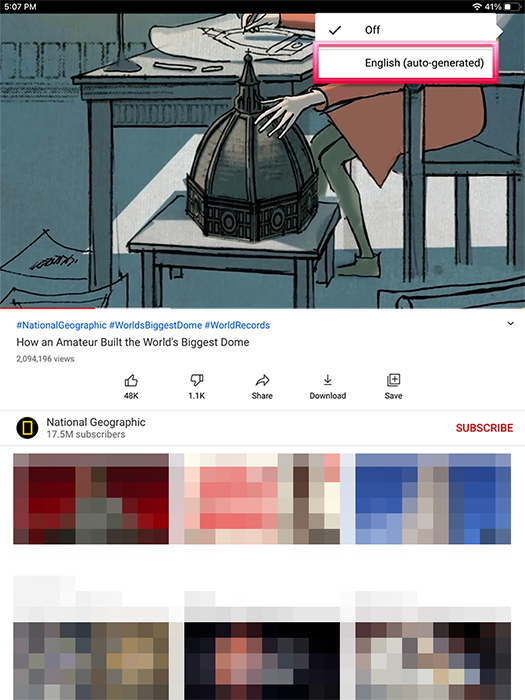
Or tap ‘Captions’ in the ‘Settings’, then select required languages to turn on subtitles.
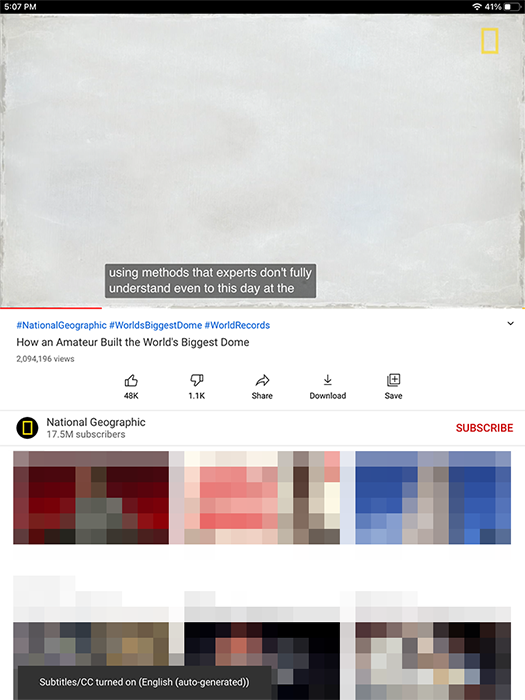
Note 1: Auto-translation function is not available on the mobile version of YouTube.
Note 2: The auto-generated subtitles are for reference only, that the subtitles may not be accurately presenting the video content.