3D 模型網頁指引User guide of the 3D model web page
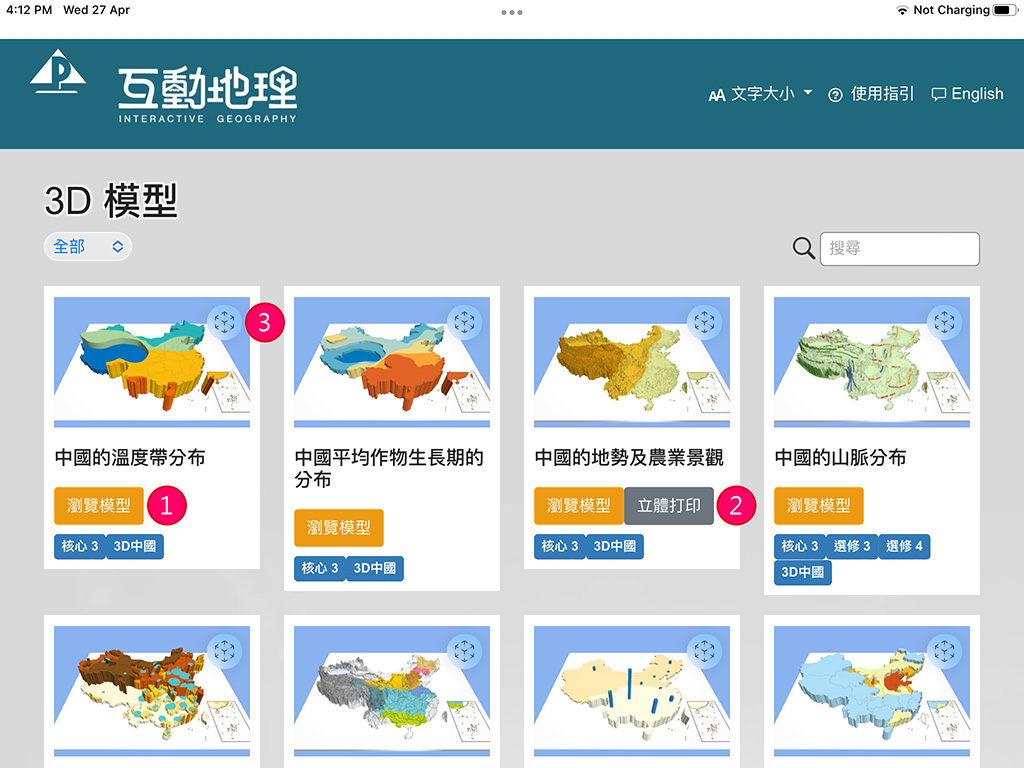

| 1 | 按此直接在瀏覽器上觀看模型。 Click here to view the model from web browser directly. | |||||
| 2 | 按此下載立體打印模型及鐳射切割模型(如有提供)。 Click here to download the model for 3D printer and laser cutting (if available). | |||||
| 3 |
按此進入 AR 模式。
Click here to enter AR mode.
|

以下是使用 iPad 觀看 AR 模式的示範:
The following demonstration of AR mode is made by using iPad:
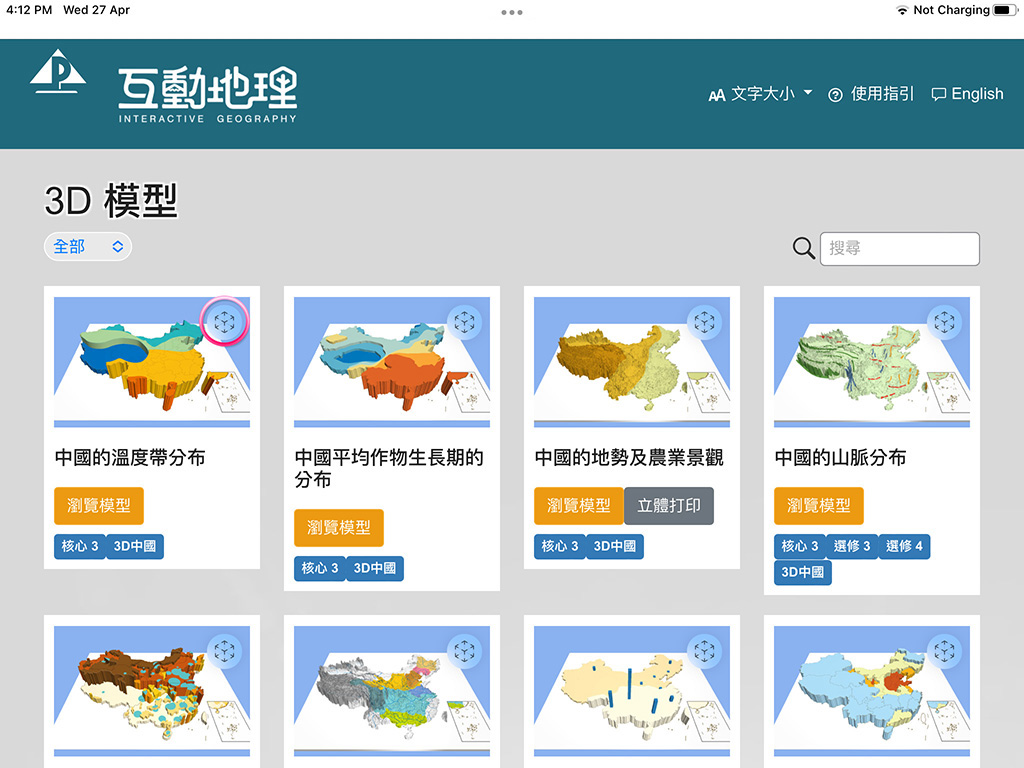
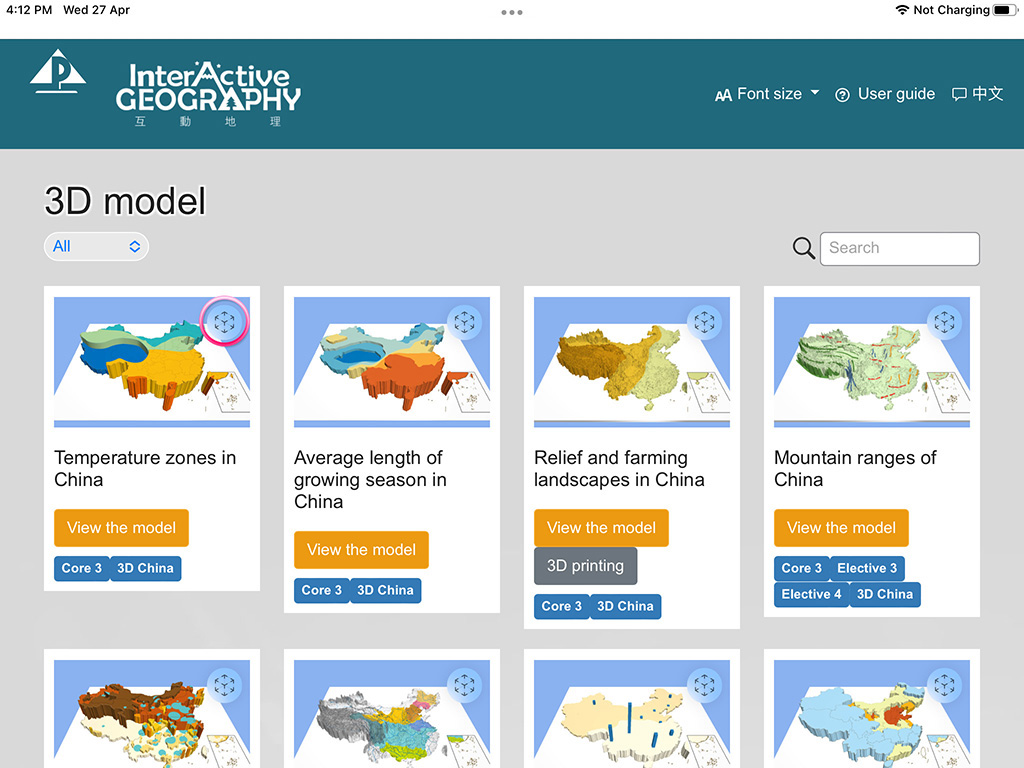
(1) 按此進入 AR 模式。
(1) Click here to enter AR mode.
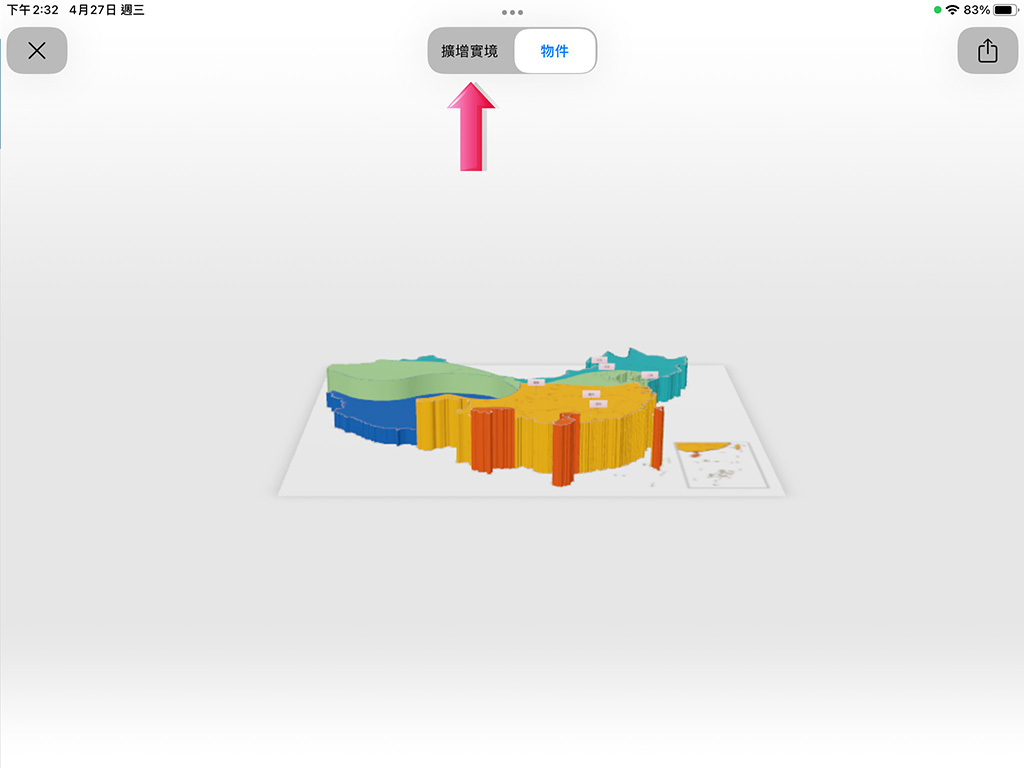
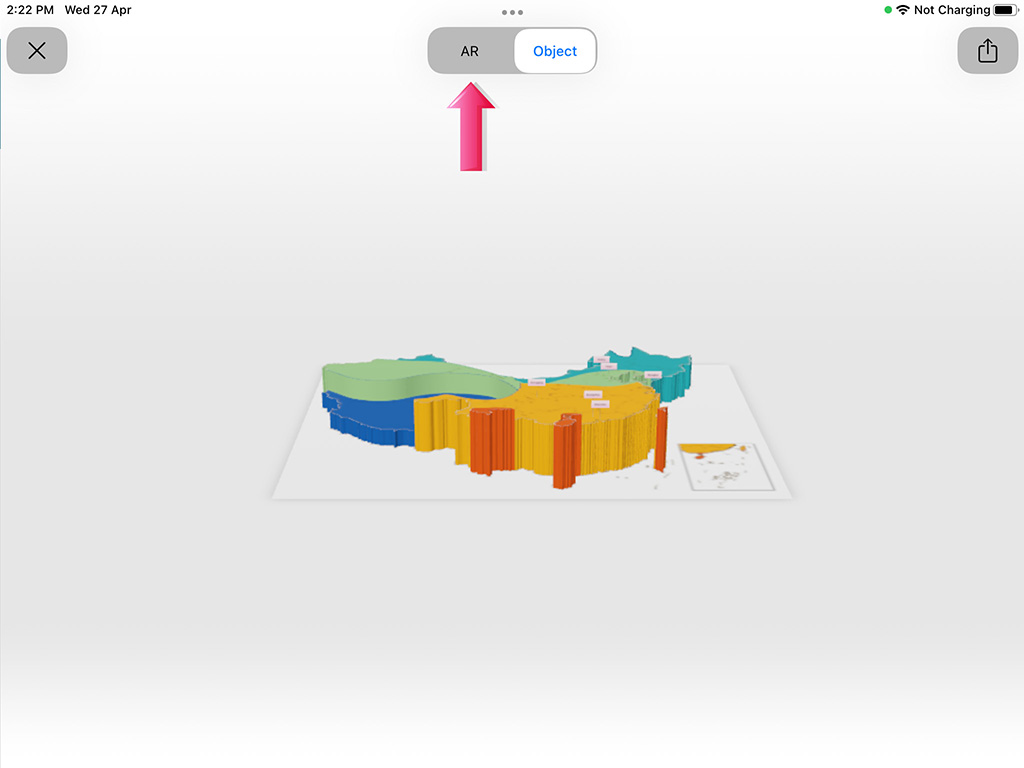
(2) 點按「擴增實境」以切換至 AR 觀看模式。
(2) Click ‘AR’ to switch to AR viewing mode.
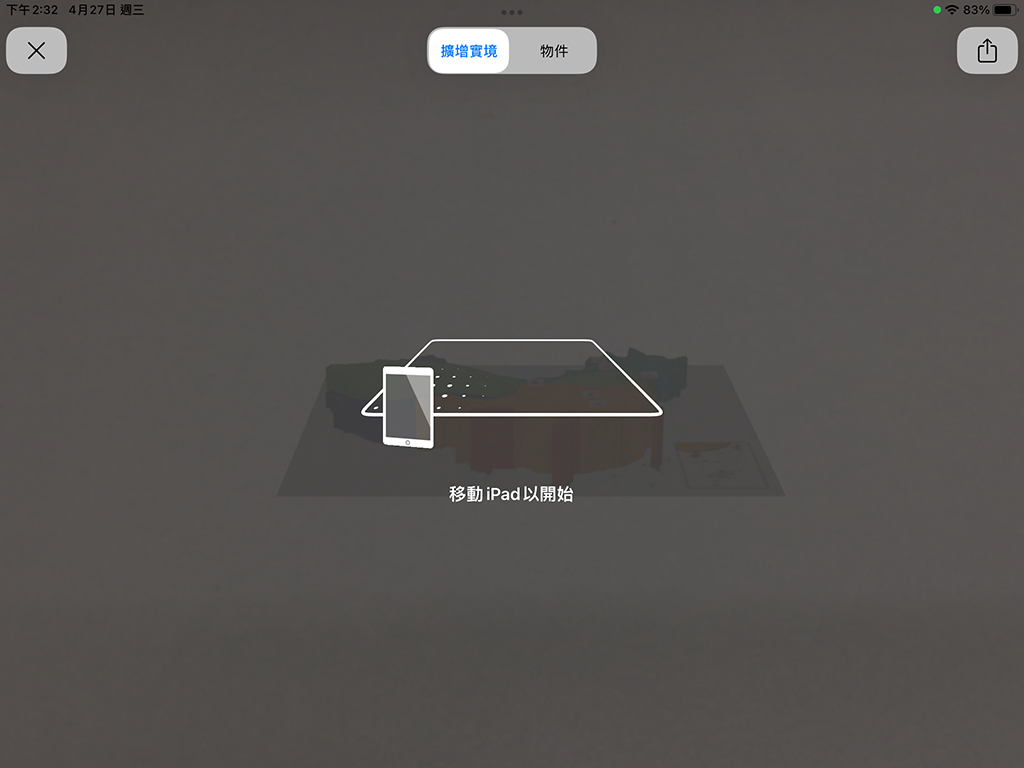
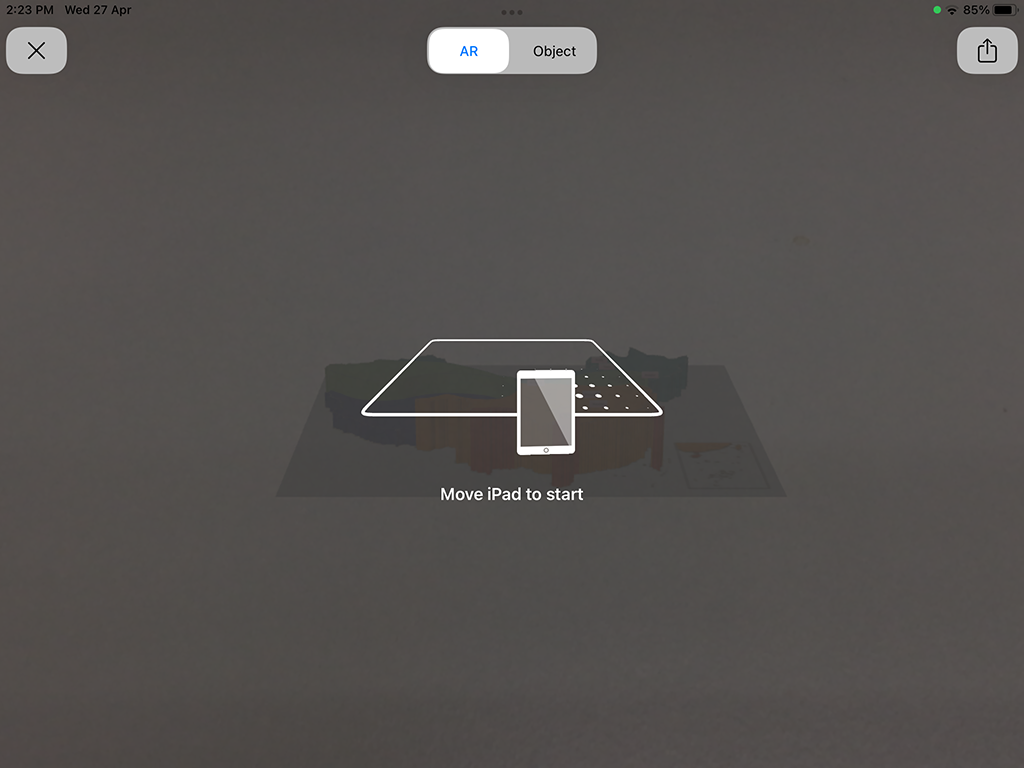
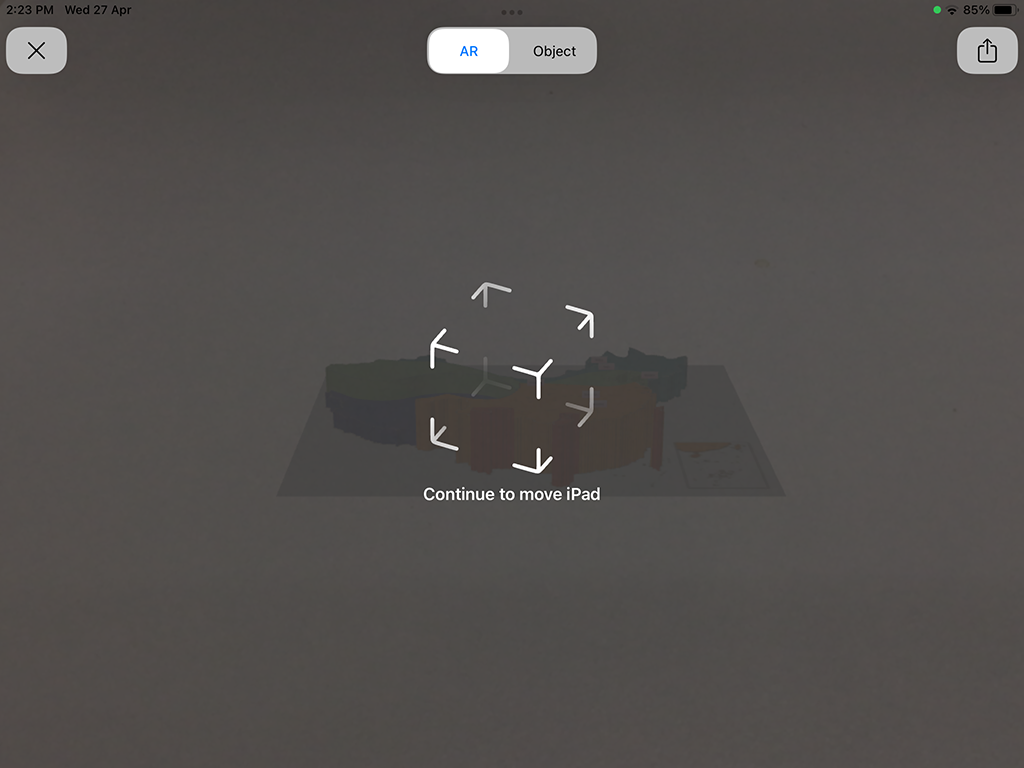
(3) 依屏幕所示,左右移動 iPhone 或 iPad 以讓裝置檢測到水平表面。
(3) Follow the instruction on the screen, move the iPhone or iPad to left or right to let it detect a horizontal surface.
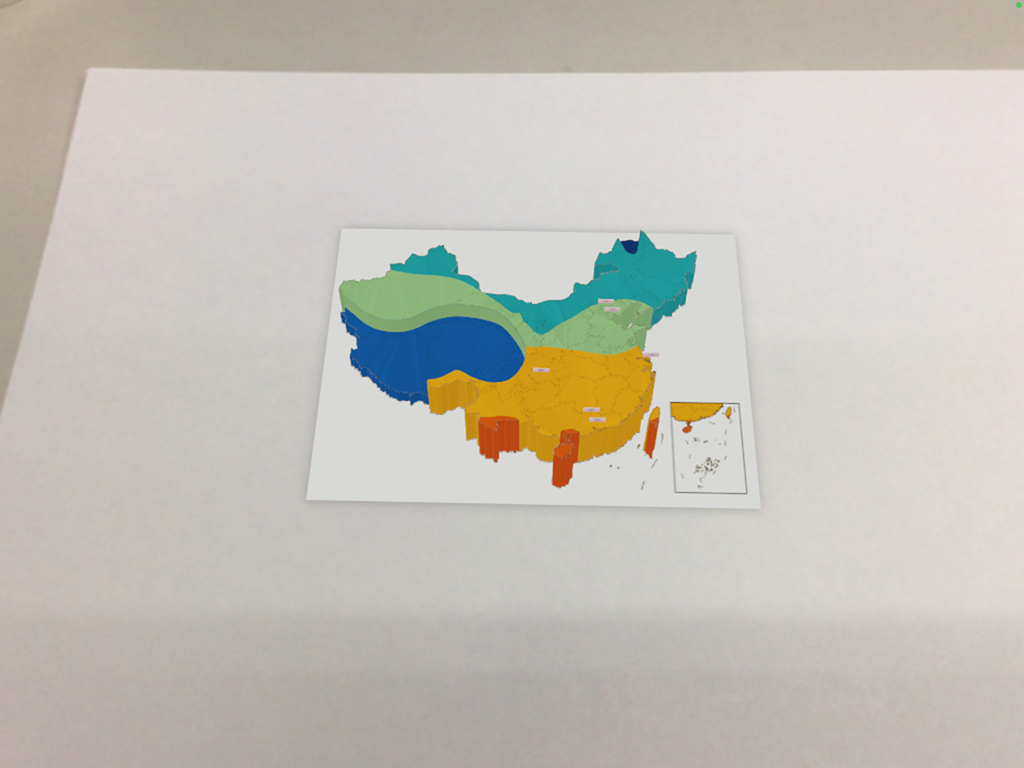

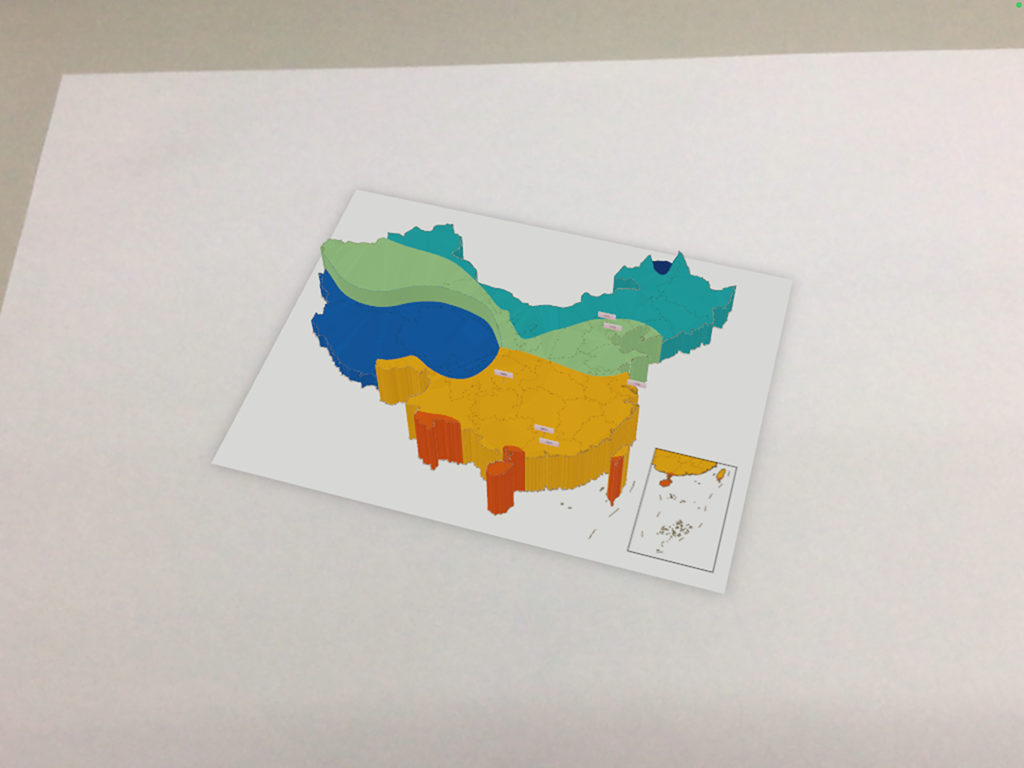
(4) 可在桌面或地面上放上一張白紙,讓裝置更易檢測到水平表面。
(4) You may put a white paper on the table or floor, to make it easier for the device to detect the horizontal surface.
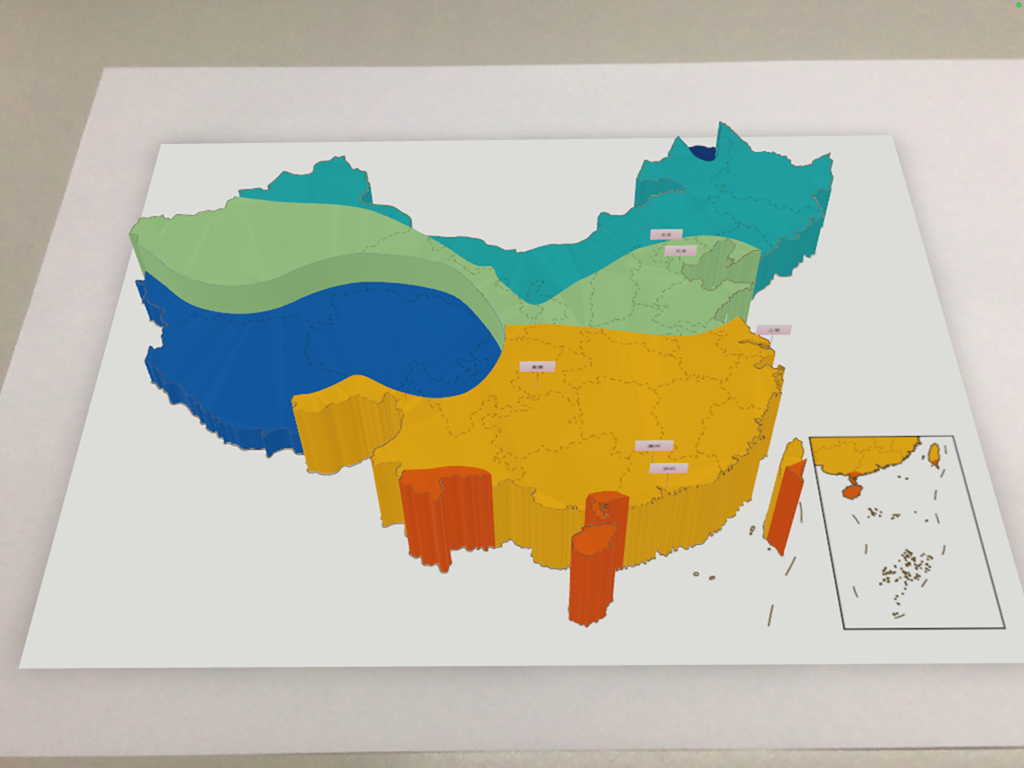


放大Zoom


轉動Rotate
(5) 如成功顯示該模型,可使用以上手勢放大或轉動。
(5) After the model is loaded, you can zoom or rotate it with above gestures.

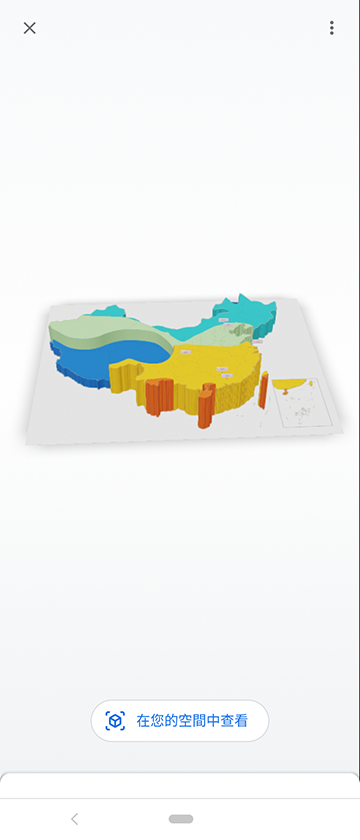
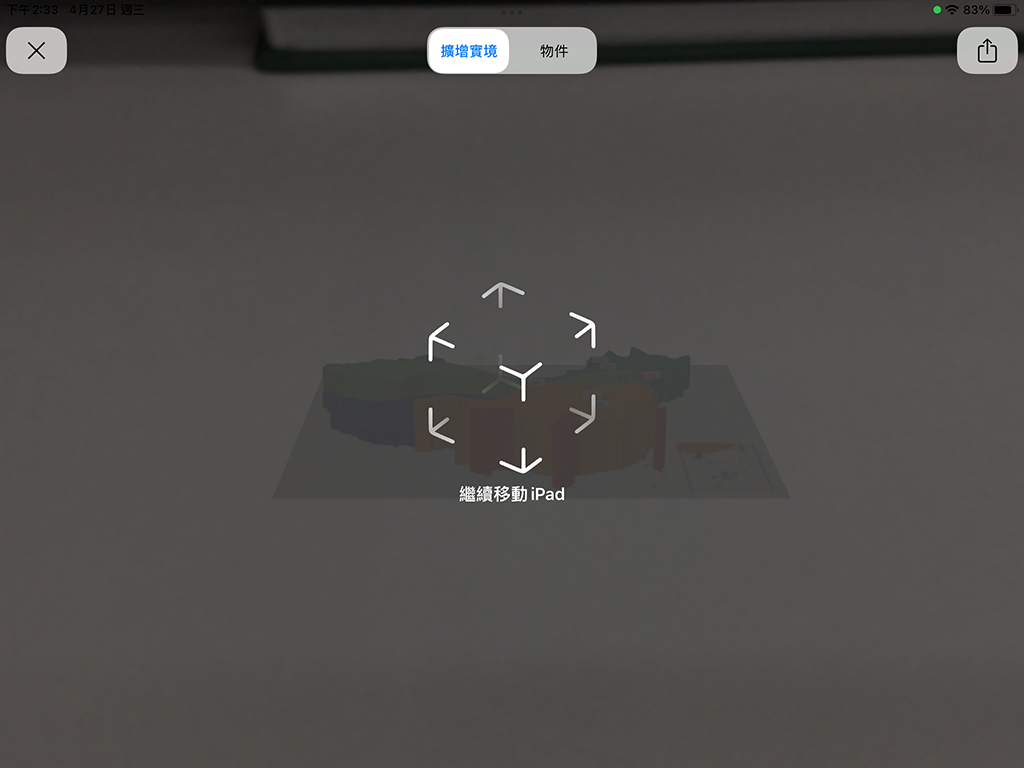
(6) 如未能成功載入模型(例如出現以上畫面),請重新載入頁面再嘗試。
(6) If the model cannot be loaded (such as showing the above screen), please refresh the web page and try again.
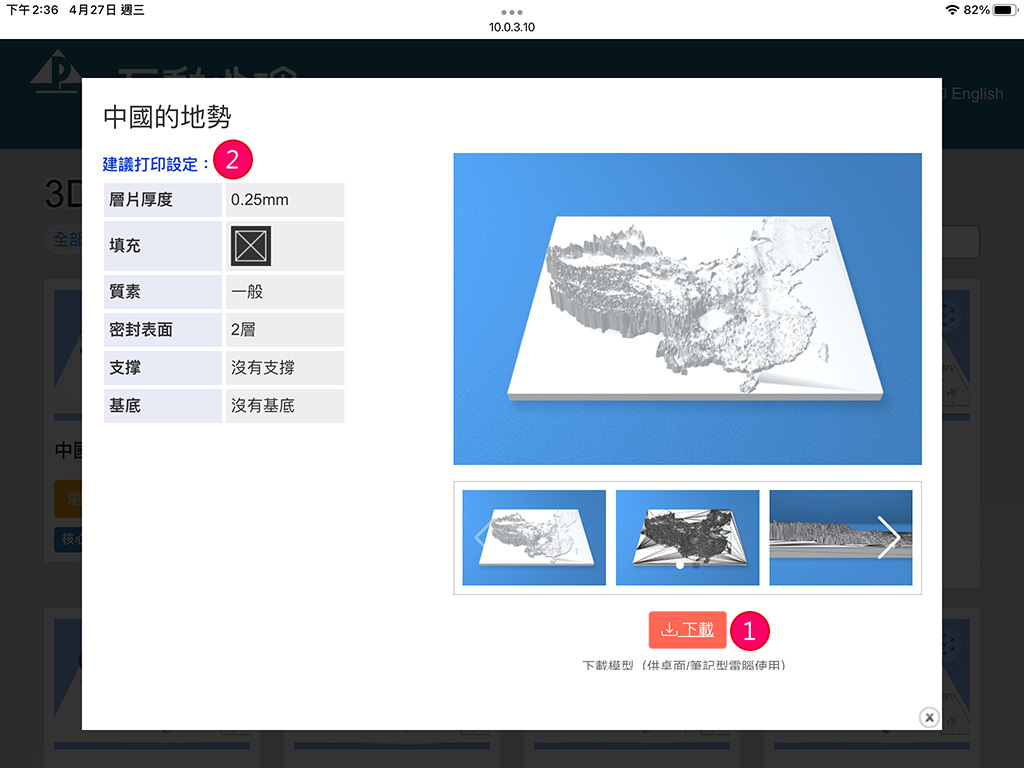
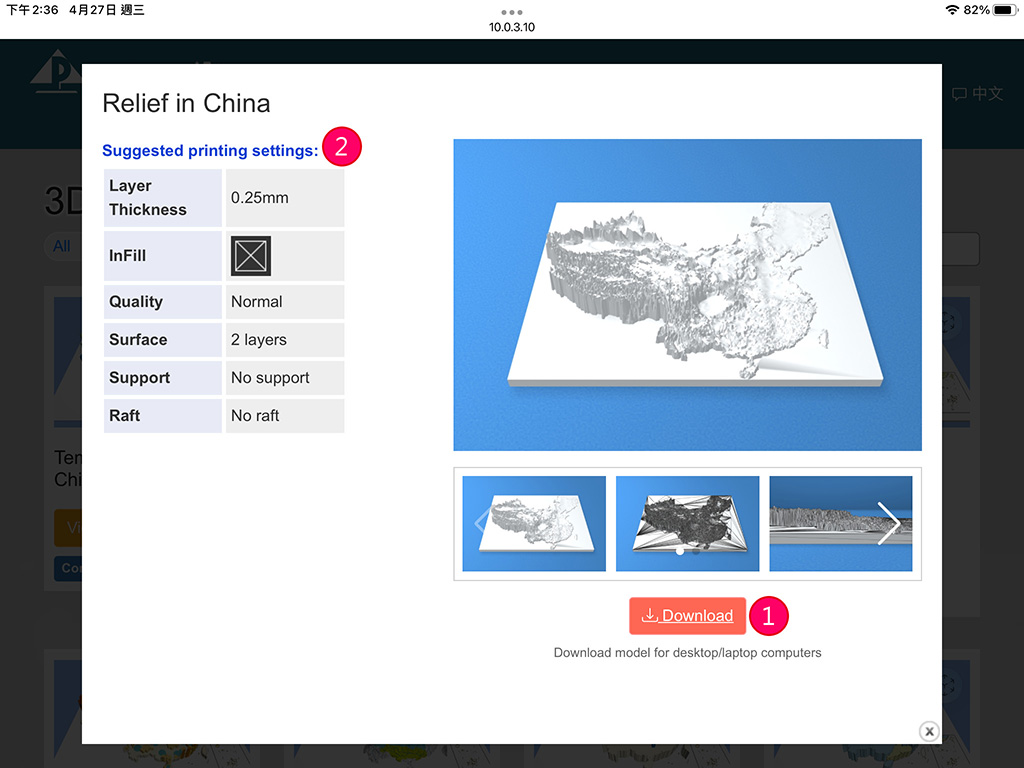
| 1 | 按此下載可供立體打印機使用的檔案。檔案或以 ZIP 形式儲存,僅支援桌面或手提電腦。 Click here to download the model(s) for 3D printer. The file(s) may be saved in ZIP format, that can be viewed with desktop or laptop computers only. |
| 2 | 學校可參考有關模型的建議參考設定。 School may refer to the suggested printing settings of the model(s). |
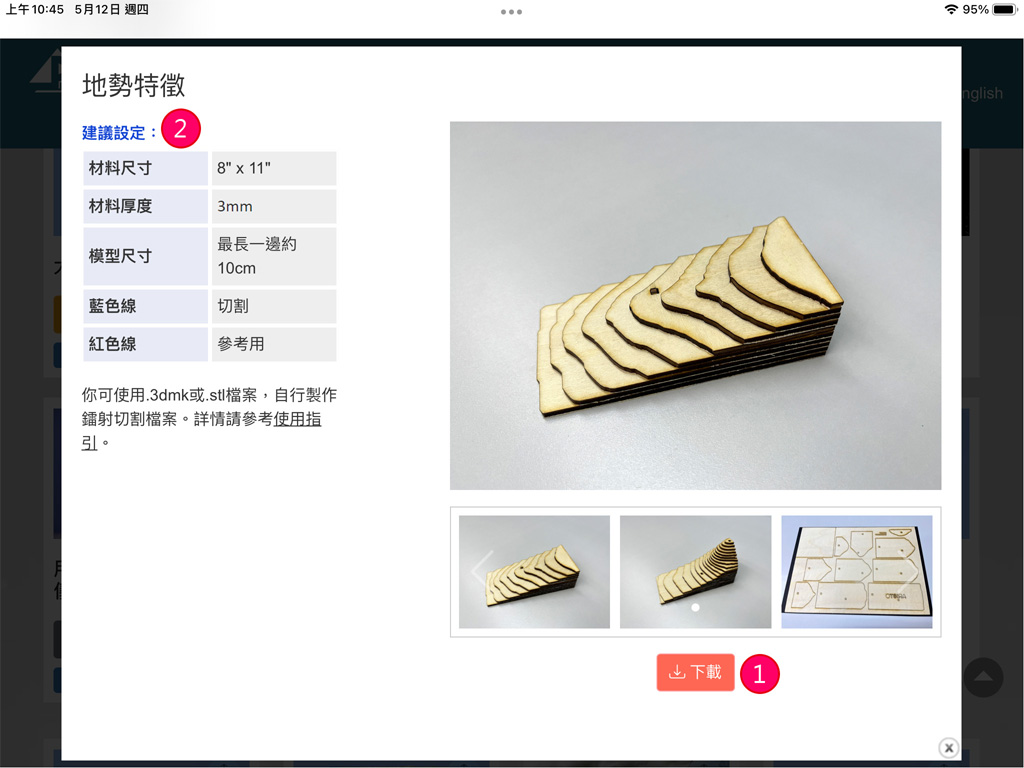
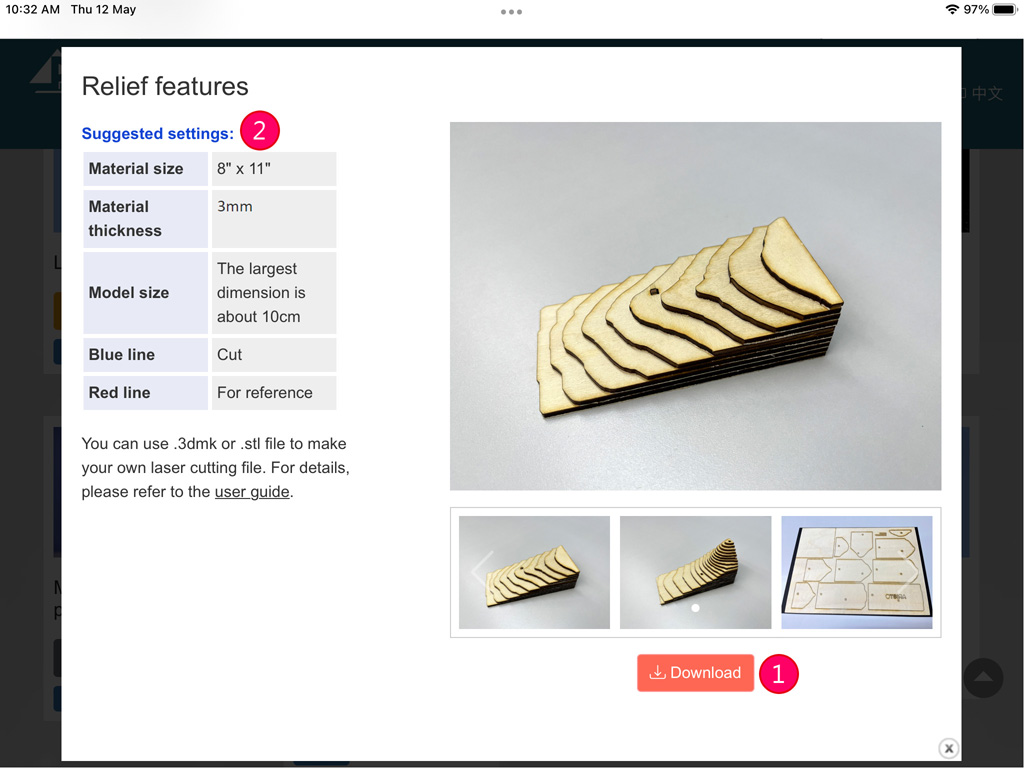
| 1 | 按此下載鐳射切割的檔案。檔案或以 ZIP 形式儲存,僅支援桌面或手提電腦。 Click here to download the model(s) for laser cutting. The file(s) may be saved in ZIP format, that can be viewed with desktop or laptop computers only. |
| 2 | 學校可參考有關模型的建議設定。 School may refer to the suggested settings of the model(s). |
以下是使用 Slicer for Fusion 360 的示範:
The following demonstration is made by Slicer for Fusion 360:
以下設定及步驟僅供參考之用。學校可聯絡雷射切割機的供應商,以查詢合適的工具及設定來製作及切割模型。
The following settings and steps are for reference only. School can contact the provider of the laser cutter to check for the appropriate tool and settings in making and cutting the models.
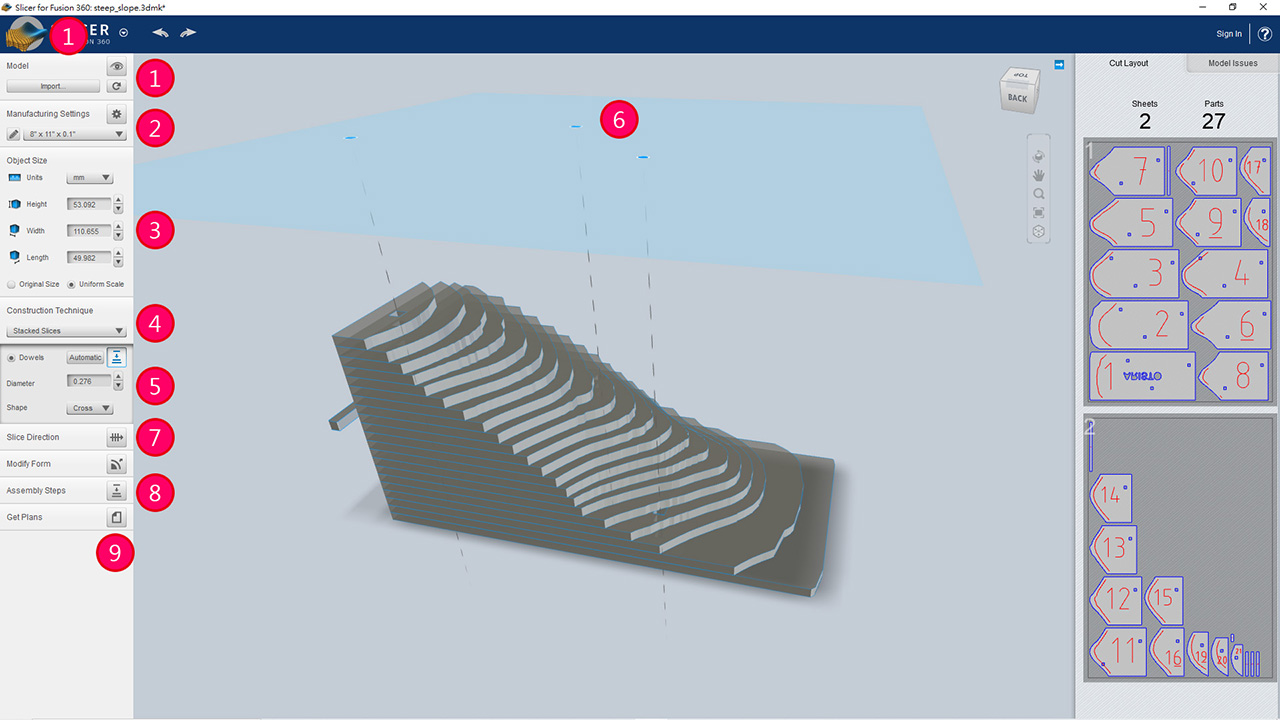

| 1 | 按此開啓.3dmk檔案或匯入.stl檔案。 Click here to open .3dmk file or import .stl file. |
| 2 | 新增或選擇你的材料設定檔。 Create or select your material setting. |
| 3 | 調整模型尺寸。 Adjust the model size. |
| 4 | 選擇製作模型的方法。 Select the construction technique. |
| 5 | 如選擇「切片推疊(Stacked Slices)」,可勾選「定縫銷釘(Dowels)」,並選擇形狀。 If ‘Stacked Slices’ is selected, turn on ‘Dowels’ and choose the shape. |
| 6 | 點擊藍色色塊,可在該位置添加定縫銷釘。點選圓點後按鍵盤的「delete」按鈕可刪除。按著並拖拉圓點可移動位置。 Click the blue area to add a dowel. Select the dot and then press ‘delete’ button to delete it. Drag the dot to move it. |
| 7 | 修改切片方向。 Adjust the slice direction. |
| 8 | 模擬製作模型的步驟。 Assembly steps of the model. |
| 9 | 匯出鐳射切割的檔案。 Export file for laser cutting. |